

You're standing in the kitchen with a half-packed backpack, a missing mitten, and a daycare form that says, again, “please label all belongings.” The label pile looks small until you realize every hoodie, sock, lunch bag, and backup shirt needs a decision. That's where personal clothes labels stop being a cute add-on and start being the thing that keeps your mornings from turning into a scavenger hunt.
Why Personal Clothes Labels Save Your Sanity
The lost-and-found bin at daycare is usually full of the same story, a sweater that looked identical to six others, a jacket peeled off after recess, a hat tossed into the wrong cubby. Parents don't need another reminder to “label everything.” They need a system that gets items back home, fast.
That's the value of personal clothes labels. They turn a generic shirt into something a teacher can return without guessing, and they make it easier for kids to keep track of their own stuff before they can read fluently. If you've ever replaced a favorite hoodie because it vanished into a pile of identical outerwear, you already know how expensive “temporary” loss becomes.
There's also a practical operations angle. School and daycare staff waste less time sorting mystery clothing when ownership is obvious, and that's exactly why labeling has stayed standard across children's gear for so long, from early maker labels in the late 19th century to modern identification systems that became more formal through U.S. textile rules in 1939 and 1960 historical labeling timeline. Labels aren't decoration. They're a retrieval system.
Practical rule: If an item leaves your house, it should have a name on it.
That's why I'd rather spend one quiet evening labeling drawers of clothes than spend three weeks asking a daycare teacher whether the missing raincoat turned up. If you want a simple case for the habit, this guide to personalized labels for kids says the quiet part out loud, labels reduce chaos because they make ownership visible.
Choosing the Right Label Type for Every Fabric
Most parents don't need more label options. They need fewer bad ones. The right choice depends on the fabric in your hand, the wash cycle it's about to face, and whether the garment even has a care tag worth using.
Start with the fabric, not the product page
Stick-on labels are my first pick for garments with a smooth care tag. They're fast, clean, and ideal when you don't want to heat an iron or permanently alter the fabric. They're a strong fit for many everyday clothes, but they're not magic. Fuzzy fleece, highly textured knits, and very stretchy items give adhesive a harder job, and that's where people blame the label when the issue is the surface.
Iron-on labels belong on tagless clothes, heavy-wear items, and anything that gets dragged through repeat washing. If a garment has no useful tag, or the tag area is too small and slippery, heat-activated labels usually make more sense. They're the better choice for clothes that need a more permanent bond.
Sew-in labels make sense when you want a physical stitch through the label itself, especially for niche garments or items where you trust stitching more than adhesive. They're slower, but they're not dependent on a sticky backing or heat application.
The simplest way to decide is to ask one question. Where will this label have the best chance of staying readable after repeated laundry, movement, and friction? The answer changes by fabric, not by label hype. That's why this fabric label guide from InchBug is useful, because it lines up the label type with the garment instead of pretending every shirt behaves the same.
| Label Type | Best For | Avoid Using On | Expected Lifespan |
|---|---|---|---|
| Stick-on | Smooth care tags, quick labeling, frequent sorting | Fuzzy fleece, very stretchy fabric, rough textures | Good when applied to the right surface and laundered properly |
| Iron-on | Tagless shirts, heavy wear, repeated wash cycles | Heat-sensitive materials and places with poor access to a flat surface | Long-lasting when applied correctly |
| Sew-in | Garments where stitching is acceptable and permanent attachment matters | Delicate spots that could irritate skin or change the fit | Very durable, especially when sewn securely |
Bottom line: Match the label to the surface. Don't ask adhesive to do a job it can't physically hold.
Application Secrets and Laundering Care
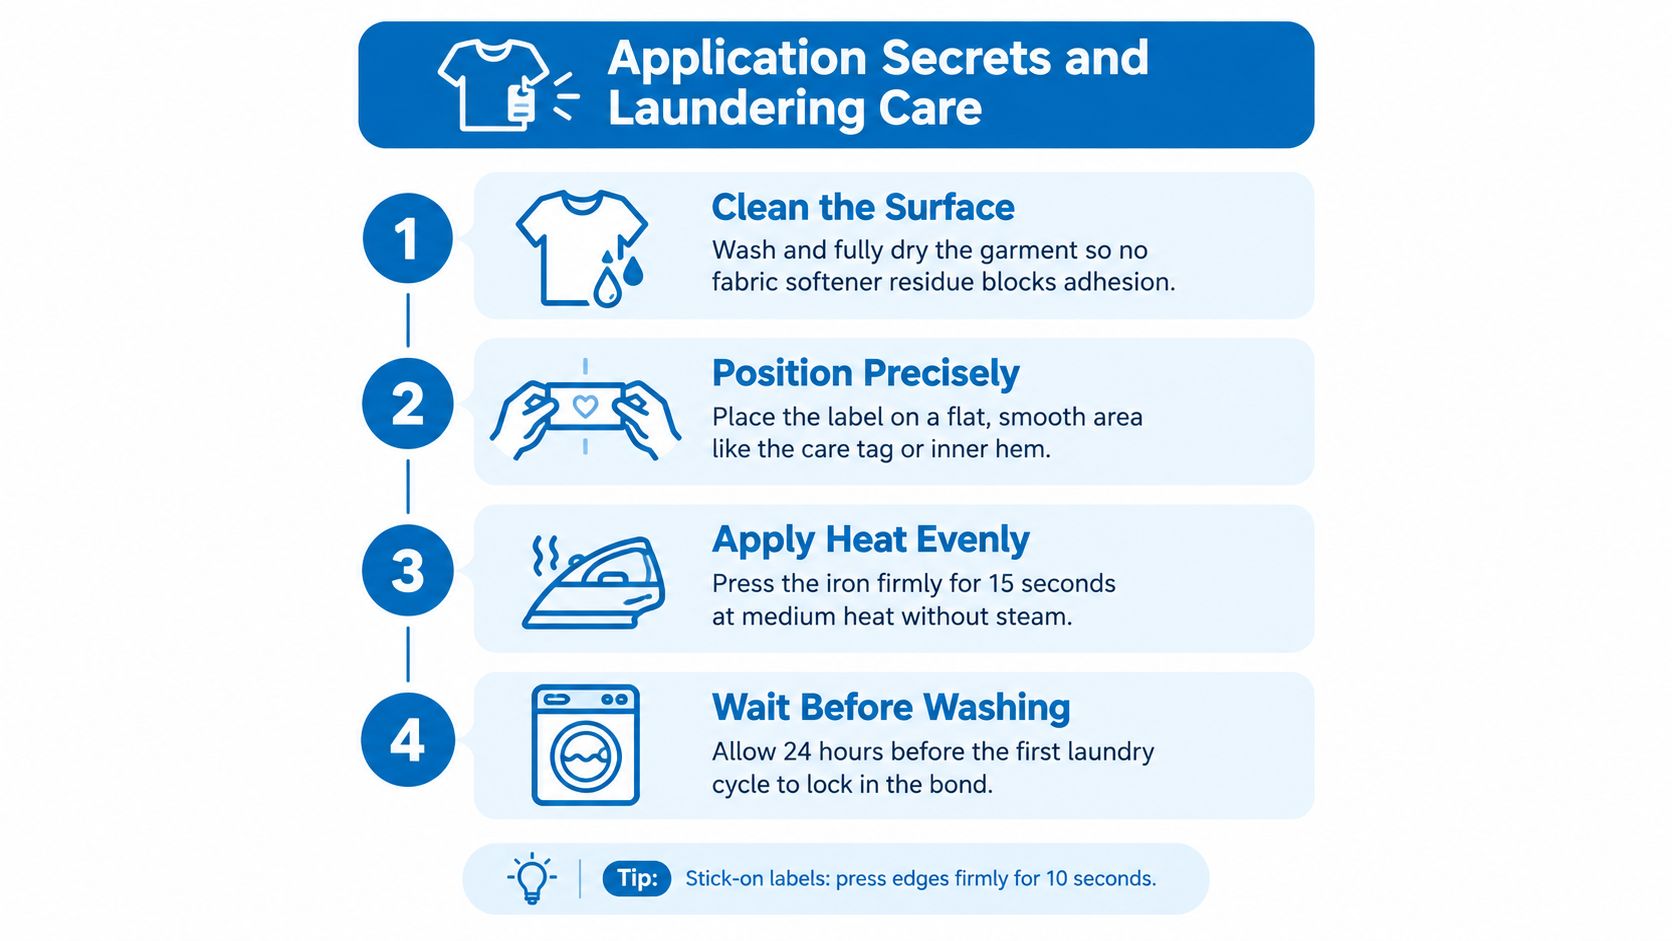
Most label failures are application failures. Parents think the label “didn't work,” but the actual problem was softener residue, trapped moisture, or rushing the first wash. A label needs a clean surface and a proper bond before it can survive a normal week of daycare abuse.
Apply it like you mean it
Start with a fully clean, fully dry garment. If fabric softener has left a film on the cloth, adhesion gets weaker, so skip softener before applying any label that depends on bond strength. Put the garment on a hard, flat surface, not a squishy ironing board that steals pressure.
Press iron-on labels firmly at medium heat without steam, and hold steady long enough to let the label grab the fabric. For stick-on labels, press the edges down hard so the corners don't lift first. The corners are always where a label dies.
Use the care tag, inner hem, or another flat zone that won't rub against skin constantly. If you place the label on a seam, a fold, or a bumpy texture, you're asking for early failure.
Wait before washing. That pause matters because the bond keeps setting even after the heat is gone.
Laundry habits that protect the label
Turn garments inside out before washing when you can. That reduces direct abrasion from zippers, Velcro, and other clothing in the load. Don't treat a new label like a race car sticker and throw it into the first cycle an hour later. Give it time.
For more application details, the label care instructions are worth reading before you label a whole drawer in one sitting. If you want the visual version, the embedded guide above is the one I'd follow for iron-on placement.
The same logic applies to care-symbol labels, which have to stay readable at small sizes and after repeated wear. International systems standardize laundry instructions, so the only thing between a clear label and an unreadable one is usually print quality and bond quality care symbol standards overview. In real life, that means durability beats clever design every time.
Balancing Privacy and Personalization
A child's label doesn't need to broadcast everything. In many settings, too much information is just sloppy privacy management. A first name is often enough for daycare cubbies and classroom sorting, while initials or a nickname can make more sense for public-facing items.
Use the least information that still gets the item home
If the label is inside clothing, teachers and staff can still see it, but strangers can't casually read it. That's my default for most garments. For backpacks, lunch bags, and outerwear that leave controlled spaces, think hard about visibility before printing a full name. The goal is identification, not advertising.
The right format depends on setting. Secure daycare rooms and classrooms usually tolerate more personalization because the audience is limited. Parks, camps, and public playgrounds call for restraint. I'd rather use a first name and last initial than print a home-detail-heavy label that hands information to anyone who can read a jacket sleeve.
There's also a practical reason to keep labels modest. Kids lose clothing in visible places, not only in supervised rooms, and the label should help the right adult return the item without making it easy for the wrong person to collect more information than they need. If you want a sharper framework for the choice between identity and style, this personalization versus customization piece is the right mindset check.
What I'd use by setting
- Daycare and preschool: First name, or first name plus last initial, inside the garment.
- School clothing: First name or initials on the interior, especially for items handled by staff.
- Public settings: Keep identifying details tucked inside and avoid full address-style information.
- Older kids: Let them help choose the label format so they'll keep using it.
The best label is readable to the adult who needs it, and invisible to everyone who doesn't. That's not a design trend. That's common sense.
Building a Complete Daycare and School Bundle
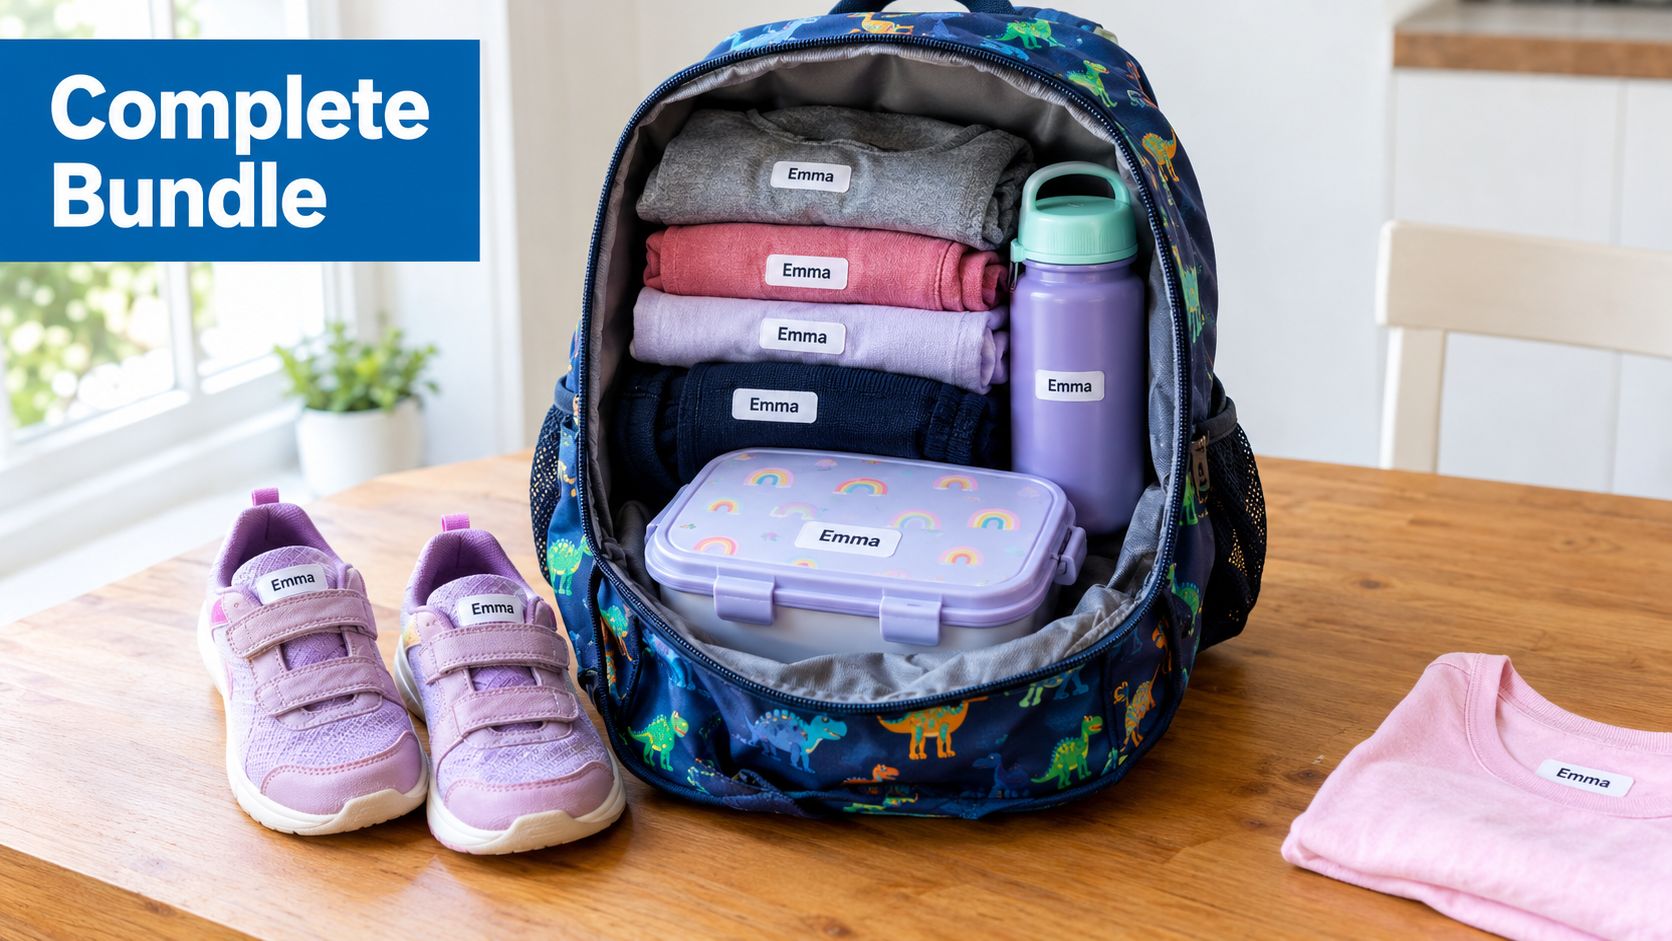
Clothing labels work best as part of a full gear system. Once you start labeling shirts and jackets, the rest of the bag becomes obvious, shoes, bottles, lunch containers, and sports gear all have the same habit of disappearing at the wrong moment. One coordinated set keeps everything readable, consistent, and easier to sort.
Build around the items that vanish first
For younger kids, the bundle should start with clothing labels, shoe identifiers, and something durable for lunch gear. For older kids, it should shift toward sports bags, hoodies, and anything they remove mid-day and never remember to bring home. A good bundle isn't about buying more. It's about removing all the obvious weak points in one pass.
InchBug's lineup fits that logic because it covers clothing labels, bottle bands, shoe labels, and allergy tags in the same family of products. That matters if you're trying to keep labeling consistent instead of patching together a different system for every item. One look, one style, fewer mix-ups.
I like bundles because they force the same decision across the whole routine. If you've already chosen a clear font and a high-contrast style for clothing, you shouldn't reinvent the system for water bottles or sports gear. Consistency helps teachers, coaches, and daycare staff recognize the labels faster.
A practical bundle setup
- Daycare starter set: Clothing labels, shoe labels, bottle labels, and a few extra tags for spare outfits.
- Preschool-to-elementary set: Clothing labels plus lunch gear and jacket labels.
- Sports-heavy set: Clothing labels, bag tags, and durable identifiers for water bottles and equipment.
The point is simple. If an item leaves the house regularly, it belongs in the bundle. Anything less is half a system.
Ordering Tips for Maximum Readability
A label that's hard to read is almost as useless as no label at all. Teachers need to scan it fast, sometimes in a dim cubby room, sometimes with one hand while they're wrangling ten other tasks. If your label blends into the fabric or the font is too decorative, you've already lost the advantage.
Make readability the priority
Use high contrast first. Dark text on a light background, or the reverse, beats cute combinations that disappear at a glance. Skip tiny script fonts if the label has to carry a full name. Clean lettering wins in real life because staff can read it without leaning in.
Measure the available space before you order. Care tags are not all the same size, and a label that fits on one shirt can overwhelm another. If the area is narrow, shorten the text and keep the design simple. If it's a bigger label, use the extra space to make the name clearer, not busier.
Icons help too, especially for pre-readers. A small symbol can help a child identify their own item before they can read the name, and it can also help non-English-speaking staff spot the right garment faster. Don't overload the design with extra graphics. One recognizable mark is enough.
If you want a more detailed breakdown of sizing choices, the font size guidance for labels is worth using before you finalize an order. That matters because tiny text may look fine on-screen and still fail in everyday use once the item is folded, stretched, or shoved into a cubby.
Rule of thumb: Design for the person who has to read it at a glance, not the person who made it online.
Securing Your Child's Belongings for the Year
A fully labeled wardrobe changes the rhythm of family life. You stop wondering whether that hoodie is at daycare, at the playground, or stuffed into a mystery bin. You also stop replacing things that were never really lost, just unidentifiable.
The payoff isn't abstract. It's fewer morning fights, less searching, and fewer “we need to buy another one” moments that drain your budget and patience. Once the labels are on, the system mostly runs itself, as long as you keep using the same logic for new clothes, new seasons, and new activities.
I'd tackle the laundry pile, pull out the tagless items, and label the next wave before they enter rotation. That's the move that keeps the problem small. Once the system is in place, your child's clothes come home more often, and your weekends stop getting eaten by replacement errands.
If you want a simpler way to keep daycare and school gear organized, InchBug offers clothing labels, bottle bands, shoe labels, and bundle options that fit the same practical system described here. Take a look at InchBug and build a labeling setup that matches the clothes, the laundry, and the pace of your family's routine.