

If you're a parent, you know the scene all too well: a mountain of unclaimed jackets, hats, and sweatshirts piled high at daycare or school. Every single lost item means more than just missing clothing—it's wasted money and another frustrating trip to hunt it down. This is the exact problem personalized iron on labels were made to solve.
What Are Personalized Iron On Labels and Why Parents Love Them
Think of them as permanent, custom name tags for fabric that you can apply in just a few seconds. Unlike messy permanent markers that bleed and fade or old-school sew-in tags that take forever, these modern labels use a strong, heat-activated adhesive. With a quick press from a hot iron, the label fuses right into the clothing fibers, creating a bond that’s built to last.
A Simple Investment in Peace of Mind
The real appeal here goes way beyond just getting organized. For parents like us, these labels are an investment in peace of mind. Just knowing your child’s favorite hoodie or pricey school uniform is clearly marked and has a good chance of coming home is a huge relief. It takes away one of the little stresses that can make a day feel chaotic.
The numbers don't lie, either. It’s amazing what a difference a simple label can make.
A 2026 survey found that 78% of U.S. daycare parents reported lost items costing an average of $250 per child annually. But get this—a separate UK study noted that 92% of labeled items made it back home, compared to just 55% of unlabeled ones. That’s a massive saving in both time and money.
It just goes to show that a small, upfront cost for a pack of labels can easily save you hundreds of dollars in replacement costs over a single school year. It turns the dreaded lost-and-found bin from a black hole into a simple sorting station.
More Than Just a Name
Today’s iron on labels are so much more than just a name. Here at InchBug, we have options to add fun icons, bright colors, and even important allergy information. It turns a practical tool into something fun that your child will love.
- For Pre-Readers: I found that using a consistent, fun icon (like a star or a dinosaur) next to their name is a game-changer. It helps little ones who can't read yet spot their own stuff in a pile.
- Safety First: You can add critical information like a phone number or an allergy alert. This gives you an extra layer of safety during school trips or busy events.
- Expressing Personality: Let your child help pick out their favorite color or icon! Getting them involved makes them more excited about their belongings and, hopefully, a little more responsible for them.
The options are pretty much endless, which also makes them great for creating unique personalised gifts for friends and family.
Ultimately, these labels are a simple, modern fix for a timeless parenting headache. They offer a mix of durability, convenience, and personality that older methods just can't touch. It's no wonder so many parents rely on them for school, daycare, and summer camp. To see even more options, you can check out our guide on personalized name tags for clothes.
How to Apply Iron On Labels for a Perfect, Lasting Bond
Getting your personalized iron on labels to stick for good is way easier than you might think. It’s not about having some magical touch; it’s all about heat, pressure, and following a few simple steps. Think of it like baking a cake—if you follow the recipe exactly, you get a perfect result every time.
First things first, always start with a clean garment. I’ve found it’s best to apply labels to clothes that have already been washed and are completely dry. The most important tip? Skip the fabric softener and dryer sheets for that pre-wash, as they leave behind an invisible film that can stop the label’s adhesive from grabbing onto the fabric.
Preparing Your Workspace and Iron
Once your clothing is prepped, it's time to get your ironing station ready. You’ll want a hard, flat surface that can take the heat, like a wooden cutting board or a countertop with a towel down for protection. Try to avoid a standard padded ironing board—that soft surface just absorbs all the pressure you need for a solid bond.
Next, get your household iron ready to go.
- Make sure all the water is emptied out and, most importantly, that the steam function is turned OFF. Steam is the enemy here; it adds moisture and messes with the adhesive.
- Crank your iron up to the highest heat setting. This is usually the "Cotton" or "Linen" setting.
- Let the iron sit for a few minutes to fully preheat. A consistently hot iron is what makes the magic happen.
This infographic breaks down just how this simple process can solve one of the biggest headaches for parents.
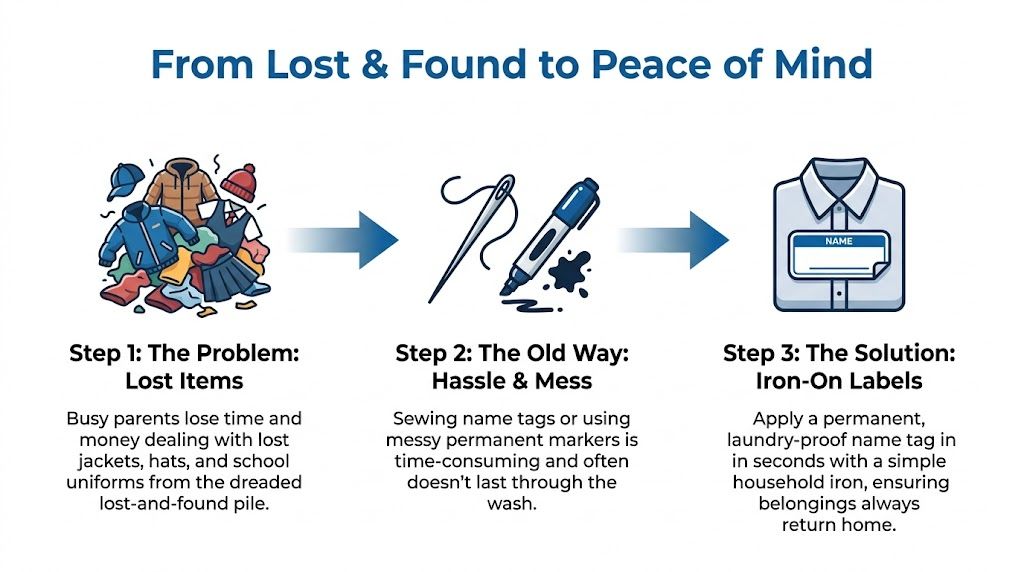
It’s amazing how a tiny label can take you from lost-and-found chaos to organized peace of mind.
The Application Process Step-by-Step
With everything ready, it’s application time! Lay the garment flat on your hard surface and place the label right where you want it, with the name facing up.
Now, cover the label with the parchment paper that came with your order. This little sheet is a crucial buffer. It protects both the label and the fabric from the direct heat of the iron, preventing any scorching or melting.
Press your preheated iron firmly down onto the parchment paper, making sure to cover the whole label. Apply firm, steady pressure and hold it for 15-20 seconds. The key is to press and hold—don't slide the iron around like you normally would.
After those 20 seconds are up, lift the iron and let the area cool down completely. I know it’s tempting to peek, but this cooling-off period is when the adhesive truly sets and creates that permanent bond. Resisting the urge to peel it while it’s still warm is one of the most important things you can do.
Key Takeaway: The secret sauce is the combination of high heat, firm pressure, and letting it cool down completely. Rushing any of these steps is the number one reason I see applications fail.
This process is designed to be quick but incredibly durable. It’s why so many parents trust these labels; some multi-packs on Amazon sell over 7,000 units a month because they are proven to last through 50+ wash cycles.
Once it's done, you'll have a smooth, flexible label that feels like it’s part of the fabric. For a more detailed walkthrough and other helpful hints, be sure to check out our complete instructions on applying iron on nametags.
Keeping Labeled Clothing Looking Great Wash After Wash
You’ve carefully pressed on your new personalized iron on labels, and they look fantastic. But now comes the real test: laundry day. The good news is that with a few simple tricks, you can keep those labels looking great and stuck on tight for the long haul. It all comes down to protecting that adhesive from heat and friction.
The very first, and most important, rule is to have a little patience. After you’ve applied a label, you absolutely have to wait at least 24 hours before washing the item. This little waiting period is everything! It gives the heat-activated adhesive time to fully cure and really bond with the fabric. Tossing it in the wash too soon is the fastest way to a peeling label.
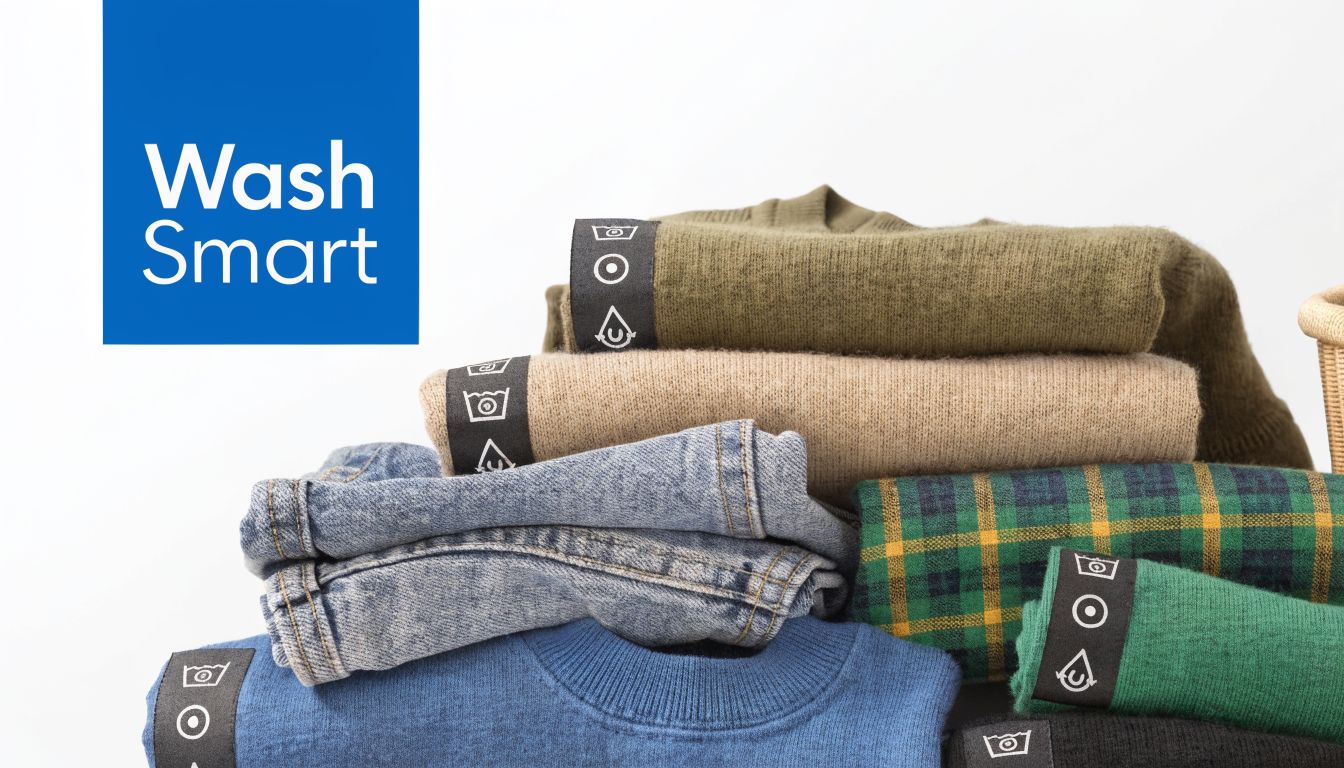
Laundry Day Do's and Don'ts
Once the label has had time to set, a few tiny tweaks to your laundry routine will make all the difference. I like to think of the label like any other print on a t-shirt—you want to be gentle with it to keep it from cracking or fading.
The single best trick I’ve found is to turn the garment inside out before throwing it in the machine. This one simple move protects the label from rubbing up against other clothes, zippers, and buttons in the wash, which is the main cause of peeling over time.
When it comes to the actual washing and drying, lower temperatures are your best friend.
- Washing Temperature: Stick to a cold or warm water cycle. Hot water, wash after wash, can slowly break down the adhesive.
- Drying Temperature: Tumble dry on a low or medium heat setting. High heat is the number one enemy of an iron-on label because it can reactivate the glue and make it loosen up.
- Avoid Direct Ironing: Never, ever iron directly on top of a label that's already applied. If the shirt needs a touch-up, just iron around the label or on the other side of the fabric.
These small changes will keep your labels looking crisp and clear through countless tumbles and turns. For more tips on durability, you can check out our guide to machine washable labels.
Quick Fix for a Lifting Corner
Even when you do everything right, kids' clothes go through a lot. If you ever spot a corner or edge of a label starting to lift, don’t panic! It’s a super easy fix that only takes a few seconds.
Just grab your parchment paper and place it back over the label. Press it with a hot iron for about 10-15 seconds, then let it cool down completely. This reheats the adhesive just enough to create a strong new bond with the fabric.
By following these simple laundry tips, you can feel confident that all your labeling work will last. Your personalized iron-on labels will stay put, keeping your child’s gear out of the lost-and-found and saving you time and money, wash after wash.
Choosing the Right Label for Every Item
While personalized iron on labels are a lifesaver for so many things, I’ve learned they aren’t the magic solution for every single item your child owns. Think of it like having a toolkit; you wouldn’t use a hammer when you really need a screwdriver. The secret to making sure everything comes back home is matching the right kind of label to the right item.
The most important thing to consider is the fabric. Iron-on labels are the absolute champs for materials that can handle a hot iron, like cotton and poly-blends. This makes them perfect for t-shirts, sweatshirts, school uniforms, and canvas bags. They literally become one with the fabric, creating a bond that’s meant to last.
But for some fabrics, heat is the enemy. You should never, ever try to use an iron-on label on anything heat-sensitive. I'm talking about nylon windbreakers, cozy fleece jackets, stretchy spandex leggings, or delicate sweaters. A hot iron can melt, scorch, or completely ruin these items in seconds.
Building Your Complete Labeling System
This is where having a smart, multi-label system comes into play. A truly organized parent knows that different items call for different solutions. At InchBug, we've created a whole family of labels designed to work together, covering every single thing your kid takes to daycare, school, or camp.
So, what do you do with those items that can't take the heat? This is where our amazing sticker labels save the day.
- Adhesive Clothing Labels: For tagless shirts or those tricky heat-sensitive fabrics, our peel-and-stick TagPal™ labels are a game-changer. You just stick them onto the garment’s care tag, and they’re designed to stay put through wash after wash—no iron needed.
- Lunch Box & Gear Labels: Hard surfaces like lunch boxes, thermoses, and pencil cases need a different kind of strength. Our super-durable, waterproof sticker labels are made to be dishwasher-safe and stick tight to plastic, metal, and glass without peeling or fading.
For a closer look at these no-iron wonders, you can check out our complete guide on how to use stick on clothing labels to their full potential.
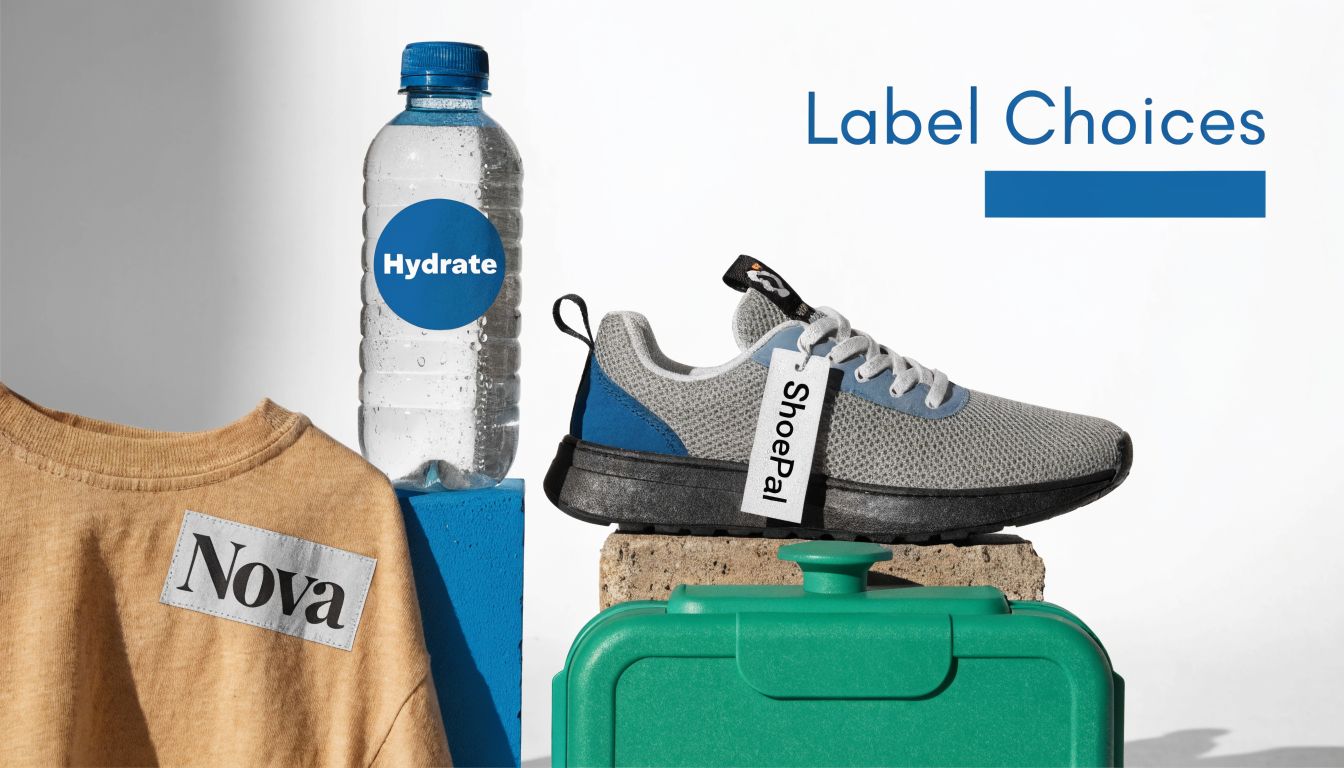
To make it even easier, I've put together a quick cheat sheet. It’s my go-to reference for figuring out exactly which label to grab for any item.
Your InchBug Labeling Cheat Sheet
| Item to Label | Recommended InchBug Label | Why It Works Best |
|---|---|---|
| T-Shirts & Uniforms | Personalized Iron On Labels | Fuses permanently with cotton and poly-blends. |
| Water Bottles & Sippy Cups | The Original Orbit Label® | Reusable, non-adhesive, and fits snugly on bottles. |
| Shoes & Sneakers | ShoePals™ | Contoured to fit inside shoes and built to resist sweat and friction. |
| Lunch Boxes & Hard Goods | Adhesive Sticker Labels | Dishwasher-safe and sticks firmly to plastic, metal, and glass. |
| Nylon Jackets & Fleece | TagPals™ Stick-On Clothing Labels | A no-heat solution that applies directly to the care tag. |
Think of this table as your master plan for conquering the lost-and-found bin for good!
Specialized Labels for Tricky Items
Then there are those items that are just notoriously difficult to label. Water bottles get wet, shoes get sweaty, and standard stickers just don't stand a chance in those high-friction, oddly shaped environments.
This is exactly why we developed labels to solve these specific problems.
The Original Orbit Label® is our iconic, non-adhesive band that stretches to fit snugly around bottles and sippy cups. It’s reusable, totally dishwasher-safe, and means you’ll never have to deal with a peeling, soggy sticker on a bottle again. For shoes, our ShoePals™ are specifically shaped to fit perfectly inside a sneaker and tough enough to stand up to all the sweat and friction, helping your kiddo easily spot their pair in a crowded cubby.
Personalization for Safety and Fun
Finally, let's talk about the "personalized" part of your labels. This is so much more than just putting a name on something; it's a powerful tool for communication and giving your child confidence.
- Icons for Pre-Readers: For toddlers and preschoolers, adding a cute, unique icon (like a rocket ship or butterfly) is a game-changer. It helps them find their things long before they can read their own name.
- Allergy & Medical Alerts: For so many of us, being able to add crucial info like "Nut Allergy" or "Asthmatic" is an absolute must. It’s a bright, clear, extra layer of safety for teachers and caregivers.
- Contact Information: I always add a phone number to things that travel, like jackets and backpacks. It dramatically increases the chances of getting an item back if it gets lost outside of school.
When you combine the right type of label with thoughtful personalization, you're not just labeling—you're creating a complete system that protects every single one of your child's belongings. It’s the ultimate way to make sure everything that leaves the house in the morning actually comes back home at night.
A Smart Solution for Daycares and Schools
If you run a daycare or teach in a classroom, you know the daily routine is a balancing act between organized chaos and, well, just chaos. For educators and providers, personalized iron-on labels are way more than just a nice-to-have for parents—they're a tool that can totally restore order and sanity to the day.
Think about the time your staff spends wrestling with the lost-and-found bin, trying to play detective with a single mitten or a lone sock. That time adds up, pulling focus away from where it’s truly needed: with the children. A simple, clear labeling policy turns that daily scavenger hunt into a quick, painless process of getting things back to their rightful owners.
Streamline Your Day and Boost Hygiene
A well-labeled classroom is more than just organized; it's a healthier space. When every kid’s jacket, nap-time blanket, and spare outfit is clearly marked, the chances of an accidental mix-up drop to nearly zero. It’s a simple step that helps cut down on the spread of germs, since kids are far less likely to mistakenly grab or use another child's things.
This is more important now than ever. With an estimated 65 million U.S. kids expected to be in daycare or school settings by 2026, finding ways to manage the crowd is key. Iron-on labels are a first line of defense against classroom chaos and can be a fun and functional part of modern school life, as seen on sites like Accio.com. It’s a proactive approach that makes for a less stressful, more hygienic space for everyone involved.
How to Talk to Parents About Your Labeling Policy
Getting parents on board is the secret to making any labeling system work. The key is to frame it not as another rule to follow, but as a partnership that makes life easier for everyone—especially their child.
When you roll out your policy, be really clear about the benefits for them:
- Fewer Lost Items: Explain that labels are the best way to ensure that pricey jacket or favorite hoodie actually makes it home at the end of the day, saving them money and the headache of replacing lost items.
- More Focus on Their Child: Let them know that when your staff isn't digging through lost-and-found, they have more time for quality interactions and teaching.
- A Healthier Classroom: Highlight how proper labeling is a simple but effective way to prevent mix-ups and keep the entire classroom healthier.
Making it easy for them is the final, crucial step. When you can point them toward a trusted, high-quality solution, you're not just giving a recommendation—you're making their lives simpler.
By recommending a specific, durable option, you ensure every label is easy to read and will actually last. This prevents parents from grabbing a marker that will fade after one wash, guaranteeing every item stays identifiable all year long.
A Cost-Effective Solution for Your Facility
We know that getting everyone on the same page is crucial, so we’ve created options specifically for group settings. Our Daycare Label Packs and School Combo Packs are affordable bundles that give parents everything they need to follow your policy. These packs come with a mix of labels perfect for everything from iron-ons for clothes to durable stickers for lunchboxes and supplies.
By suggesting these bundles, you’re giving families a one-click solution that meets all your facility’s needs. It takes the guesswork out for them and ensures your classroom runs like a well-oiled machine, with every item accounted for. You can find more ideas and check out our top picks in our guide on labels for daycare. A simple label really does make everyone’s job easier, creating a more harmonious environment from the moment kids walk in the door.
Your Top Questions About Iron-On Labels, Answered
When you first hear about personalized iron-on labels, it can feel like you’ve stumbled upon a secret weapon for keeping track of your kid's stuff. But like any new tool, you probably have a few questions before you're ready to dive in. I get it! I had the same ones.
Think of this as your go-to guide. We’re going to walk through all the common questions parents ask, clearing up any confusion so you can feel totally confident you’re making the right choice for your family.
How Long Do Personalized Iron-On Labels Actually Last?
This is always the first question, and for good reason—you want a solution that’s going to stick around, literally. The honest answer is that when you apply a high-quality iron-on label correctly, it’s designed to last for the entire life of the garment. This isn’t a temporary fix.
Think of the adhesive as becoming one with the fabric. The powerful thermal glue melts and weaves itself into the clothing fibers, creating a bond that’s built to withstand everything childhood throws at it. From the playground to countless cycles in the washing machine, it’s made to stay put.
Our own InchBug labels are specifically made to endure dozens and dozens of wash and dry cycles. You can count on them to stay put without cracking, peeling, or fading. The quality materials make sure the name and any cute icons stay crisp and readable from the first day of school to the last.
Are Iron-On Labels Safe for My Baby's Sensitive Skin?
Absolutely. As a parent, I know nothing is more important than your child's safety and comfort. The materials used in premium iron-on labels are chosen specifically to be non-irritating and perfectly safe, even against the most delicate newborn skin.
The key thing to look for is labels that are CPSIA-compliant. This is a big deal. It means they've been independently tested and meet the strict safety standards set by the government for children’s products.
Once it's applied, an InchBug iron-on label becomes incredibly smooth and flexible, almost like it’s part of the fabric itself. You won’t find any of the scratchy, sharp edges that come with old-school sew-in tags, making it a much comfier and safer choice for babies and toddlers.
It’s a huge step up from using permanent markers, which can contain chemicals that bleed into the fabric, or those rough-sewn tags that always seem to irritate kids’ skin.
Will Iron-On Labels Work on All My Kids' Clothes?
This is a fantastic question, because it gets right to the heart of building a smart labeling system. While iron-on labels are amazing, they aren't the perfect tool for every single item. Their magic really depends on the type of fabric.
They work beautifully on materials that can take the high heat of an iron. This includes most of your kids' wardrobe:
- Cotton: The absolute best candidate. Think t-shirts, school uniforms, and onesies.
- Polyester: Another great one, as it can usually handle the heat just fine.
- Poly-Cotton Blends: Most sweatshirts, sweatpants, and everyday play clothes are made from this and are perfect for iron-ons.
- Canvas: Great for items like tote bags, library bags, or even canvas shoes.
However, you’ll want to avoid using iron-on labels on certain fabrics. The heat needed to apply them can cause melting, scorching, or other damage. Steer clear of using them on:
- Nylon (like rain jackets or splash pants)
- Fleece or other plush, fuzzy materials
- Velvet or other delicate, heat-sensitive fabrics
- Super stretchy stuff like spandex or Lycra, as the stretching can pull and distort the label
For those trickier items, you'll want to switch to a no-heat solution. Our TagPals™ Adhesive Clothing Labels are my go-to for these—they just stick right onto a garment's care tag. No iron needed!
Can I Remove an Iron-On Label Later?
While our labels are definitely designed to be permanent, we know life happens. Sometimes you want to pass clothes down to a younger sibling or a friend. It is possible to remove them, but it takes a little patience.
You’ll basically reverse the application process by reheating the label. Place your parchment paper over the label, press it with a hot iron for 10-15 seconds, and then—while it’s still very warm—carefully use a pair of tweezers to gently peel a corner and lift it off.
Just a heads-up: this method isn’t always flawless. Depending on the fabric, you might see a faint outline from the adhesive or a slight shadow where the label was. Because of this, it's best to think of iron-ons as a permanent choice from the start.
If you know an item is destined to be a hand-me-down, you might opt for a non-permanent label instead. Our Original Orbit Labels® for bottles or our Bag Tags for backpacks are awesome because you can easily move them from one item to the next.
What If a Corner Starts to Peel?
Even the toughest labels can sometimes meet their match with extreme wear and tear. If you ever spot a corner or an edge starting to lift, don’t panic! It's a super simple fix that takes less than a minute.
There’s no need to take the label off and start over. Just lay the garment flat, place the piece of parchment paper back over the lifting label, and press down firmly with your hot, dry iron for about 10-15 seconds.
This little trick re-melts the adhesive, letting it bond with the fabric fibers all over again. Let it cool down completely, and your label should be good as new. The key, as always, is to let it cool before you check the seal.
Ready to put an end to the lost-and-found pile for good? Explore the full range of custom, durable, and kid-friendly labeling solutions at InchBug. From our classic personalized iron-on labels to our innovative Orbit Labels, we have everything you need to keep your family organized. Shop now and discover the peace of mind that comes with a perfectly labeled world!