

You're crouched beside the daycare cubbies, matching a water bottle to a lunch box while three nearly identical backpacks wait for their owners. The sticker on yesterday's cup is half peeled, the marker on the jacket has faded, and you're wondering whether one label can really survive both a dishwasher and a washing machine.
Butterfly name tags can make that routine simpler, but the butterfly print is only the beginning. The important decisions are the label's material, adhesive or attachment method, surface, wording, and exposure to water, heat, friction, and detergent. A pretty design won't rescue a label that's applied to the wrong item.
This guide treats butterfly tags as practical tools, not just cute decorations. You'll learn which format belongs on clothing, bottles, shoes, bags, and party favors, what to print when space is tight, and how to balance easy identification with your child's privacy.
What Butterfly Name Tags Are and Why Parents Love Them
A butterfly name tag is a personalized identification label decorated with a butterfly theme. The design might use wings, a silhouette, a watercolor illustration, or a simple butterfly icon beside the child's name. The label's job remains straightforward, the design helps a child and caregiver recognize it quickly.
Butterflies work especially well on children's belongings because the shape feels friendly without being tied to one narrow style. A small butterfly fits on a bottle lid or shoe, while a larger version can stand out on a backpack or overnight bag. Bright wings also create visual separation when a classroom shelf is crowded with similar cups, coats, and lunch containers.
The practical work behind the pretty design
Parents usually buy these labels for three reasons:
- Lost-item recovery: A readable name gives a finder a way to identify the owner.
- Caregiver recognition: Staff can connect a cup, coat, or comfort item with the right child more quickly.
- School and daycare organization: Some daycare centers expect children's belongings to carry labels, and independent guidance recommends checking the center's exact policy before choosing the copy for each item. Daycare labeling guidance commonly points parents toward a child's full name, with contact or allergy information when relevant.
The same butterfly artwork can appear on several formats, but those formats don't perform alike. A laminated sticker depends on pressure-sensitive adhesive. An iron-on relies on heat and fabric bonding. A bag tag hangs from a loop, while a reusable snap tag can move from one item to another.
Practical rule: Choose the attachment method first, then choose the butterfly design.
That order prevents a common mistake, buying one attractive label style and forcing it onto every possession. Smooth hard goods usually need a sticker. Clothing needs a textile-specific label. Backpacks and luggage benefit from a visible tag that doesn't depend on a small adhesive patch.
Every Format Explained from Stickers to Bag Tags
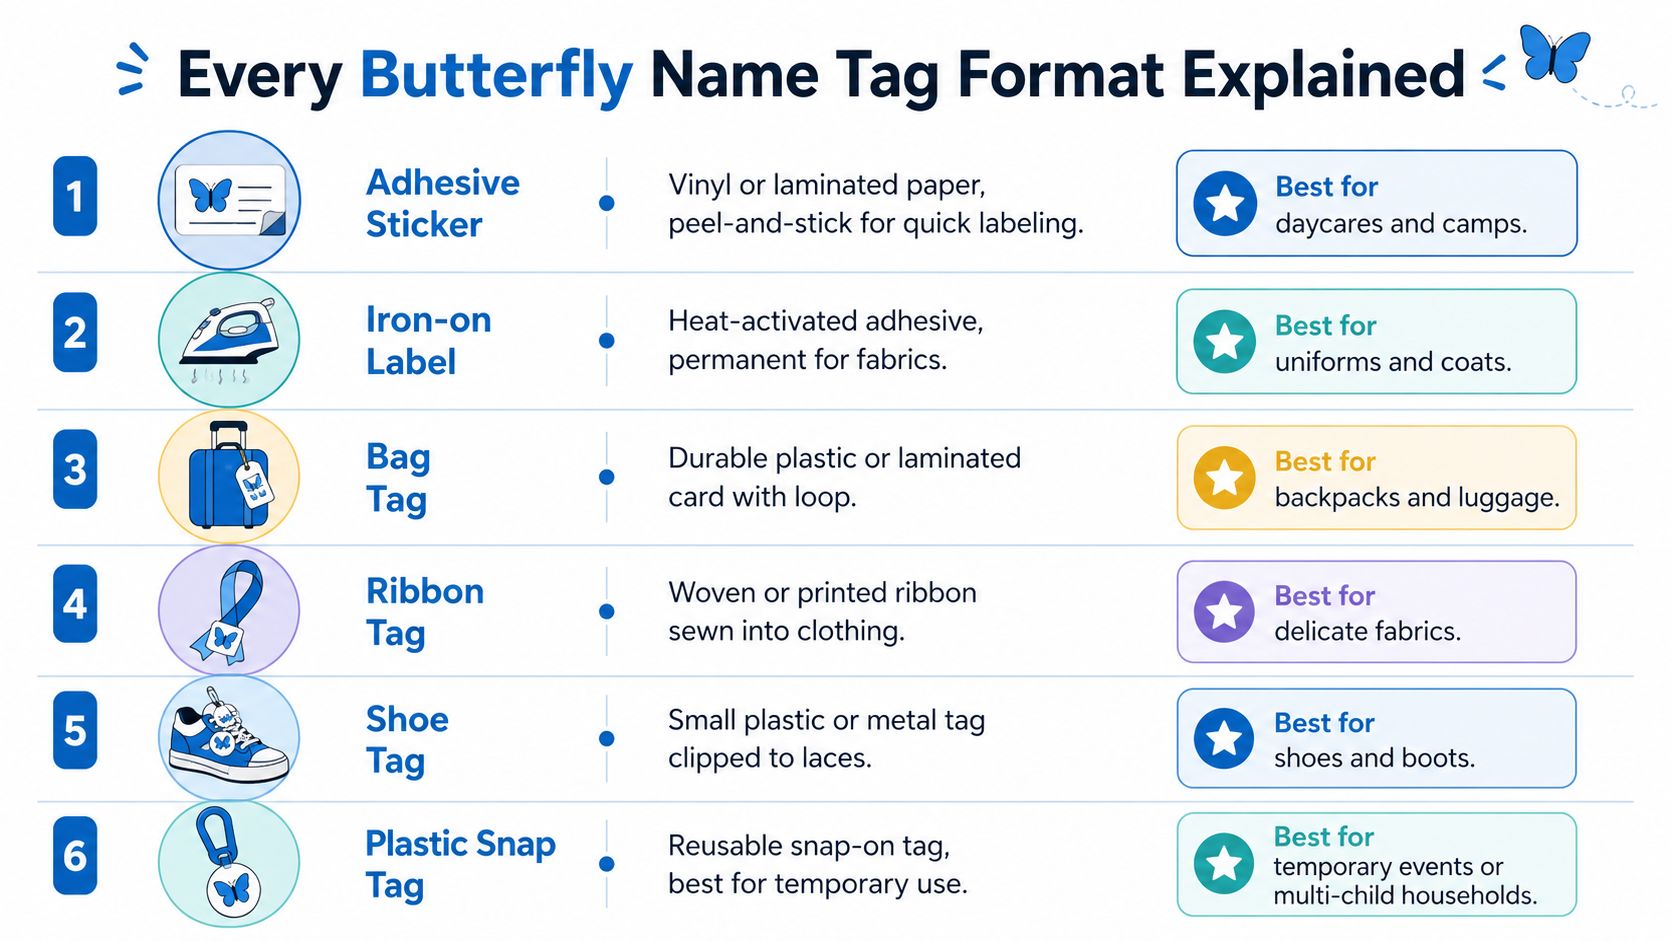
Each butterfly name tag format solves a different problem. Think of the label as a tool kit. A sticker is quick and discreet, a bag tag is visible and removable, and a clothing label must tolerate repeated flexing and laundering.
Stickers for smooth hard surfaces
Adhesive stickers typically use vinyl or laminated paper with a pressure-sensitive backing. They're a natural fit for water bottles, lunch boxes, pencil cases, containers, and other smooth surfaces. Premium versions pair a conformable face stock with protective lamination, which helps reduce abrasion and color fading during everyday use. Dishwasher-safe label construction details also warn that silicone and rubber are difficult surfaces because their low surface energy makes reliable adhesion harder.
Stickers are quick to apply, but the surface has to be clean, dry, and free of grease. They're a poor choice for rough fabric, heavily textured plastic, or flexible silicone.
Iron-ons for garments
Iron-on labels use heat-activated adhesive to bond with textile fibers. They suit uniforms, coats, pajamas, and fabric gear that will remain with the child. Correct temperature, pressure, and cooling time matter more than the butterfly illustration.
Sew-on and ribbon labels for delicate fabric
Sew-on labels attach through the edge, so they don't depend entirely on a surface adhesive. Woven or printed ribbon can work well inside delicate garments, though the stitching takes longer and may feel less convenient during a rushed morning.
Bands for temporary identification
Silicone or elastic bands wrap around a wrist or item. They're useful for outings, sports, travel, or short-term events where a flat sticker may peel or a permanent label would be excessive. Check the fit and the manufacturer's safety guidance before using a band on a child.
Bag tags, shoe tags, and snap tags
A bag tag uses a loop, clip, or strap through a backpack or duffel handle. It's highly visible and easy to replace. A shoe tag clips to laces or attaches to a shoe-specific surface, while a plastic snap tag can move between items when a family shares gear.
For clothing-specific examples, personalized name tags for clothes offers another way to compare textile labeling formats before ordering.
| Format | Material and attachment | Best surface | Durability tier |
|---|---|---|---|
| Adhesive sticker | Vinyl or laminated paper, peel-and-stick | Smooth bottles and containers | Moderate to high when applied correctly |
| Iron-on label | Textile label with heat-activated adhesive | Garments and uniforms | High for regular clothing use |
| Sew-on label | Woven or printed fabric, stitched at the edge | Delicate or frequently washed fabrics | High, with more application effort |
| Silicone or elastic band | Flexible band, wrapped or snapped around an item | Wrists, handles, temporary gear | Reusable and situation-dependent |
| Bag tag | Plastic, laminated card, leather, or similar material with a loop | Backpacks and luggage | High visibility, removable |
| Shoe or snap tag | Small clip-on or snap-on plastic or metal component | Shoes, boots, temporary gear | Moderate to high, depending on movement |
Iron-On Versus Stick-On for Clothing and Gear
For clothing, iron-on and stick-on labels aren't interchangeable. They use different bonding systems, and fabric creates a harsher environment than a smooth lunch box. Garments bend, rub against skin and backpacks, and pass through detergent, agitation, and heat.
An iron-on label uses heat to activate a thermoplastic adhesive. When applied correctly, that adhesive locks into the fabric and moves with the garment. A stick-on clothing label uses pressure-sensitive adhesive instead. It's faster because there's no iron, but repeated flexing and washing can weaken the bond sooner.
Published product guidance describes organic-cotton iron-on labels remaining legible for several years after an initial wash-related fade. It also notes that sew-on edges may fuzz without unraveling when cut on the bias, because laundering wears the outer fibers before it removes the printed image. Iron-on butterfly label material guidance supports the practical distinction between textile construction and surface adhesion.
Use the garment's future, not today's convenience
Choose an iron-on for a daily uniform, daycare clothing, coat, or school sweatshirt that will be washed repeatedly. Choose a stick-on for a camp shirt, loaner jacket, or item you can't safely iron. A stick-on also makes sense when the label needs to come off without leaving a more permanent textile bond.
| Feature | Iron-On Labels | Stick-On Labels |
|---|---|---|
| Application | Requires heat, pressure, and a pressing cloth | Peel and press onto a suitable surface |
| Bond | Heat-activated adhesive joins with fabric fibers | Pressure-sensitive adhesive grips the surface |
| Best use | Everyday garments and uniforms | Temporary clothing or no-iron situations |
| Main advantage | More secure textile attachment | Fast, simple application |
| Main risk | Poor bonding from low heat or early peeling | Corners can lift during agitation |
| Removal | More involved | Usually easier, depending on fabric and adhesive |
Before applying either style, wash and dry a new garment if the care instructions allow it. Pre-washing removes manufacturing finishes that can interfere with adhesion. For iron-ons, use the recommended temperature, keep the iron dry unless the instructions say otherwise, press through a cloth, and let the label cool fully before testing it. For a closer look at the application process, see this guide to iron-on name tags.
Matching the Right Label to Bottles Bags and Lunch Boxes
The surface decides the format. A curved stainless-steel bottle, a flexible shoe, and a canvas backpack all move differently, so they shouldn't receive the same kind of butterfly tag.
Start with the object's shape, then consider its cleaning method and abrasion points. A label placed beside a zipper pull faces more rubbing than one centered on a lunch box lid. A bottle label must tolerate hand contact, condensation, and possibly a dishwasher. A backpack identifier needs visibility and a secure attachment more than a waterproof adhesive film.
A surface-by-surface guide
- Water bottles: Use a small, flexible laminated sticker on a smooth area. Avoid placing it across a seam or directly beneath a grip sleeve.
- Sippy cups: Choose a dishwasher-compatible sticker or a reusable band designed for the cup's shape. Clean and dry the cup before application.
- Lunch boxes: A vinyl waterproof decal works well on smooth plastic or coated surfaces. Keep it away from textured fabric panels.
- Backpacks: Use a looped bag tag on the handle. It's easier to see at pickup and doesn't depend on adhesive sticking to woven fabric.
- Pencil cases: A sticker suits a smooth case, while a clip or sewn label is safer for rough textile exteriors.
- Shoes and boots: Use a shoe-specific label or a small tag designed for curved, flexible surfaces. Place it where the foot won't scrape it constantly.
- Jackets: Select an iron-on or sew-on textile label for a garment that will be washed regularly.
For container-specific placement and material considerations, this guide to labels for containers is a useful reference.
| Item | Best Format | Why It Works |
|---|---|---|
| Stainless-steel bottle | Small laminated sticker | Flexible enough for a curve and easy to read |
| Sippy cup | Dishwasher-compatible sticker or band | Handles frequent handling and cleaning |
| Plastic lunch box | Waterproof vinyl decal | Bonds to a smooth, non-porous surface |
| Backpack | Loop-through bag tag | Visible and independent of fabric adhesion |
| Pencil case | Sticker or clip-on tag | Fits either smooth plastic or soft fabric |
| Shoes and boots | Shoe label or clip-on tag | Designed for curved, moving surfaces |
| Jacket | Iron-on or sew-on label | Built for textile movement and laundering |
Apply a sticker by pressing from the center outward, then smooth the edges firmly. Give the adhesive time to grip before exposing the item to water. If the item has silicone or rubber sections, move the label to a smoother plastic or metal area instead of hoping the adhesive will overcome the material.
How Butterfly Labels Hold Up in the Wash and the Dishwasher
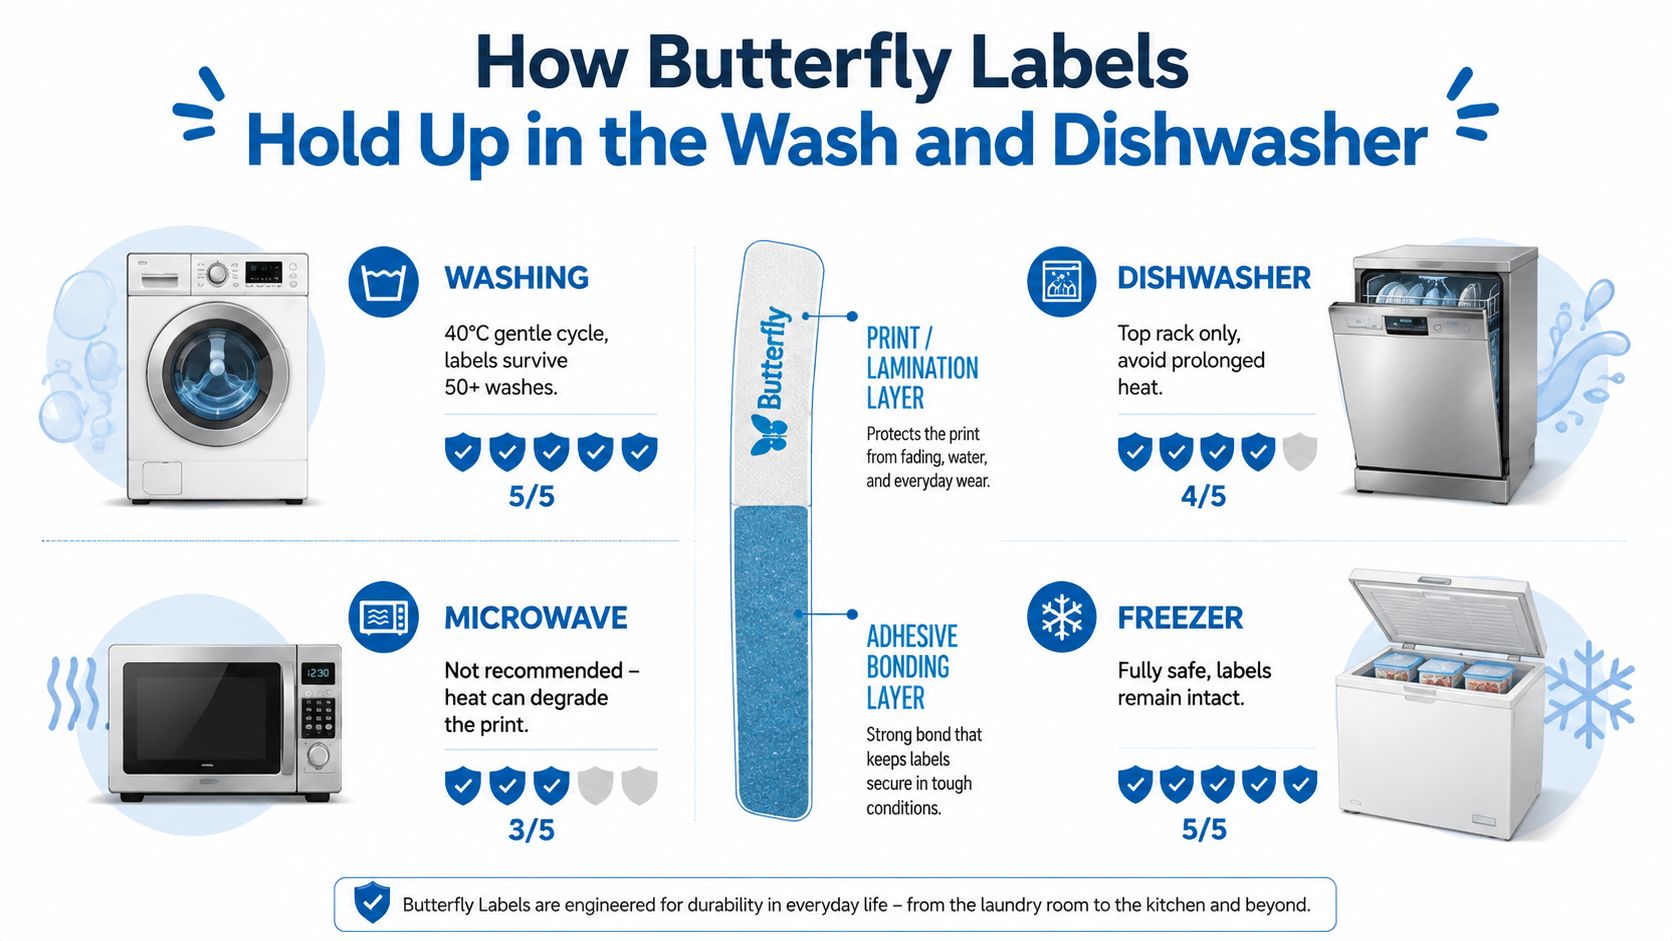
A label's durability comes from two layers working together: the bonding layer underneath and the print or lamination layer on top. The adhesive keeps the label attached. The surface film protects the artwork and text from water, detergent, abrasion, and fading.
For bottles and containers, laminated vinyl generally offers a stronger practical choice than uncoated paper. Lamination reduces abrasion and color loss, while the pressure-sensitive adhesive is formulated for smooth, non-porous surfaces. That construction can tolerate dishwasher, microwave, freezer, and laundry exposure when the product is specifically rated for those conditions, but silicone and rubber remain difficult substrates. Technical label durability information explains why surface energy matters so much.
Where labels usually fail
A corner lifts first when the label is too large for a curve, applied over moisture, or placed in a high-friction zone. Text may fade when the protective layer is thin or when the item receives strong sunlight and repeated chemical exposure. A label can also crack if it's wrapped around a sharply bending surface.
Clothing has a different failure pattern. Flexing and mechanical agitation can weaken a pressure-sensitive adhesive before the printed image visibly deteriorates. Heat-activated textile bonds usually make more sense for garments, while laminated stickers remain the practical choice for smooth hard goods.
Use care habits that match the product instructions:
- Apply dry: Clean the item and let it dry completely before pressing on a sticker.
- Protect corners: Avoid seams, ridges, zipper paths, and areas children constantly grip.
- Follow appliance guidance: A dishwasher-safe label still needs a dishwasher-safe item and the recommended rack or cycle.
- Limit unnecessary heat: High heat can stress adhesives and printed layers, particularly when the label isn't rated for microwave or heated drying.
- Inspect regularly: Replace a label once the name becomes hard to read, even if part of it remains attached.
A label that survives isn't automatically a label that suits every appliance. Read the product rating, match it to the surface, and treat early edge lifting as a signal to change placement or format. For daycare containers, dishwasher-safe labels for daycare provides a practical comparison point.
What to Print on a Butterfly Name Tag for Safety and Privacy
The right label copy answers one question quickly, who owns this item and how can a responsible adult return it? It shouldn't reveal more about a child than a finder needs.
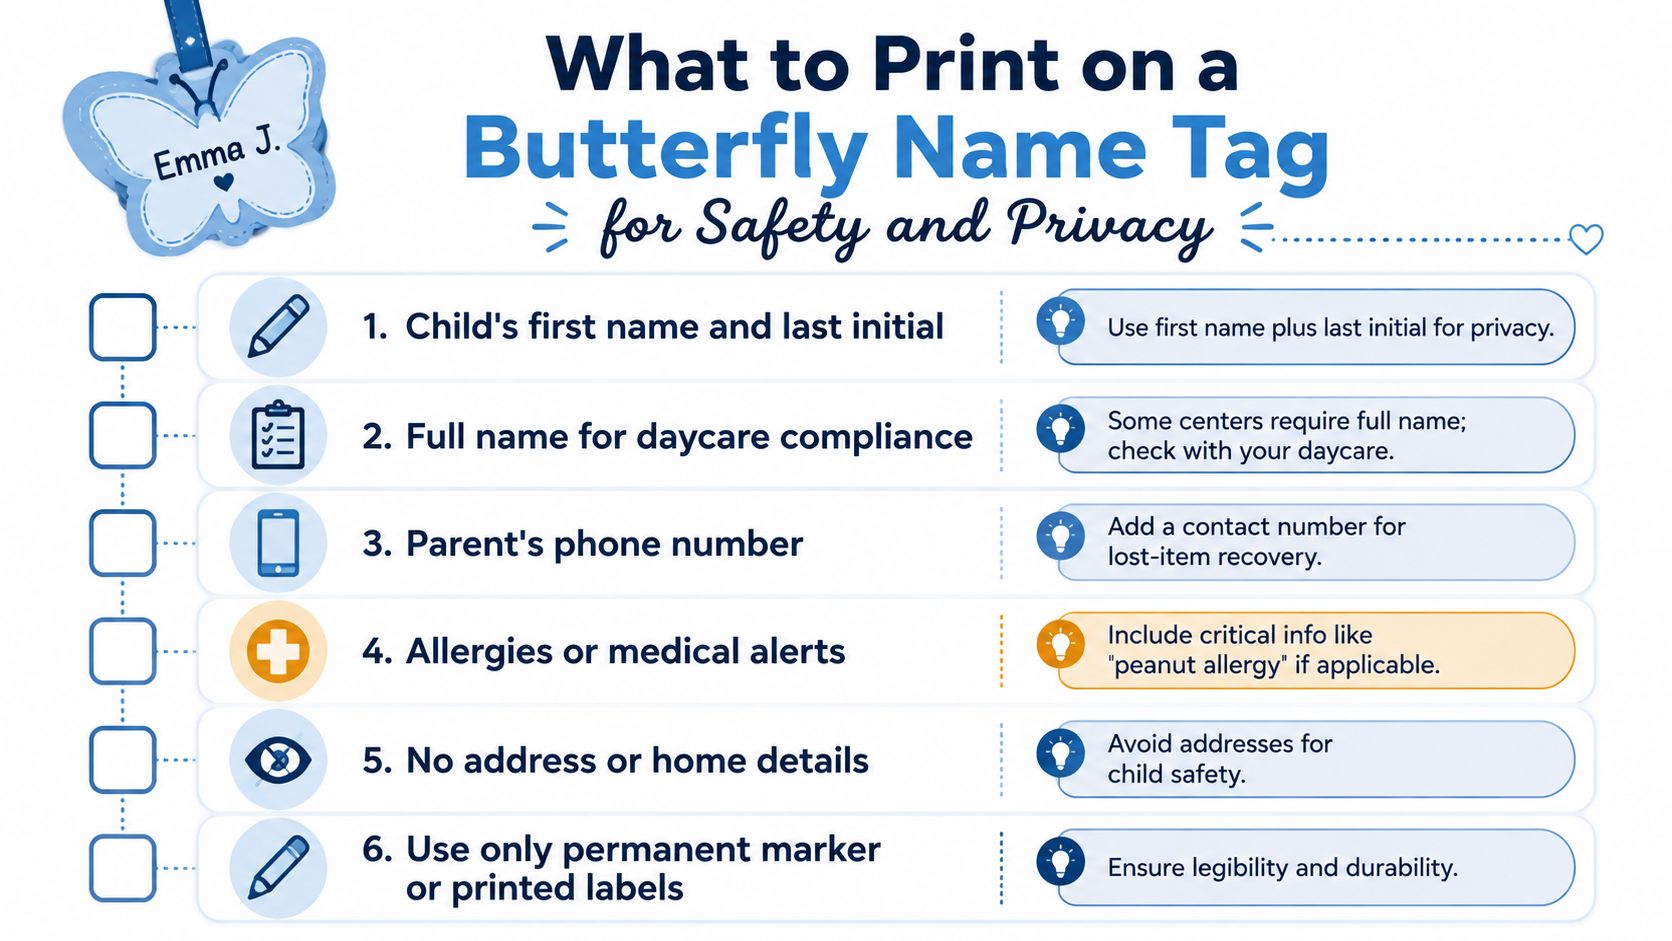
Daycare requirements vary. Independent daycare guidance says centers commonly expect belongings to be labeled and often recommends at least the child's full name, with a phone number for infants and toddlers and allergy details when applicable. Guidance on daycare label wording is useful when a center's handbook doesn't spell out its preference.
Build the copy in layers
Start with the identification line. In a small, familiar classroom, a first name and last initial may be enough, especially when the child's privacy matters. If the center requires full names or several children share the same first name, use the child's full name.
Add contact information only when it serves a clear purpose. A parent's phone number can help return an item found outside the classroom, while a classroom or teacher name may work better in a closed school setting. If space is limited, choose one dependable contact method rather than shrinking every line until it becomes unreadable.
Medical information deserves prominence, not clutter. A short line such as NUT ALLERGY or PEANUT ALLERGY can use a contrasting color or larger type when relevant, but only include information that caregivers need and the school has approved for visible labels.
Use this privacy check before ordering
- Child's name: Choose first name plus last initial, or full name if required.
- Contact method: Add one parent phone number when lost-item recovery justifies it.
- Allergy alert: Include a concise, approved alert when medically necessary.
- School context: Add a classroom or teacher identifier only if it helps staff.
- Private details: Leave off home addresses, full birthdates, and unnecessary personal information.
- Readability: Keep the type large enough for a caregiver to read at a glance.
Print only what helps a safe return or an appropriate care response.
That rule resolves most copy decisions. A butterfly should make the label inviting, but the words must remain clear, restrained, and useful.
Real-World Uses from Daycare to Birthday Parties
At daycare drop-off, the difference between a labeled cup and an unlabeled cup appears immediately. Several children may bring the same style of bottle, but a bright butterfly sticker on a smooth cup gives the caregiver a quick visual match without turning the morning into a guessing game.
A bottle sticker belongs on the clean, dry cup surface. A jacket needs an iron-on or sew-on label inside the garment. A backpack benefits from a looped bag tag attached to the handle, where staff can spot it during pickup.
A week of small labeling wins
Back-to-school preparation often works better as a short kitchen-table task than as a giant weekend project. Put the butterfly stickers beside the pencils, notebooks, lunch box, and pencil case, then label smooth surfaces together. Keep iron-ons and the pressing cloth separate so you don't accidentally use a sticker where a textile bond is needed.
For a sleepover at a grandparent's home, label the overnight bag and pajamas rather than every item with the same format. A bag tag identifies the main luggage, while a garment label keeps pajamas from being confused with a cousin's clothing after laundry.
Sports create another useful split. A wrist band can identify a child during an outing, a shoe tag can stay with boots, and a sticker can mark a helmet or water bottle if the surface is smooth and the product is compatible. For families planning a sports-themed celebration, JC Sports Houston party ideas offers ideas that can be adapted with matching butterfly tags for teams, favor bags, or activity stations.
Parties and shared supplies
At a birthday party, butterfly tags can serve as place cards, seals for favor bags, or take-home labels for plush toys and craft projects. A removable snap tag works when the same item will be reused for another guest, while a printed sticker makes a favor feel intentionally prepared.
For party favors, party labels and favors can help parents think beyond ordinary name stickers. The small payoff is fewer mix-ups at the end of a busy event, especially when several children leave with similar bags or handmade items.
The pattern stays consistent across every setting. Put the label where the person handling the item will look first, and select an attachment method that matches the item's material.
Your Quick Butterfly Name Tag Checklist
A successful labeling system doesn't require one giant order or an afternoon of fixing failed stickers. Choose formats by surface, write only useful information, and apply each label with the conditions it needs to bond.
Formats to keep on hand
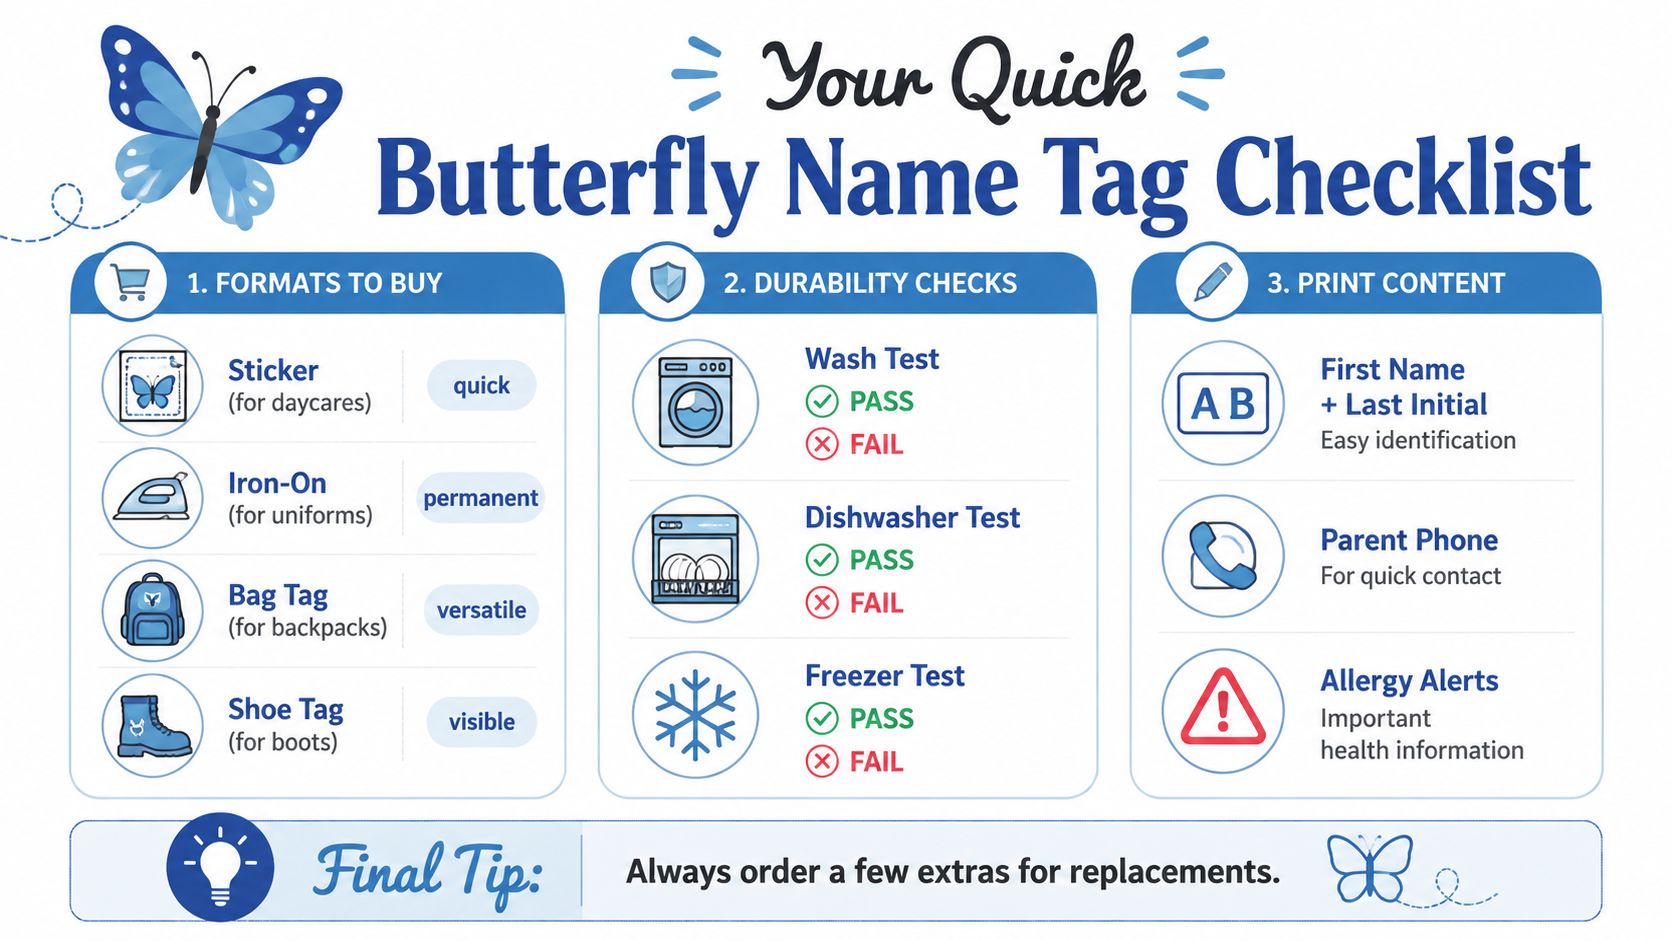
- Stickers: Use for bottles, lunch boxes, containers, and smooth pencil cases.
- Iron-ons: Reserve for uniforms, coats, pajamas, and regularly washed clothing.
- Sew-ons: Choose for delicate fabric or garments where stitching is preferable.
- Bag tags: Attach to backpack and duffel handles for quick visibility.
- Shoe tags: Use labels made for curved, flexible footwear.
- Bands or snap tags: Keep for outings, sports, temporary events, and shared gear.
Copy rules that protect clarity
- Start with identification: Use the first name and last initial when privacy allows, or the full name when daycare policy requires it.
- Add one contact method: Include a parent phone number when a finder may need it, but don't overcrowd a small label.
- Flag relevant allergies: Use a short, prominent alert approved by the child's caregivers and school.
- Remove sensitive details: Skip addresses, full birthdates, and information unrelated to returning the item.
- Make the name readable: A simple butterfly design with high contrast works better than a crowded illustration behind tiny text.
Application and care habits
Clean and dry every surface before applying an adhesive label. Press from the middle toward the edges, then leave the item undisturbed long enough for the adhesive to grip. For iron-ons, use the recommended heat and a pressing cloth, and let the label cool before laundering.
Pick two butterfly colors for one child's belongings. That visual code helps you spot duplicates even before you read the name.
A simple starter plan keeps the job manageable:
- Monday: Label bottles and cups.
- Tuesday: Label clothing and shoes.
- Wednesday: Label the backpack, lunch box, and pencil case.
- Thursday: Add a bag tag and check allergy wording.
- Friday: Inspect corners, replace unclear labels, and store extras.
Order a few spare labels for replacements, especially for items that travel between daycare, school, grandparents' homes, and activities.
InchBug offers personalized labels and tags for containers, clothing, shoes, bags, and sports gear, including reusable formats for belongings that change often. Visit InchBug to choose a butterfly-friendly labeling setup that matches your child's daily items, then start with the surfaces that cause the most mix-ups.