
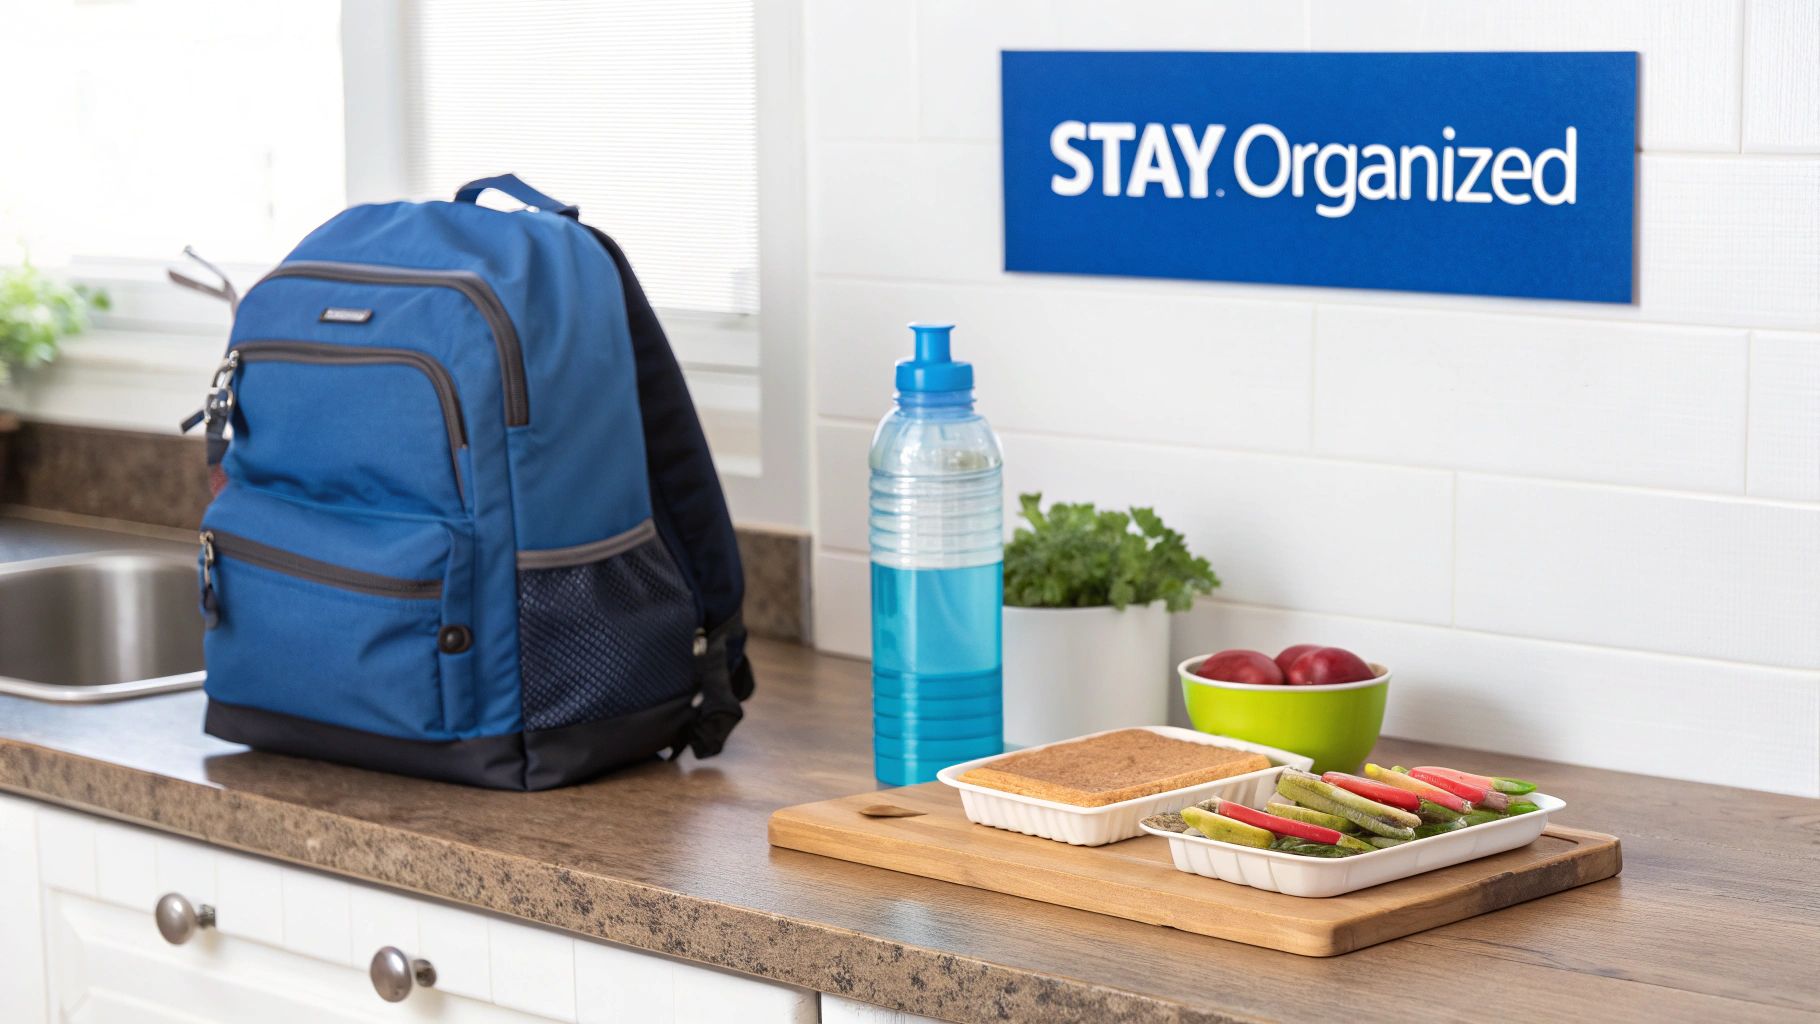
Let’s be honest, parenting is basically an exercise in organized chaos. Trying to keep track of every single bottle, lunch box, and piece of gear can feel like a full-time job. This is where the right labels for containers become your secret weapon, turning that potential clutter into clarity and giving you some much-needed peace of mind. They aren't just stickers; they're your ticket to making sure everything you send out into the world actually makes its way back home.
Why Smart Labeling Is a Parent's Best Friend
Between daycare drop-offs, school lunches, and weekend playdates, our world is a constant flow of items leaving and (fingers crossed) returning home. Without a solid system, this cycle quickly leads to lost property, frustrating mix-ups at school, and having to buy replacements for things you just bought. A smart approach to labeling is a total game-changer.
Think of high-quality labels for containers as a small investment that pays you back in time, money, and sanity. They go way beyond a faded permanent marker or a piece of tape that falls off after one wash, offering a durable and clear solution that's actually built for the reality of family life.
The True Cost of Lost Items
It’s not just about losing another water bottle (though that's frustrating enough!). Lost items create a ripple effect. A thirsty kid at school, a last-minute trip to the store to replace a lunch box—these little disruptions add up. A simple, well-placed label can prevent all these headaches, ensuring your child’s things are easily spotted and returned by teachers or other parents.
This idea of clear organization goes beyond just school gear. Smart labeling makes a parent's life easier by bringing order to the chaos at home, too. For instance, exploring baby nursery organization ideas shows just how essential labels are for managing clothes, diapers, and toys, creating a calmer space for everyone.
Benefits Beyond Simple Identification
Good labeling does more than just put a name on something. It empowers our kids, builds their independence, and makes our daily routines run a whole lot smoother.
- Promotes Responsibility: When kids can easily recognize their own belongings, they start to learn how to take ownership of them.
- Reduces Germs: No more accidental sharing of sippy cups and utensils at daycare! Clear labels help minimize the spread of sniffles and germs.
- Saves Teacher Time: In a busy classroom, clearly marked items let educators focus on teaching instead of playing detective with a mountain of lost property.
By setting up a smart labeling system, you're not just organizing stuff. You're putting a strategy in place that supports your child's development, their health, and the smooth running of your home and their classroom. It’s one of the simplest and most effective parenting hacks out there.
Understanding Different Label Materials and Their Benefits
Choosing the right labels for containers might seem like a small detail, but believe me, the material is everything. It’s what separates a label that survives the school year from one that peels off after a single trip through the dishwasher. Getting a feel for what these labels are made of helps you make a smarter choice—one that actually saves you money and stops those dreaded “lost water bottle” notes from coming home.
It’s no surprise that the demand for good labels has exploded. The global labels market is expected to be worth around USD 52.3 billion by 2025, and the food and beverage industry accounts for a huge 33.65% of that. This just shows how critical clear, durable labels have become for families everywhere, on everything from sippy cups to snack packs.
Adhesive Vinyl: The Everyday Workhorse
When you picture a classic name label, you’re probably thinking of adhesive vinyl. This isn’t your average paper sticker; it’s a high-performance material engineered to be way more resilient. It’s the perfect choice for anything with a flat or slightly curved surface where you need a strong, stay-put bond.
Think of it as the difference between painter’s tape and duct tape. A paper sticker gives up at the first sign of moisture, but a quality vinyl label is designed to hang on for the long haul.
- Pros: It’s waterproof, dishwasher-safe, and often microwave-safe, too. Because it’s so thin, it sticks smoothly without adding any bulk.
- Best For: Plastic lunch boxes, snack containers, thermoses, and school supplies like folders and pencil cases.
- Cons: It’s not meant for anything stretchy or super textured. Once you stick it on, it’s there to stay—it's not designed to be peeled off and reused.
If you’re the crafty type, you can even explore DIY options with materials like printable sticker paper, which opens up a whole world of custom designs.
Silicone Bands: The Reusable Champion
For round items that are in a constant cycle of use and wash—like baby bottles, sippy cups, and water bottles—adhesive labels can really struggle. The constant stretching and temperature changes are just too much for them. This is exactly where silicone bands, like InchBug’s Orbit Labels, come to the rescue. These aren't sticky at all; they’re made from a flexible, food-grade material that stretches to fit snugly around a container.
The best way to think of a silicone band is like a durable, personalized bracelet for your bottle. You can pop it off to wash the bottle, then slide it onto a new cup as your child grows. It’s an incredibly versatile and long-lasting solution.
This reusability is a huge win. It cuts down on waste and saves you money over time, since you’re not constantly buying new labels. You can learn more about the benefits in our guide to reusable labels.
Woven Fabric and Specialized Materials
While vinyl and silicone cover most bases, some situations call for something different. Woven fabric labels, for instance, are perfect for soft items like lunch bags or fabric pencil cases where a sticker just won't work.
You can also find specialized labels made to be freezer-proof for meal prep containers or some with extra-strong adhesive for sports gear that’s going to take a beating. The real secret is matching the label’s strengths to how the container will be used. That way, you know it can handle whatever your kid throws at it (sometimes literally!).
Matching the Right Label to Every Container
Now that we've covered the different label materials, it’s time to play matchmaker. Picking the right label for a specific container is about more than just looks—it’s about making sure it can handle the job. A label that’s perfect for a flat plastic folder will likely give up on a curvy, constantly washed sippy cup.
Choosing the perfect labels for containers means you have to think like an engineer for a minute. You’ve got to consider the container’s shape, its material, and what it goes through every day. Will it be boiled, frozen, tossed in a backpack, or scrubbed in the sink? Each scenario needs a different solution.
For Baby Bottles and Sippy Cups
Let’s be honest, baby bottles and sippy cups are some of the hardest items to label. They're usually round, get washed multiple times a day in super-hot water, and are often made from tricky materials like silicone, glass, or slick plastic. This combo is a total nightmare for most adhesive stickers.
This is exactly where a non-adhesive, reusable label comes to the rescue. A stretchy silicone band, like our InchBug Orbit Label, is the hands-down winner here.
- It Grips Curved Surfaces: A flat sticker can peel or wrinkle on a cylinder, but a silicone band stretches to hug the bottle snugly without needing any sticky stuff.
- It’s Built for Washing: These bands are made from 100% food-grade silicone, which is naturally waterproof, dishwasher-safe, and even sterilizer-safe. You never have to take it off.
- It’s a Long-Term Investment: The same label can move with your child as they graduate from a baby bottle to a sippy cup and then to a water bottle. It's an eco-friendly and smart choice. You can learn more about finding the perfect fit in our Orbit Label size guide.
This little decision tree can help you visualize the process based on what you're labeling and how you'll use it.
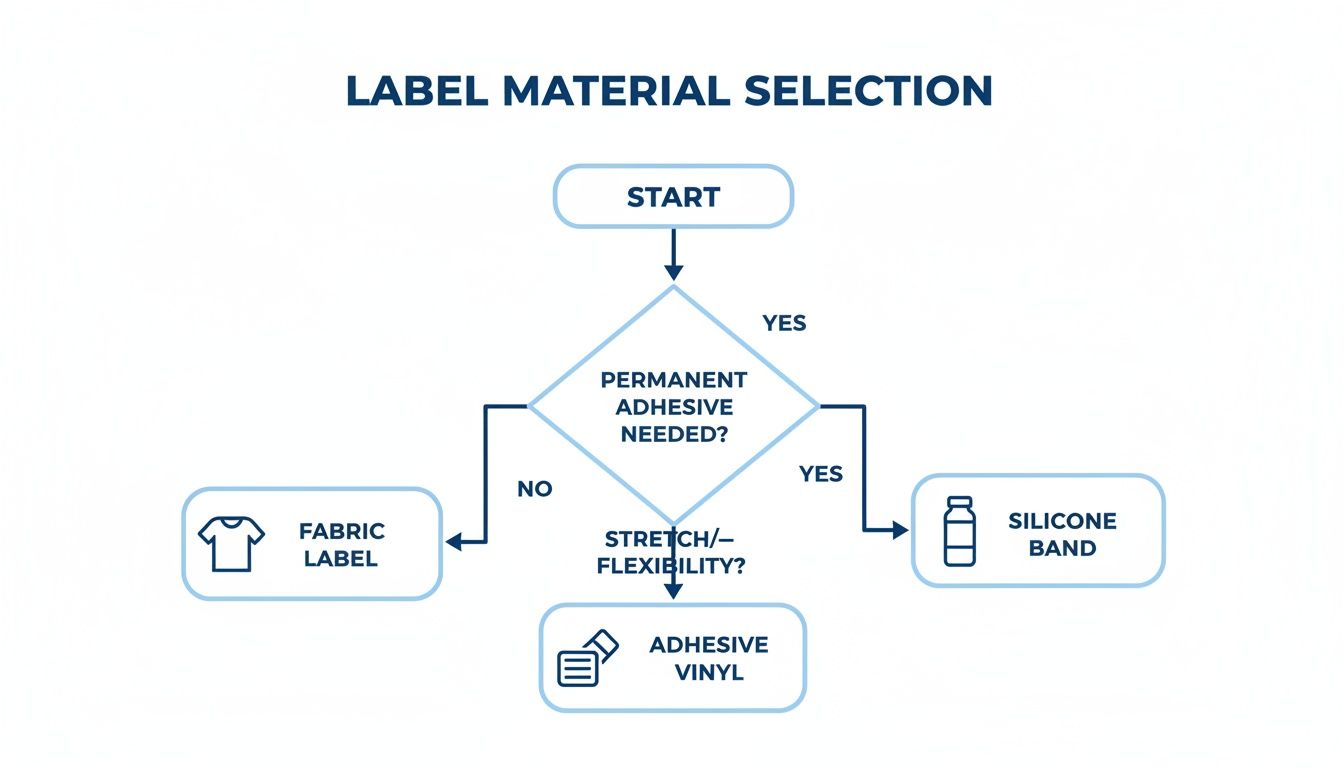
As you can see, for anything that needs flexibility and can stand up to constant washing (like bottles), a non-adhesive band is definitely the way to go.
For Lunch Boxes and Food Storage
Lunch boxes and food storage containers bring a different set of challenges. They’re usually made of hard plastic with flat or gently curved surfaces, which are great for high-quality adhesive labels. The catch? They also have to survive the dishwasher, the microwave, and sometimes even the freezer.
A plain paper sticker will turn to mush under these conditions. You need a tough, waterproof vinyl label made specifically for this. Look for labels that are clearly marked as dishwasher-safe and microwave-safe. The protective laminate on top is what keeps the ink from fading and stops the adhesive from dissolving.
Think of a good adhesive label for a food container as a tiny, waterproof shield. It has to guard the name and design from heat, water, and soap, day after day. A quality vinyl label provides that crucial protection.
For Classroom and School Supplies
When you get to classroom supplies like pencil boxes, folders, notebooks, and glue sticks, things get a bit easier. These items usually stay dry and don’t face extreme temperatures. Plus, they have smooth, flat surfaces that are perfect for a sticker to grab onto.
For these, a standard—but still durable—adhesive vinyl name label is the perfect fit. While it doesn't need to be as tough as a lunch box label, you still want one that can resist peeling from the daily wear and tear of being handled by little hands and shoved into backpacks.
A Quick Checklist for Choosing Your Label
Feeling a little overwhelmed? Don't be. Before you click "buy" on any labels, just run through these quick questions. Your answers will point you straight to the best choice for your family.
- What’s the container’s shape? Is the surface flat like a folder, or is it curved and round like a bottle?
- How will you clean it? Will it be hand-washed, or does it need to survive the dishwasher, sterilizer, or even the washing machine?
- Will it be heated or frozen? Does the label need to be microwave-safe for reheating leftovers or tough enough for the freezer?
- How long do you need it to last? Is this for a disposable item, or are you looking for a permanent or reusable solution for a long-lasting piece of gear?
By matching the label’s features to the container's life story, you'll make sure every item stays clearly and reliably identified.
How to Apply and Care for Labels to Make Them Last
Getting your labels to stick and stay put is both an art and a science. A perfect application doesn't just look better; it's the secret to making sure your labels for containers go the distance. The right prep work and a little TLC can mean the difference between a label that lasts for years and one that peels off after just a few washes.
Think of the label’s adhesive like the foundation of a house. You wouldn't build on a weak, uneven, or dirty surface, right? The same idea applies here. A clean, prepped surface is everything when it comes to getting a strong, lasting bond.
The Perfect Application Process for Adhesive Labels
For adhesive labels to really do their job, you need to give them the best possible start. Following these simple steps will help you dodge those common frustrations like peeling corners and annoying air bubbles.
-
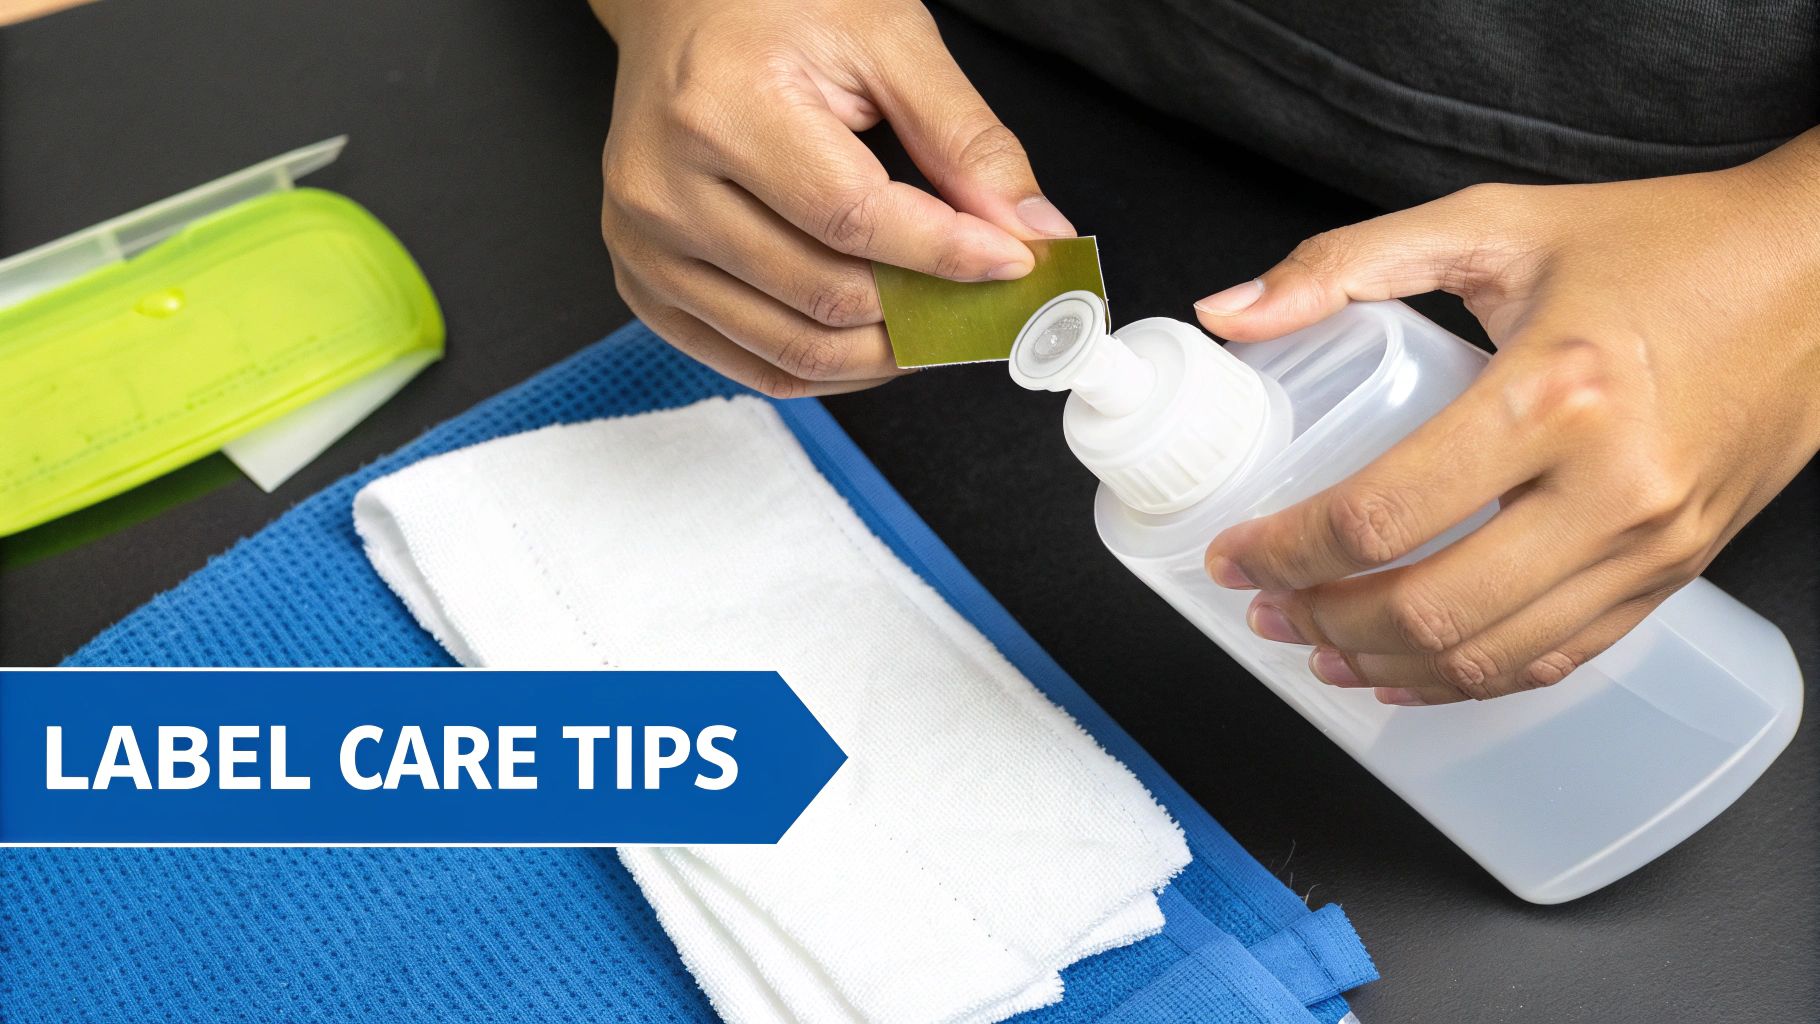
Start with a Clean Slate: Before you do anything else, give the container's surface a thorough cleaning. My go-to method is wiping it down with a cotton ball soaked in rubbing alcohol. This gets rid of any invisible oils, dust, or residue that can get in the way of the adhesive.
-
Make Sure It's Bone Dry: After cleaning, let the surface air dry completely, or use a lint-free cloth to wipe it down. Even a tiny bit of moisture can mess with the label’s grip.
-
Position and Press Firmly: Stick the label onto a smooth part of the container. I always start from the center and press outwards, using my thumb to smooth it down and push out any potential air bubbles. This "press and hold" move makes sure every bit of the adhesive makes solid contact.
-
Give It Time to Cure: This is the most important step, and it's the one most people skip! Let the labeled container sit for at least 24 hours before it sees the inside of a dishwasher or gets a hand wash. This crucial curing time lets the adhesive fully bond and reach its maximum strength.
Rushing to wash a newly labeled item is the number one reason even the best labels sometimes fail. Patience during that 24-hour window is your secret weapon for a truly waterproof and durable bond.
The demand for high-performance labels is huge and still growing, especially in places with booming packaged goods industries. In fact, the Asia-Pacific region is a powerhouse, expected to hold 44.60% of the global label market share by 2025. This global scale means we're constantly seeing new and better adhesive technologies designed to handle daily life. You can take a closer look at what's shaping the global label market in this report from Mordor Intelligence.
Smart Care for Long-Lasting Labels
Once your labels are on and fully cured, a little bit of smart care will keep them looking bright and easy to read for years.
Dishwasher Best Practices:
- Top Rack Only: Always, always, always place labeled items on the top rack of the dishwasher. The main heating element is at the bottom, and that intense heat can weaken the adhesive and fade the design over time.
- Avoid High-Heat Cycles: Steer clear of "heavy-duty" or "sanitize" settings. A normal wash cycle has plenty of cleaning power without putting your labels through the wringer.
General Maintenance Tips:
- No Abrasive Scrubbers: When you're hand-washing, use a soft sponge or cloth. Steel wool or other harsh scrubbers can easily scratch the label's protective surface.
- Caring for Reusable Labels: For silicone bands, you can just wash them with soap and water or leave them right on the container in the dishwasher. Just try not to over-stretch them to keep their elasticity and snug fit.
By following these simple application and care tips, you’ll get the absolute best performance out of your labels for containers, making sure they can handle whatever your busy family throws their way.
Prioritizing Safety in Kid-Friendly Labels
When we're picking out products for our kids, especially anything that's going to touch their food or drinks, safety isn't just a nice-to-have feature—it's everything. That same eagle eye we use for bottles and lunch boxes should absolutely apply to the labels for containers we put on them. A label isn't just a sticker; it becomes part of the item, and what it's made of really matters.
This is why you’ll see BPA-free shouted from the rooftops on high-quality kids' labels. But what does that actually mean for your family? Bisphenol A (BPA) is a chemical that's been used in plastics for decades. Over time, concerns have popped up about its potential health effects, especially for our little ones.
Choosing BPA-free labels means you don't have to worry about funky chemicals leaching from the label into your child's water or snacks. It's that simple peace of mind that every parent deserves with every sip and bite.
Decoding Safe Materials
Beyond just being BPA-free, there are a few other safety checks to tick off the list. A truly kid-safe label is designed with every little detail in mind, from the main material down to the ink used to print your child’s name.
Here's what to keep an eye out for:
- Food-Grade Materials: This is a big one. Labels made from materials like 100% food-grade silicone are perfect for things like bottles and sippy cups. They’re non-toxic and won't react with liquids or food.
- Non-Toxic Inks: The cute personalization on the label needs to be safe, too. The inks should be lead-free so the printed name doesn't introduce any harmful stuff.
- Choking Hazard Prevention: Durability is a safety feature in disguise. A well-made label won’t peel, chip, or break into small pieces that a curious toddler might find fascinating.
When you choose a label designed specifically for children's products, you're not just buying an organizational tool. You're investing in a product that has been thoughtfully engineered to meet rigorous safety standards, giving you one less thing to worry about.
Allergy Alerts: A Lifesaving Label
For kids with food allergies, a clear label can be a literal lifesaver. Specialized allergy alert labels are designed to be a bright, impossible-to-miss signal for teachers, caregivers, and other parents. They often come in bold colors like red or orange to grab attention immediately.
Sticking these on lunch boxes, water bottles, and snack containers is a simple way to communicate your child’s specific dietary needs, helping to prevent accidental exposure in a busy daycare or classroom. You can read more about the importance of using personalized allergy labels to keep kids safe.
Thankfully, there's a growing focus on consumer safety, which has led to stricter regulations for products like these. The packaging labels market is a huge industry, estimated at USD 53.92 billion in 2024 and still growing. This kind of regulatory attention helps ensure that the labels making their way to our homes meet high safety and quality standards.
Getting More Bang for Your Buck with Customization and Bundles
Let's be honest, labeling is about more than just slapping a name on something. It's a chance to add a little personality and fun to your child's gear! Custom labels for containers can turn a plain old water bottle into their special water bottle—the one they’ll recognize and love in a sea of identical ones.
This is a game-changer for pre-readers. When a little one can spot their lunch box because of the cool rocket ship icon or their favorite bright pink color, it gives them a real sense of independence. They're not just finding their stuff; they're learning to take ownership, which is a huge step for them. It’s such a simple trick to make organization feel like a fun and positive part of their day.
It’s not just about looks, either. Picking out unique fonts, bold colors, and fun icons turns each label into a tiny piece of art that really shows off who your kid is.
Making Personalization Fun and Easy
Customizing labels shouldn't feel like a chore. The best part is getting to mix and match different elements to create a design that’s one-of-a-kind, just like your kid.
- Font Selection: You can go with playful block letters or a cute, loopy script. The right font sets the mood and, most importantly, makes their name super easy to read.
- Color Choices: A pop of color helps labels stand out from the crowd. You could match it to their backpack or just let them go wild with their favorite shade.
- Icon Library: This is my favorite part! Adding a small graphic—like a star, a friendly dinosaur, or a soccer ball—gives kids who can't read yet an instant visual clue.
Here's a little tip: get your child involved in designing their labels. When they help pick the colors and icons, they’re not just getting a label; they’re becoming a part of the process. That shared activity builds so much excitement and makes them way more likely to keep track of their awesome new gear.
The Smart Way to Shop: Think Bundles
Okay, beyond all the fun stuff, there's the practical side of things: getting the best value. A little strategy here can save you a surprising amount of money and make sure you’re ready for anything that needs a name. This is where combo packs and bundles become a busy parent’s secret weapon.
Buying labels one by one for every single thing can get expensive fast. A much smarter move is to look for a curated pack that gives you a bunch of different shapes and sizes, designed to cover all your bases at once. Back-to-school or daycare bundles are perfect for this, often including a mix of labels for bottles, clothes, shoes, and backpacks.
This isn’t just about saving money; it’s about convenience. By planning ahead and buying in bulk, you build up a stash of high-quality labels for containers. That means no more last-minute panic when a new sippy cup or crayon box shows up. It’s truly the easiest way to get organized and stay on budget.
Your Top Questions About Container Labels Answered
Even after doing all the research, you're bound to have a few questions when picking out the perfect labels for containers. I get it! To help you feel totally confident, I've gathered answers to the questions I hear most often from parents just like you. My goal is to give you practical, straightforward advice to make this whole process a breeze.
You need to know that the labels you choose can stand up to the daily grind of family life. From chaotic mornings and jam-packed lunchboxes to endless cycles through the dishwasher, you need a solution that’s tough and reliable.
Are Your Labels Really Dishwasher and Microwave Safe?
Yes, absolutely! Our adhesive name labels are made with a super-strong adhesive and covered with a protective top layer. This powerful combo makes them completely waterproof and incredibly durable. We’ve put them through the wringer to make sure they can handle tons of trips through the dishwasher and are perfectly safe in the microwave without peeling, fading, or causing any trouble.
And for those round containers and bottles, our Orbit Labels are made from 100% silicone. Silicone is naturally dishwasher-safe and microwave-safe, which means you can wash and heat bottles without ever having to take the label off. It's a game-changer!
What Is the Difference Between Reusable and Adhesive Labels?
The biggest difference really comes down to how you apply them and how you plan to use them long-term. Let me break it down.
Think of our reusable silicone Orbit Labels like a personalized, stretchy bracelet for your bottle. You can easily slip them off a baby bottle and onto a sippy cup, then onto a water bottle as your child grows. This makes them a fantastic long-lasting and eco-friendly choice.
Adhesive labels, on the other hand, are high-performance stickers. They’re designed for a more permanent stick on one specific item, which makes them perfect for flat or gently curved surfaces like lunch boxes, school supplies, and all those food storage containers.
How Do I Make Sure My Adhesive Labels Stick Properly?
Getting the application right is the secret to a label that lasts forever. First, make sure the surface of the container is clean, dry, and free of any grease or oils—a quick wipe with rubbing alcohol works wonders here. Then, apply the label to a smooth spot, pressing down firmly from the center out to squeeze out any air bubbles.
Now for the most important part: you have to let the label’s adhesive "cure" for at least 24 hours before you run it through the dishwasher. This little waiting period is key because it allows the bond to reach its maximum strength, ensuring it holds on tight wash after wash.
Can I Write on the Labels Myself?
Our labels arrive professionally personalized with your child's name, so you never have to deal with messy handwriting or ink that smudges and fades away. The text on our Orbit Labels is laser-engraved, and our adhesive labels are printed with durable, non-toxic ink. This gives you a crisp, clear, and permanent name that will easily outlast any marker, which is a much more reliable and easy-to-read solution for busy daycare and school settings.
Ready to conquer the container chaos? Check out our full collection of durable, personalized labels for containers at InchBug and find the perfect fit for your family. Shop now at InchBug.com