

The daycare shelf is full of bottles that look almost identical. Your child comes home with someone else's, another parent is searching through the lost-and-found bin, and the teacher has already asked everyone to add a name. Water bottle labels printable projects can solve that mix-up quickly, but the right method depends on how hard the bottle will be used.
At home, you can print a cheerful name label for a birthday party, school event, sports team, or short daycare stretch. You can also choose a pre-made durable label, a silicone bottle band, a vinyl wrap, or permanent personalization. DIY printing gives you immediate control over colors and designs, while ready-made options usually offer more reliable performance through washing, condensation, and daily handling.
Why Printable Water Bottle Labels Are Worth the Effort
Your child's bottle is ready for school, but the name tag you printed last night already looks soft around the edges after one cold drink. That small test reveals the main choice: a printable label offers speed and creative control, while a pre-made durable label is designed for repeated handling and washing.
A printed label can still do useful work. Large, clear lettering helps a teacher identify the bottle quickly, and a small symbol, such as a dinosaur, flower, star, or favorite animal, gives children another recognition cue. For a young child who cannot read yet, that picture can work like a visual landmark.
The category now extends beyond occasional party crafts. A market report covering school identification labels estimated the broader category at $4.2 billion in 2025, with a projection of $6.4 billion by 2034 and a 5.8% compound annual growth rate. The same report placed personal use at 32.5% of 2025 revenue and Asia Pacific at 38.2% of revenue share. Those figures describe market demand, not a promise that every home-printed label will last.
When DIY makes sense
Print at home when the bottle has a short-term or special purpose:
- Birthday parties: Match the label with the invitations, cake, or party colors.
- School events: Create coordinated bottles without waiting for custom production.
- Sports teams: Add a team name and color for a season of use.
- Wedding favors: Turn a plain bottle into part of a table setting or welcome bag.
- Last-minute needs: Print a replacement when a school supply is due tomorrow.
A printable label can also become a small craft. Let your child write their name, select an icon, or decorate the border before you add the protective finish.
Practical rule: Choose DIY for appearance, speed, and flexibility. Choose a commercial durable option, such as Orbit Labels, when the bottle must handle repeated washing, condensation, and daily drops.
Childcare centers, schools, and camps often ask families to label bottles and other belongings. A market analysis of school identification labeling demand discusses that wider category and estimated the school ID labels for toddlers market at $478 million in 2024, with a projection of $892 million by 2033 at a 7.1% CAGR. For everyday reasons families choose this kind of identification, see these reasons parents use personalized labels.
The limitation shows up in the sink. Ordinary paper labels usually lose their neat appearance through a dishwasher cycle, prolonged soaking, or a summer backpack filled with cold bottles. Use them for an occasion-specific project unless you choose synthetic material and a protective finish. If the bottle will be washed often, buying a ready-made durable option may cost less frustration than reprinting and resealing labels each week.
Picking the Right Template and File Format
The right template starts with how the bottle will be used. For a birthday table or one-day school event, a blank rectangle in Canva, Microsoft Word, or Google Docs may be all you need. For bottles that will face condensation, frequent washing, or daily drops, a pre-made durable option such as Orbit Labels removes much of the guesswork and generally holds up better than ordinary home-printed paper.
Before choosing artwork, match the template to the bottle's usable area. Create a rectangle at the intended size, keep the child's name away from the joining edge, and leave enough contrast for a teacher to read it quickly. A cheerful background can look clear on a screen yet become hard to read once it curves around the bottle.
A good template should also leave room for trimming. Avoid placing small text, thin borders, or important icons right against the edge. If you plan to add clear tape or another protective layer, allow for that finish rather than letting it cover the name.
Pick the file that fits the job
- PDF: Usually the safest choice for a finished design. It keeps the layout, fonts, and page size fixed more reliably than an editable document.
- PNG: Useful for transparent backgrounds or artwork layered over a colored bottle. Check its resolution before printing.
- JPG: Suitable for a simple image, although compression can soften small letters and fine outlines.
- SVG: Useful with a craft cutter because it scales without losing sharpness. It is rarely needed for an ordinary print-and-cut label.
File choice matters most when a template includes text. If your computer cannot find the original font, the program may substitute another one, changing the spacing and moving the name toward the edge. Use a widely available font when editing, or choose a similar option from Google Fonts. If the seller provides a finished PDF, print that file rather than rebuilding the design.
Before printing: Open the file on the device connected to your printer, confirm the page size, and export a flattened copy when possible. Flattening keeps fonts and layers from shifting during the final print.
A blank template works well for a name, an icon, and a clean background. A pre-designed set saves time when you need matching artwork, several coordinated designs, or editable name fields. You can browse these printable label templates, then print a trial on plain paper before purchasing specialty stock. Hold that trial around the bottle to check the overall placement.
For a short event, DIY printing offers quick personalization and creative control. For a bottle that must survive repeated handling, a ready-made durable label may be the more practical choice, even if the design options are narrower.
Measuring Your Bottle for a Perfect Fit
A label fits best on the bottle's straight wall, where the surface stays flat. Wrapping it over ridges, shoulders, or a sharp taper can create wrinkles, leave a gap, or make an edge lift. Measure the area where the label will actually sit, not simply the bottle's widest point.
Measure in three steps
- Wrap flexible tape around the widest straight section. Record the circumference. Check below the cap as well, since many bottles narrow near the top.
- Measure the usable height. Find the space between ridges, curves, handles, or molded panels where the label can lie flat.
- Set the label width. If you need the diameter, divide the circumference by pi. For a wrap label, subtract roughly 2 to 4 millimeters from the full circumference so the ends do not bunch together or lift. A small gap is usually easier to apply than a forced overlap.
A common print reference for a 16.9-ounce bottle is about 8 inches by 2 inches, with the label kept on the straight wall, as explained in this water bottle label material and application guide. Treat that size as a starting point. Bottle brands and shapes vary.
| Bottle Type | Circumference | Recommended Label Width |
|---|---|---|
| Standard 16.9 oz disposable bottle | About 8.25 inches | About 8 inches, allowing a small seam gap |
| 16 oz stainless steel skinny tumbler | Measure the straight wall | Match the measured circumference, reduced slightly for fit |
| 12 oz kids' bottle | Measure below the shoulder | Keep the label within the flat panel height |
| 20 oz sports bottle | Measure around the widest straight section | Avoid wrapping over ridges or tapered ends |
The table helps you choose a starting size, but it cannot account for every handle, grip, groove, or molded panel. Stainless steel tumblers and sports bottles often need their own measurement.
Print one test label on ordinary paper. Cut it out and wrap it around the bottle. Check whether the ends meet cleanly, whether the height crosses a curve, and whether the name remains visible. You can also review custom label sizing for guidance on matching the label to the actual item instead of using one universal rectangle.
For a short party or school event, this test can be enough for a neat DIY result. A pre-made durable label, such as an Orbit Labels option, may suit bottles that face repeated washing, condensation, and daily handling better than a home-printed label.
Print and Material Settings That Work
A bottle can leave the printer looking beautiful and still fail after one cold drink. The printer, stock, and protective finish need to suit the way the bottle will be used. Inkjet printers handle gradients, photographs, and party artwork well, but their water-based ink needs protection from moisture. Laser printers are often more practical for waterproof blank stock because toner bonds to the surface and is less likely to smear when condensation appears.
For everyday bottles, synthetic films such as BOPP, PET, and vinyl are safer choices than ordinary paper. White BOPP is a dependable option because it resists water and tearing and stays more stable as temperatures change. A pre-made durable label, such as one from Orbit Labels, removes much of this guesswork. Home printing makes sense for a short party or school project, while ready-made labels are usually the easier choice for bottles washed and handled every day.
Match the file to the printer
Print one test page on plain paper before loading label stock. Check the margins, page orientation, and template size. Hold the test against the bottle so you can catch a shifted design before wasting a sheet.
Use these settings:
- Quality: Choose Best, High, or Photo instead of Draft or Fast.
- Resolution: Use at least 300 DPI for full-color artwork and 600 DPI for small text or logo details, following Avery's waterproof label guidance.
- Scaling: Select the template's exact size or Actual Size. Turn off automatic shrinking.
- Material: Choose synthetic waterproof stock for bottles exposed to condensation. Matte and glossy finishes can both work, provided the package lists compatibility with your printer.
- Drying time: Allow ink or toner to settle before cutting, laminating, or applying the label.
| Factor | Inkjet | Laser |
|---|---|---|
| Color gradients | Strong choice for soft blends and photos | Good, though gradients may look less smooth |
| Moisture resistance | Needs waterproof stock and ink protection | Toner is generally more resistant to smearing |
| Best material match | Inkjet-compatible vinyl or coated waterproof stock | Laser-compatible synthetic stock |
| Main risk | Wet ink can run or transfer | Heat can affect incompatible materials |
| Recommended use | Decorative short-term projects or protected labels | Practical labels exposed to condensation |
Check the package before buying. Some sheets suit inkjet printers only, while others require laser heat. Using the wrong stock can cause curling or jams, and may affect the printer's feed path.
A dishwasher-safe claim describes a complete system, not just a sheet. The material, adhesive, ink protection, and application all need to tolerate the washing conditions you expect. The dishwasher-safe label guidance helps clarify why a home-printed label may not perform like a purpose-made option.
Waterproofing Options and Real-World Durability
A bottle covered in condensation can expose a label's weak spots quickly. “Waterproof” may mean resistance to a few splashes, while ice baths, repeated rinsing, abrasion, submersion, and dishwashers demand more. Paper, waterproof film, adhesive protection, and laminate each contribute differently, so the waterproof label material options are a useful starting point.
Compare the home methods
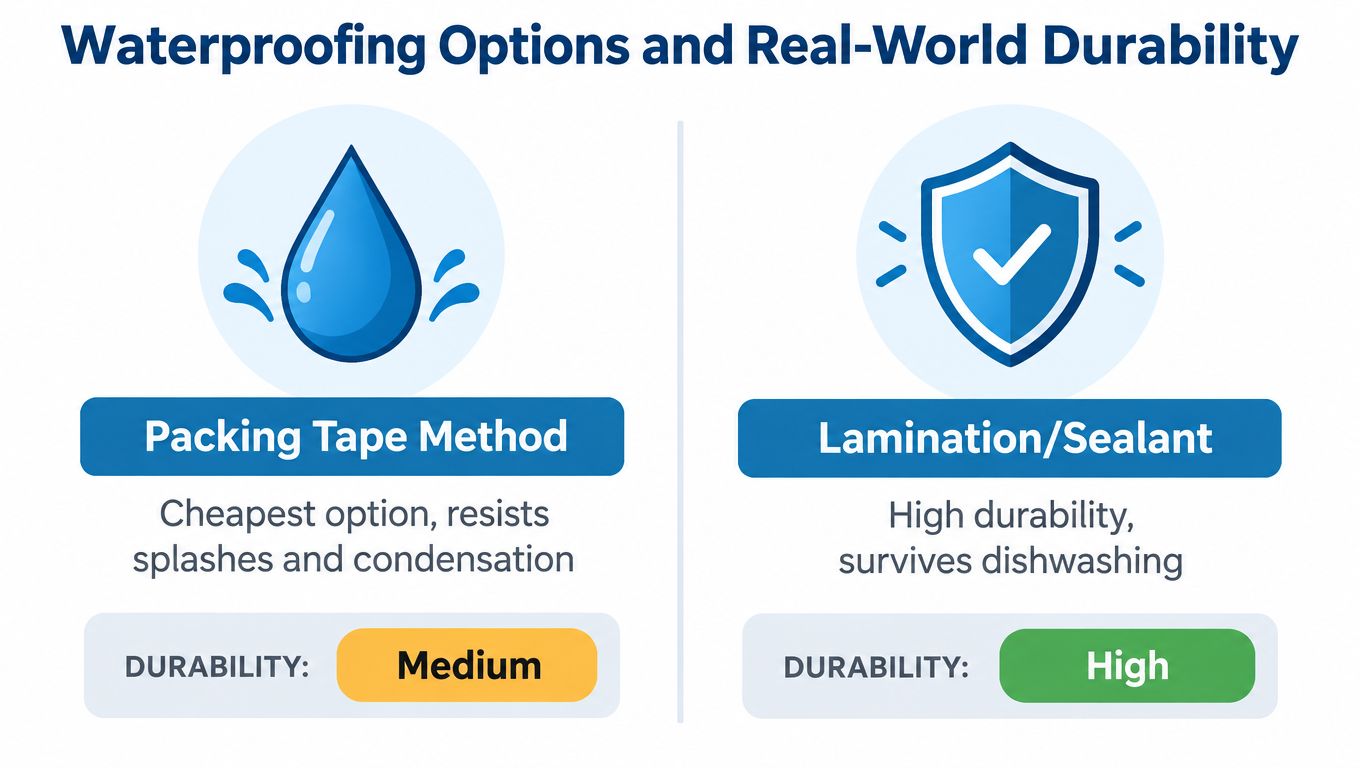
Clear packing tape is an inexpensive emergency fix. Press it over the printed label, covering the face and edges as evenly as possible. It handles splashes and condensation, although it may cloud or yellow, and exposed seams can snag inside a backpack.
Self-adhesive laminate adds a thicker protective layer. It suits cold drinks and refrigerator storage, but a stiff sheet may curl around a narrow bottle. Test one label first, then trim carefully and check that the laminate can flex without lifting.
Spray sealant follows a curved label more naturally. Clear acrylic spray or a suitable craft sealer can work well for a bottle that may be submerged, but spraying requires ventilation and careful drying. Several light coats usually behave better than one heavy coat.
Full-sheet waterproof vinyl can be a practical choice when the stock matches your printer. A laminate or protective coating can help keep the ink from smearing. Home printing still has limits, especially compared with a commercial dishwasher-safe product made as a complete material, adhesive, and protective system.
For a daycare bottle exposed to ice water and a rinse, the practical order is spray sealant, then laminate, then packing tape. Repeated hot dishwasher cycles call for a ready-made option such as Orbit Labels, whose adhesive and protective construction are designed for that environment. For more guidance, compare these waterproof labels for water bottles.
Watch the short clip below to see how a finished label is applied and sealed on a curved bottle.
Test one finished label on the actual bottle before printing a whole batch. Chill it, rinse it, rub the surface, and inspect the edges afterward. That small trial reveals how your printer, sealant, bottle coating, and application pressure work together.
Applying the Label Without Bubbles or Lifting
The bottle's surface determines how well any label starts. Remove an old wrapper if possible, wipe away lotion, dust, oil, and adhesive residue with rubbing alcohol, then wait until the plastic is completely dry. A clean surface gives the adhesive a fair chance to grip.
For a curved bottle, begin on the straightest part of the wall. Hold the label by its edges and gently flex it to match the curve. Set the middle in place first, then smooth toward each end with a credit card, plastic squeegee, or clean gift card. The center acts like an anchor, keeping the design from drifting as you work outward.
Use these checks as you go:
- Align the height. Keep the label below ridges, grooves, and the bottle's shoulder.
- Press the center. Secure a small area before attaching the rest.
- Smooth outward. Push air toward the edges with firm, even strokes.
- Close the seam. Press meeting or overlapping ends together.
- Let it rest. Keep the bottle steady before adding ice water.
Small bubbles can usually be repaired. Prick one gently with a fine pin, then press the trapped air toward the opening. Peeling off the entire label often stretches the material and weakens its adhesive, so lift only the area that needs correction.
If the first placement is crooked, warm the label briefly with a hair dryer on low and reposition it carefully. High heat may soften adhesive unevenly, warp thin plastic, or harm the print. For a bottle used at a party or for a short daycare stretch, careful application can make home printing practical. Bottles facing repeated washing may be better served by a pre-made option such as Orbit Labels.
Troubleshooting Common Label Problems and When to Buy Instead
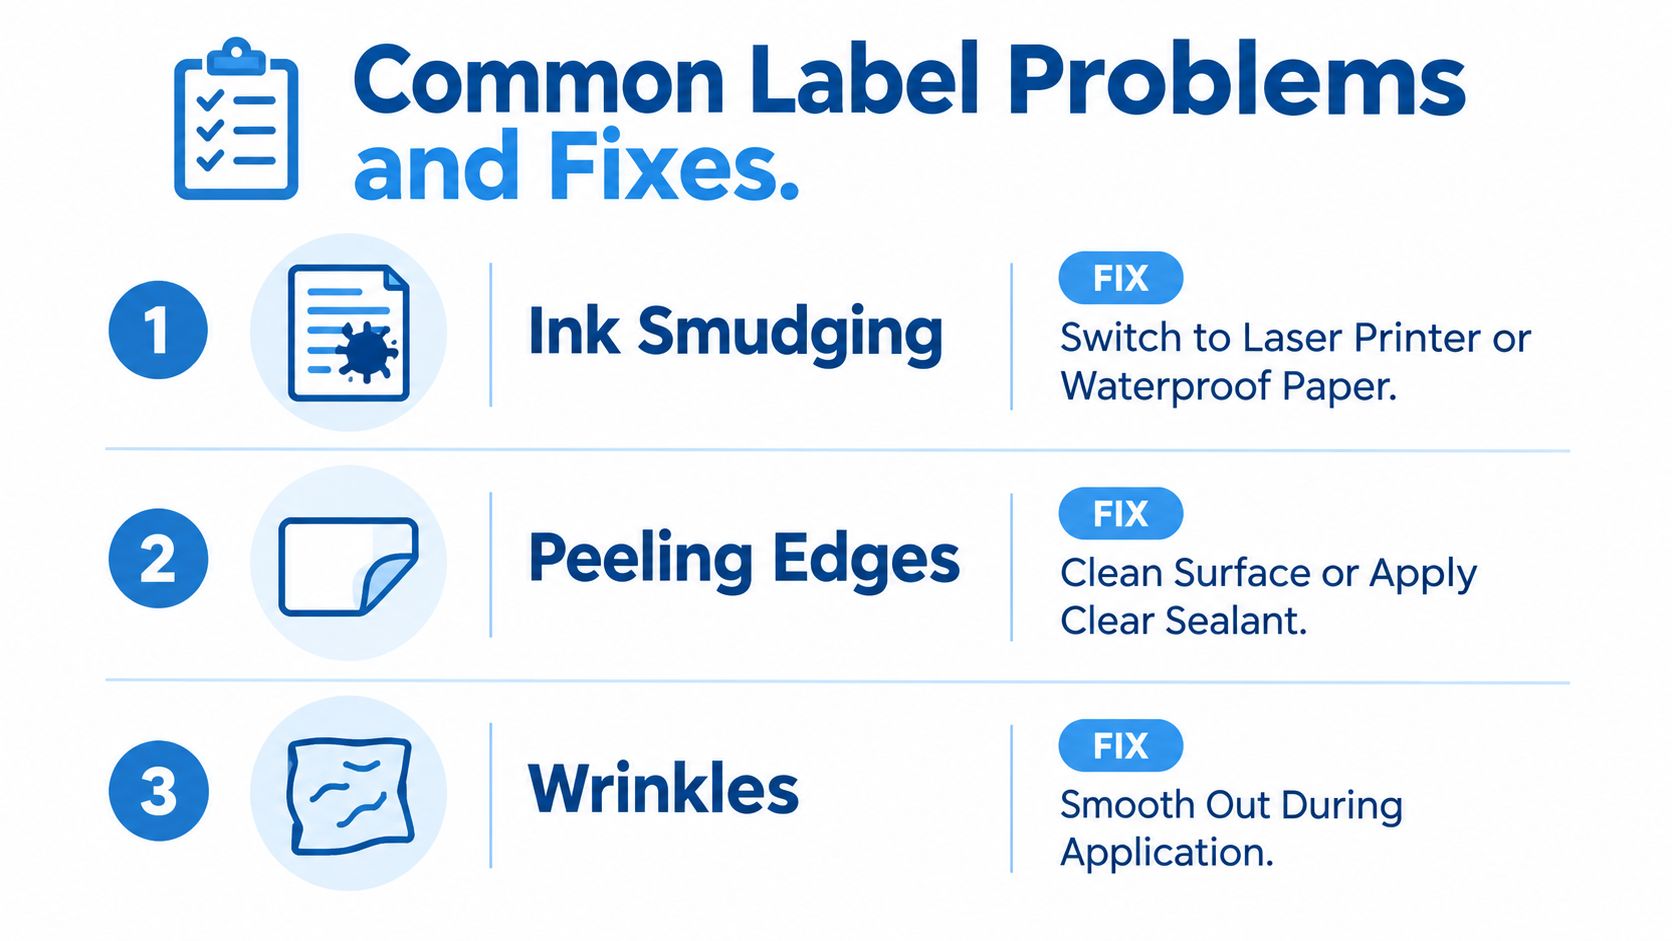
A label can look perfect on the kitchen table and fail after one school-day adventure. Smudged ink usually means the printer and label stock do not match, or the sheet was touched before it dried. Peeling edges may come from oil on the bottle, a tight curve, weak sealing, or a label wider than the bottle's flat wall. Wrinkles often mean the label was applied too quickly or started on an unsuitable curve.
Match the symptom to the fix
- Ink smudging: Use waterproof stock made for your printer, give the print more drying time, or choose a laser workflow if the material allows it.
- Peeling edges: Wipe the bottle with rubbing alcohol, trim the label slightly narrower, and apply a compatible protective coating.
- Wrinkles: Test the size on plain paper, choose the bottle's straightest wall, and smooth from the center toward the edges.
- Fading: Cover dye-based ink with laminate or sealant, and keep the bottle away from unnecessary heat and direct sunlight.
- Cloudy finish: Replace yellowing tape with clearer laminate or synthetic stock suited to the bottle's routine.
A home-printed label works well for a birthday party, classroom activity, school event, or short daycare use. It also helps when you need a small batch quickly or want a very specific theme.
Buy a durable ready-made label when the bottle faces daily commercial-dishwasher cycles, long periods in ice, a hot car, or rough equipment inside a bag. Heat, moisture, rubbing, and repeated handling can wear through even a carefully sealed DIY label.
A pre-made option such as Orbit Labels can also be the better choice when several bottles need the same neat result. You avoid printer alignment, drying, cutting, and sealant problems. For a child's everyday bottle, InchBug offers personalized reusable bottle bands and other identification labels designed for regular washing and handling. Compare that type of ready-made construction with your home-printing plan before choosing. The label should suit the bottle's actual routine, not just its appearance on day one.