

You load the dishwasher, unload the dishwasher, and somehow your child's water bottle still comes home without a name on it. Or worse, it comes home with somebody else's lid, somebody else's straw, and a half-peeled sticker hanging on for dear life. That's usually the moment parents realize that “heat resistant” on a product page doesn't always mean “ready for real family life.”
Daily kid chaos is rough on labels in a very specific way. It's not just heat. It's heat plus steam, soap, scrubbing, snack grease, rushed washing, and the occasional bottle that sits in a hot car all afternoon. A label that survives one warm rinse might still fail during a full week of daycare, camp, and dishwasher cycles.
The good news is that label failure is usually predictable. Once you know what makes heat resistant labels last, it gets much easier to pick the right kind, apply it well, and stop relabeling the same cup every weekend.
What Makes a Label Truly Heat Resistant
The phrase heat resistant labels sounds simple, but it hides a big difference that matters in everyday parenting. Some labels can survive a quick burst of heat. Others can keep their grip and stay readable after repeated exposure to heat, moisture, and cleaning.
Heat alone isn't the whole story
A helpful way to think about labels is to compare them to raincoats. One jacket keeps you dry during a short walk from the car to the store. Another can handle a long, windy soccer game in steady rain. Both might look fine on the hanger. Only one holds up when conditions get messy.
Labels work the same way.
Most consumer guides miss the distinction between a label's peak exposure temperature and its sustained service temperature. A label may survive a quick hot dishwasher burst, but fail during longer real-world exposure like a hot car or a warm daycare locker, as noted in this industry discussion of peak versus sustained heat performance. That's why “dishwasher-safe” can be true in a narrow sense and still disappointing in practice.
If you're comparing products for cups and containers, it helps to review examples of dishwasher-safe labels for family use and look closely at how they describe actual use, not just the headline claim.
Practical rule: If a label description only says “heat resistant” but doesn't explain how it handles repeated washing, moisture, and daily wear, assume you need more detail before buying.
Material and adhesive both matter
Parents usually focus on the printed face of the label. The weak point is often the adhesive. A cute name sticker can look perfect when first applied and still fail because the glue wasn't built for repeated hot, wet conditions.
For industrial labels, material choice becomes extreme. Above 250°C (482°F), polyimide substrates are technically mandatory, while high-grade PET is only an economical option under 150°C (302°F), according to this heat-resistant label material guide. That industrial example is far beyond what a lunchbox needs, but the lesson is useful: the right material must match the environment.
Here's what that means for parents in plain language:
- Short exposure isn't enough: A label that tolerates one brief hot cycle may still peel after repeated use.
- Steam changes the challenge: Moist heat is harder on many adhesives than dry warmth.
- Printed names need protection too: Even when the sticker stays on, poor surface coatings can smudge or fade.
What works in daily family life
For household items, the winning combination is usually a durable synthetic face material, a coating that protects the printed name, and an adhesive meant for repeated washing. Marketing terms like microwave-safe and dishwasher-safe are useful, but only when they describe actual conditions a family will create.
A lunchbox label doesn't need to survive a soldering line. It does need to survive sticky fingers, sink scrubbing, and a bottle rolling around in the back seat. That's the standard worth shopping for.
Choosing the Right Label for Your Child's Gear
You don't need one perfect label for everything. You need the right label for each category of stuff your child uses. A water bottle, a fleece jacket, ballet shoes, and a nap blanket don't all fail in the same way, so they shouldn't be labeled the same way either.
Match the label type to the item
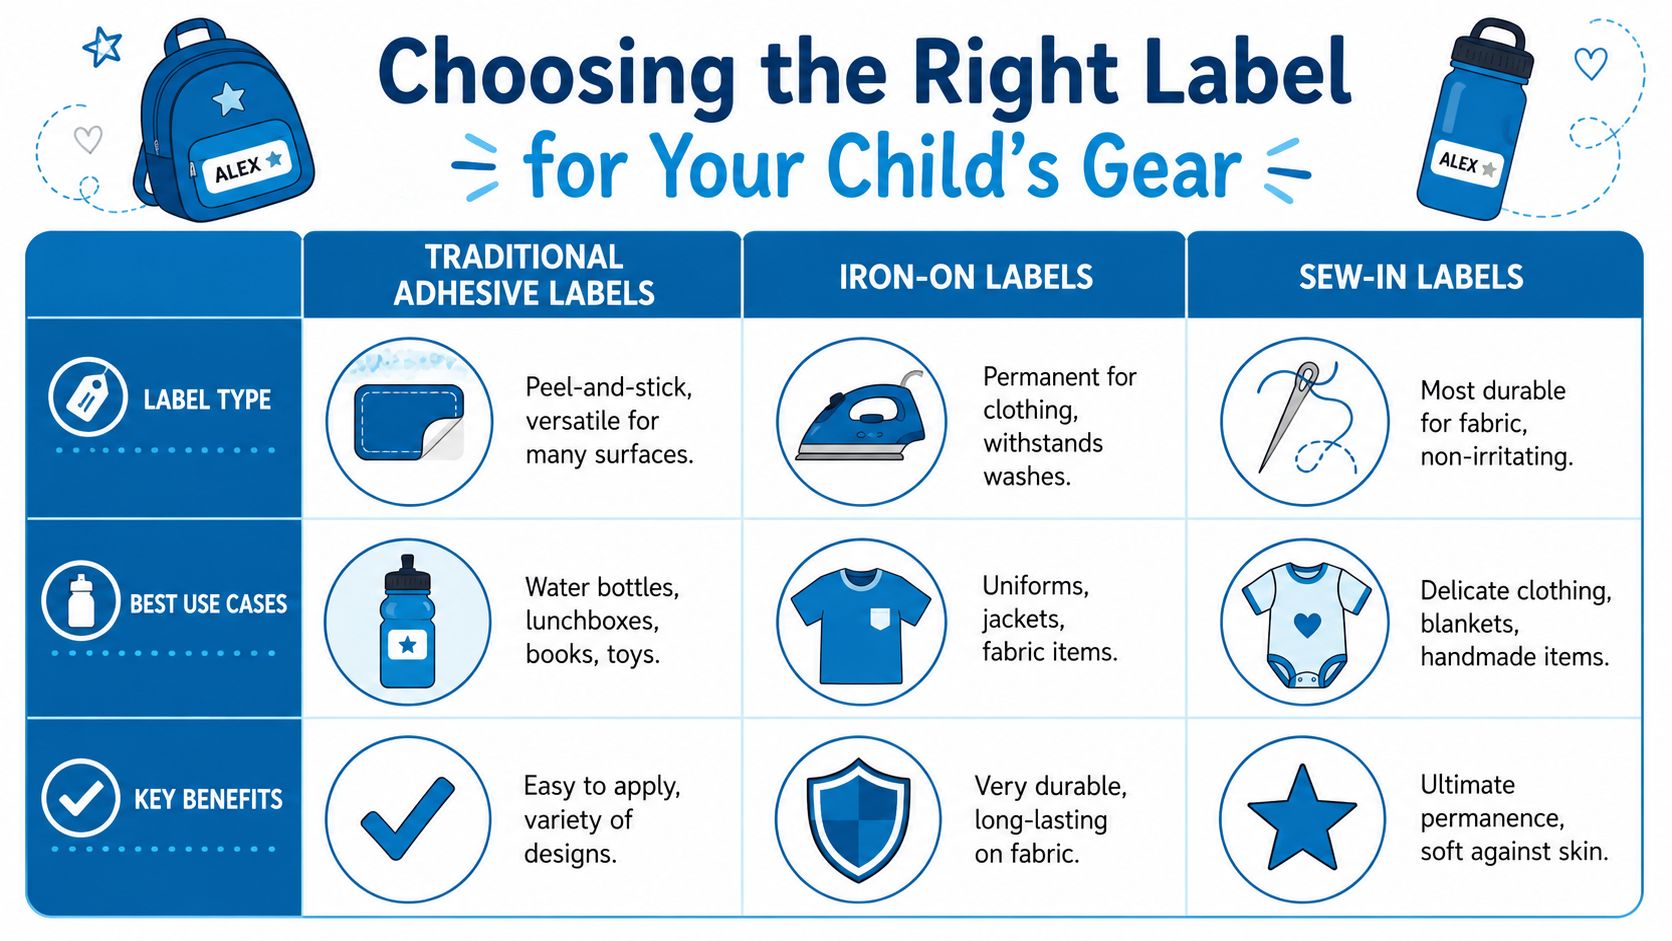
The easiest mistake is using an adhesive label on every surface just because it's fast. Sometimes that's the right move. Sometimes it guarantees frustration.
A simple buying guide looks like this:
| Label type | Best for | Strength | Trade-off |
|---|---|---|---|
| Adhesive labels | Bottles, lunch boxes, food containers, school supplies | Fast to apply, versatile | Surface prep matters a lot |
| Iron-on labels | Uniforms, jackets, fabric bins | Strong hold on fabric | Less flexible to remove or move |
| Sew-in labels | Blankets, handmade items, delicate clothing | Most permanent on fabric | Takes more time |
Good, better, best for common parent problems
For hard goods like bottles and lunch containers, adhesive labels are usually the most practical choice. They're quick, visible, and easy to place exactly where teachers and caregivers will see them. If you're labeling baby feeding gear, this guide to the best labels for baby bottles is the kind of comparison worth reviewing before you stock up.
For clothing, iron-on labels are the better fit when items go through frequent laundry and need a cleaner look than sticker-style labels. They're useful for school polos, sweatshirts, and pants that rotate through the wash constantly.
Sew-in labels are the slowest option, but they solve a very specific problem. If a child has a favorite blanket, handmade sweater, or anything likely to be washed for years, sew-in labels are hard to beat.
Some parents want labels they can move from item to item. Others want labels they never have to think about again. Those are different goals, and they usually lead to different products.
Features worth caring about
When you compare options, skip the decorative extras first and check the construction details.
- Water exposure: Bottles and food containers need labels that can handle repeated washing without lifting at the corners.
- Fade resistance: Names need to stay readable after outdoor use, lunch bag friction, and repeated cleaning.
- Material safety: For baby and toddler gear, BPA-safe materials matter when labels may sit on frequently handled items.
- Surface compatibility: Smooth plastic, stainless steel, silicone, fabric, and textured lunch gear all behave differently.
- Reusability: Some label systems can be transferred or reused, which is especially helpful for fast-changing bottle and cup routines.
A cute design gets a label noticed. A good adhesive and the right format keep it there.
Smart Labeling for Home Daycare and School
The biggest labeling wins usually happen at the most chaotic moments. Morning drop-off. End-of-day pickup. Summer camp check-in. The after-practice scramble when every black sweatshirt looks identical.
That's where a smart system beats random stickers every time.
Label the things that actually get mixed up
Most parents remember the water bottle and lunch box. The items that disappear more often are the less obvious ones: snack containers, jacket layers, sun hats, sheet bags, nap blankets, extra socks, and the charger for a school device.
For daycare, a consistent system saves everyone time. If you need ideas suited for that setting, these tips on labels for daycare line up with what caregivers usually need most: readable names, quick identification, and placement that doesn't rub off right away.
Here are a few high-value targets:
- Cup parts: Label the bottle, the lid, and any removable cup components. Those pieces get separated constantly.
- Outerwear: Put the name where staff can find it fast, such as the inside collar area or care tag zone for fabric labels.
- Shoes: Add identifiers where they won't rub directly against the foot.
- School supplies: Pencil boxes, headphone cases, folders, and scissors all migrate.
Placement can make or break durability
A label on the wrong spot can fail even if the label itself is good. The best placement is usually flat, smooth, and low-friction.
For example:
- On a lunch box, place the label on a hard outer panel, not the fabric seam.
- On a water bottle, avoid strongly curved or heavily textured areas.
- On a jacket, don't place a scratchy label where it will bother the child's neck.
- On sports gear, choose a visible area that won't be gripped constantly.
A readable label in a boring spot beats a cute label in a high-wear spot every single time.
Make the system easy for other adults
Daycare providers and teachers don't have time to decode matching sets. They need names they can spot in seconds.
A simple routine works well:
- Use one child name format consistently.
- Put labels in the same relative place on similar items.
- Label both the main item and the detachable parts.
- Recheck labels at the start of each season.
Parents often think labeling is about preventing loss. It also reduces little daily frictions for caregivers. When the bottle, sweater, and lunch container are all clearly marked, fewer things end up in the mystery bin and fewer texts get sent home asking whose item is whose.
Application Secrets for Labels That Last
A lot of label complaints come down to application, not product quality. Adhesive labels are simple, but they're not forgiving. If the surface is damp, oily, dusty, or textured, the bond starts weak and usually gets worse after the first wash.
The short version
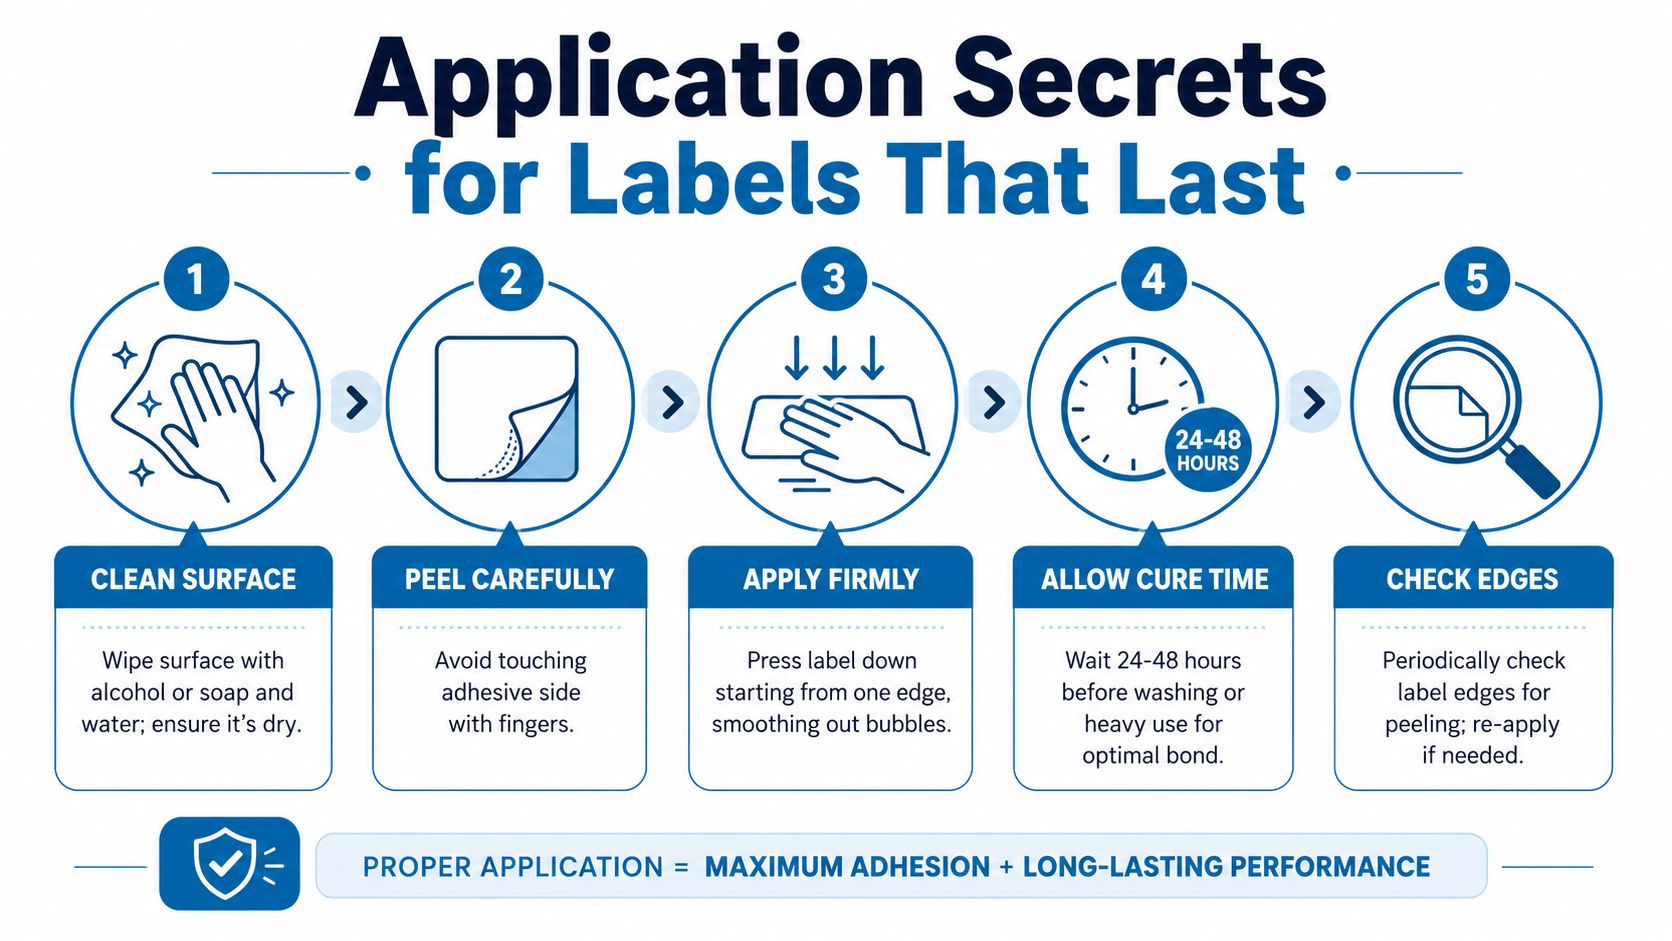
If you want labels to stay put, the process matters almost as much as the label itself. This walkthrough of label application methods is useful because it mirrors what works on busy-family gear.
A reliable application routine
Follow this in order:
- Clean the surface well. Use soap and water or rubbing alcohol, depending on the item. Then let it dry fully. Any residue from juice, dishwasher film, or hand oils can weaken the bond.
- Choose a flat area. Skip seams, heavy texture, soft rubber, and spots that flex constantly. A smooth patch gives the adhesive a fair chance.
- Peel without touching the sticky side too much. Finger oils don't help.
- Press from one edge across the label. That pushes out trapped air and improves full contact.
- Give it cure time. Don't wash it right away if you can avoid it. Adhesives generally perform better after they've had time to settle and bond.
The common mistakes
Most failures start with one of these:
- Applying to damp gear: Even a little moisture can interfere with adhesion.
- Rushing onto textured surfaces: Labels don't like ridges, pebbled plastic, or fabric-like exteriors.
- Washing too soon: Freshly applied labels need time before they face soap and hot water.
- Ignoring edge lift: If a corner starts peeling, water will keep working underneath it.
Press hard enough that you feel confident, not polite. A quick tap isn't application.
When parents say a label “didn't work,” I usually want to know where it was placed and how long it sat before the first wash. Those two details explain a lot.
Troubleshooting Common Label Headaches
It's not just you. Labels peel, names fade, and corners curl for real reasons. Once you know the failure pattern, the fix is usually straightforward.
Why peeling happens
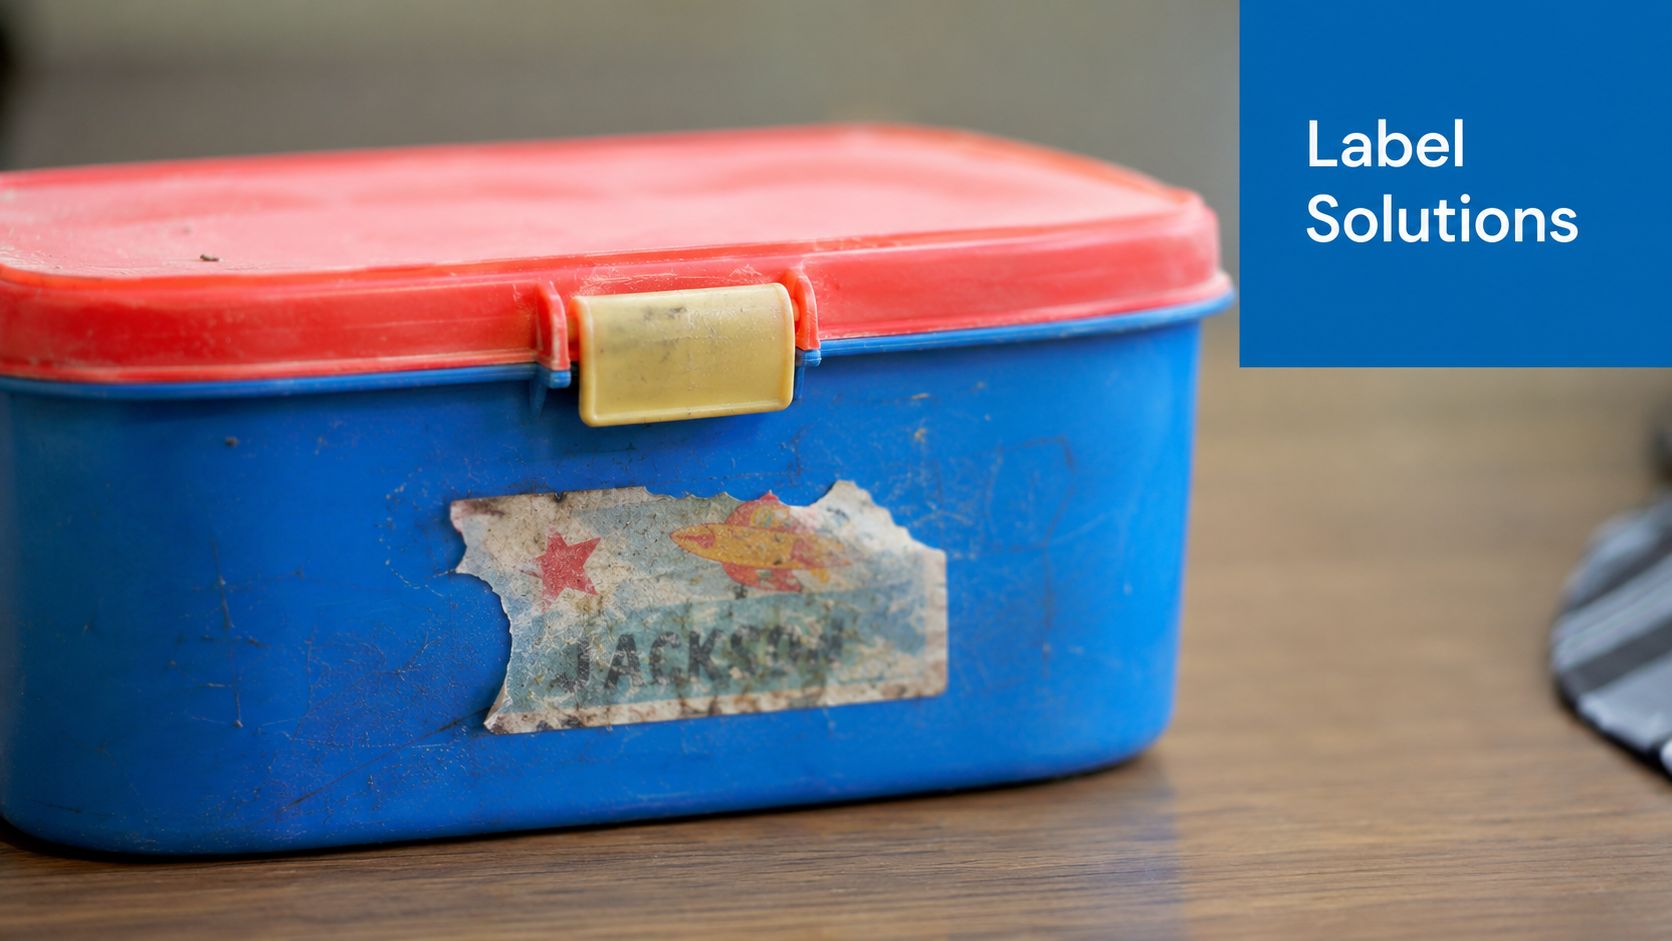
The most common complaint is peeling after dishwasher use. Parents often assume the problem is “too much heat,” but the tougher challenge is often humid heat, not dry warmth.
There's a major performance gap between dry heat and humid heat. Adhesive strength under sustained humid heat can be half that under dry heat at the same temperature, and up to 40% of home-use labels peel unexpectedly in these conditions, according to this analysis of waterproof, heat-resistant, and chemical-resistant labels.
That tracks with what parents see every day. A label may seem fine on a shelf or after hand washing, then fail in a steamy dishwasher.
What to do: choose labels intended for repeated wet washing, apply them to smooth hard surfaces, and avoid placing them where water can sit under an edge.
Why fading and smudging happen
Sometimes the label stays on, but the name becomes hard to read. That usually comes from one of three issues:
- Weak print protection: The printed surface isn't sealed well enough.
- Harsh cleaning: Scrubbing pads and aggressive detergents wear the surface down.
- High-rub placement: Labels on friction-heavy spots lose readability faster.
If the name matters more than the design, prioritize a label with a protected print layer over one with flashy decoration.
For parents who want to understand how brands test these stress points, this overview of label durability testing is worth reading.
Quick diagnosis table
| Problem | Likely cause | Best fix |
|---|---|---|
| Corners lifting | Poor prep or textured surface | Reapply on a smoother, fully cleaned area |
| Full label peeling | Humid heat and weak adhesive bond | Use a more durable label type and allow cure time |
| Name fading | Surface abrasion or poor print protection | Choose a laminated or better-protected label |
| Smudging | Moisture plus inadequate coating | Use labels designed for repeated washing |
Most label problems aren't random. They're a mismatch between product, surface, and real-life use.
Your Heat Resistant Label Questions Answered
Can I remove labels later without ruining the item
Usually, yes, but it depends on the surface and how long the label has been in place. Hard, smooth items like bottles, lunch containers, and plastic supply boxes are the easiest. Fabric and delicate finishes are trickier.
If you want the option to remove labels later, test one item first. Start with a less-visible spot and avoid using highly permanent solutions on anything you may donate, resell, or pass down.
What's the difference between labels for hard goods and clothing labels
Hard-goods labels are built for surfaces like plastic, stainless steel, and coated containers. Clothing labels need to handle bending, laundering, and skin comfort. That's why the best label for a lunch box often isn't the best label for a sweatshirt.
For clothes, comfort matters along with durability. For bottles and lunch gear, adhesion and print protection matter more.
How long should I realistically expect a label to last
The honest answer is that it depends on the item, placement, washing method, and how carefully you apply it. A label on a smooth water bottle body usually has an easier life than one placed on a textured lunch bag panel or a heavily handled snack lid.
A better question is this: does the label type match the job? When the answer is yes, labels can last through the regular routines they were designed for. When the answer is no, even a nice-looking label may fail quickly.
Buy for the item's worst day, not its best day. Dishwasher steam, backpack friction, and rushed cleanup are the real test.
Are reusable bottle bands a better option than adhesive labels
Sometimes, yes. Reusable bands are especially useful when bottle sizes change often, cups get handed down between siblings, or you want to avoid adhesive on a specific surface. They also help when a bottle gets washed constantly and every removable part needs a clear name system.
Adhesive labels still make more sense for flat hard surfaces, school supplies, and gear that doesn't need frequent relabeling. The better option is the one that fits the object and your routine, not the one that sounds most durable in theory.
Should I label every single piece
Not every single piece, but more pieces than you think. If an item comes apart, label the parts that separate. If an item is expensive, beloved, or easily confused with someone else's, label it. If staff members need to identify it fast, make the label easy to spot.
That usually covers the gear families replace most often.
If you're ready to stop replacing mystery cups, lost jackets, and half-peeled name stickers, InchBug offers practical options for bottles, clothing, lunch gear, shoes, and daycare essentials. Their personalized labels and reusable bottle bands are designed for the kind of daily wear parents deal with, which makes staying organized a lot less stressful.