

The daycare pickup line is moving, your toddler's backpack is missing a lunch container, and three blue water bottles look exactly alike. A quick check reveals that your child's name is nowhere on the bottle, coat, or snack box. That small omission can turn an ordinary morning into a search mission.
Custom name tags online turn labeling into a simple household system. Instead of writing names by hand, replacing soggy paper labels, or hoping a generic sticker stays attached, you can match each item with a readable design, suitable material, and adhesive made for its surface. The key is to choose for durability first, then add the colors, icons, and themes your child will enjoy.
Why Ordering Custom Name Tags Online Saves Time and Stress
A labeled backpack is easy to recognize at home. In a busy daycare room, it's one of many bags hanging beside coats, blankets, lunch containers, and spare clothes. A child may grab the wrong bottle, a teacher may find an unclaimed jacket, or a lunchbox may come home with another family. A clear name tag gives adults an immediate answer without turning every pickup into an investigation.
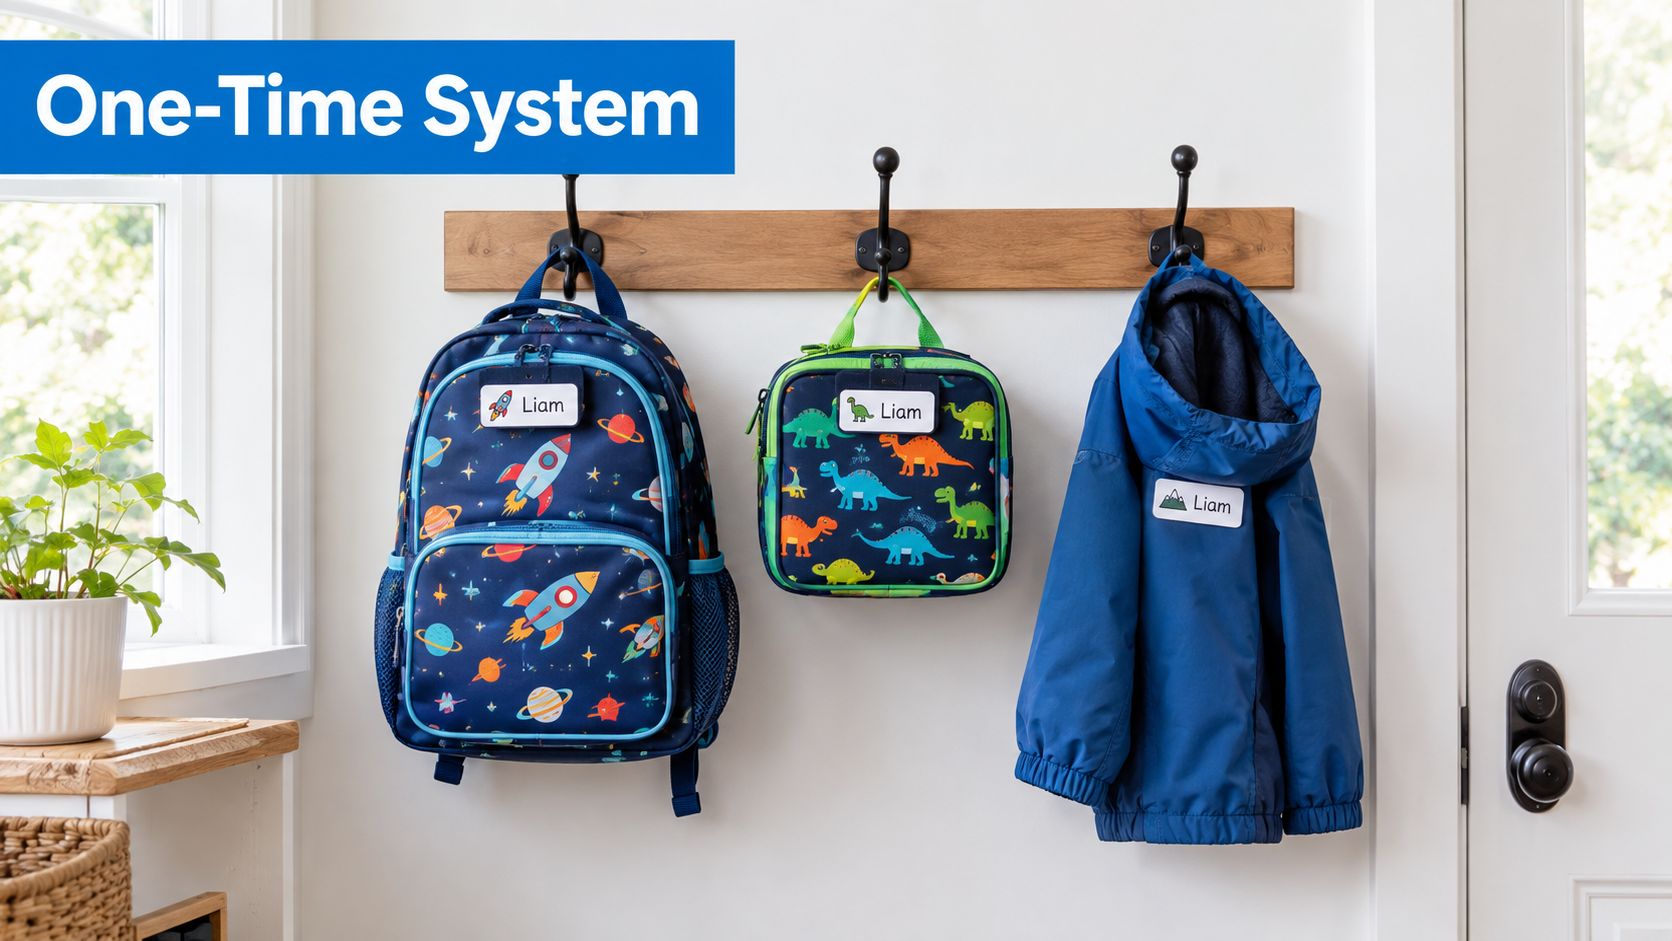
Ordering online helps because you can label several categories at once. A large sticker can suit a lunchbox, a narrow label can fit a bottle, and a tiny identifier can work inside a shoe. You can also create one coordinated design, so your child recognizes the same colors or character across different belongings.
A one-time setup instead of repeated chores
Store-bought blank labels often require handwriting, and handwritten ink can become difficult to read after handling or washing. Online personalization lets you review the spelling, font, colors, and layout before ordering. That preview matters when a small label has limited space or when a child's name includes several letters.
A custom order also supports items that generic tags can't handle well. Curved bottles, fabric clothing, shoes, sports equipment, and hard plastic containers each need a different attachment approach. A useful guide to the difference between personalized labels and ordinary stickers is this overview of customized name tag stickers.
Practical rule: Choose the label by asking where the item lives, how it gets cleaned, and how quickly another person needs to identify it.
The benefit isn't only fewer mix-ups. A complete labeling routine reduces the number of morning decisions you have to make. Once names are attached to the everyday gear, you can focus on packing the right snacks, spare clothes, and comfort items rather than searching for a missing bottle.
How Custom Name Tags Online Work From Design to Delivery
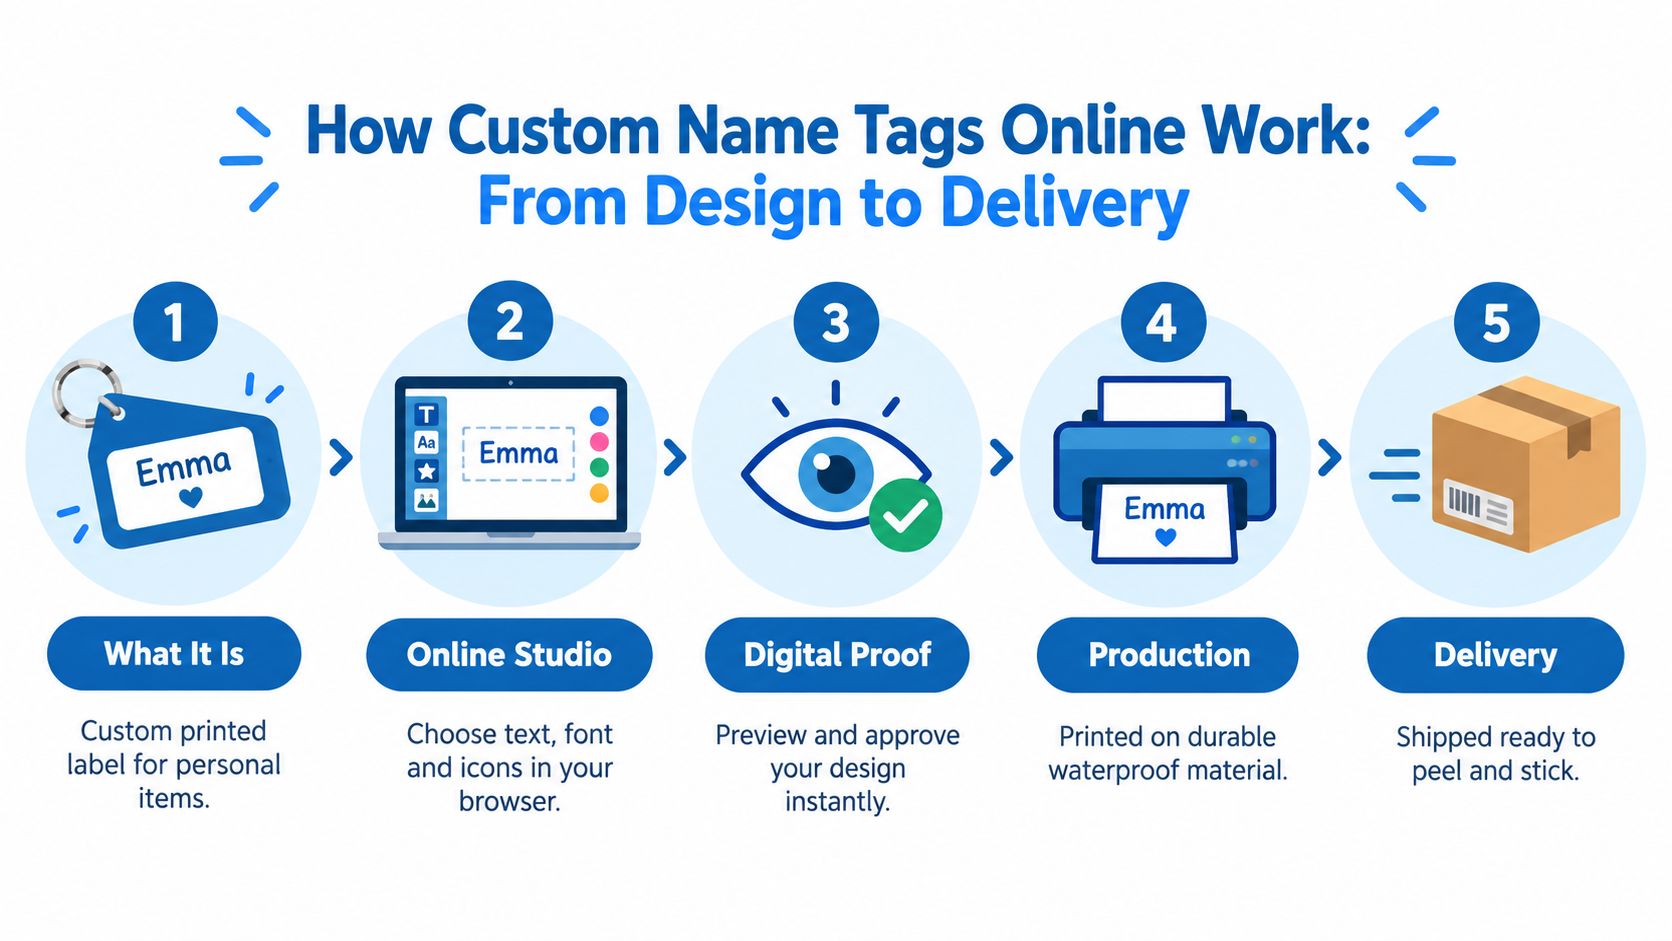
A custom name tag is a printed identifier made for a personal item. Think of an online label shop as a print-on-demand studio. You choose the information and appearance in a browser, the shop prints the design on the selected material, and the finished tags arrive ready for their intended surface.
The process depends on digital printing, which makes short-run personalization practical. The same production base supports consumer labels for daycare, school, and household organization, including digital printing, pressure-sensitive adhesives, and short-run customization. The wider custom-printing labels segment was valued at about US$2,350.4 million in 2024 and is projected to reach US$4,827.0 million by 2030, with a projected 12.8% CAGR from 2025 to 2030, according to Grand View Research's custom-printing labels market data.
The five decisions behind a finished tag
- Choose the tag type. Start with the item, not the artwork. A hard lunch container may need a waterproof stick-on label, while a shirt needs a fabric-oriented option.
- Enter the name and select the design. Online editors commonly let you choose text, fonts, colors, and icons. These choices affect recognition as well as appearance.
- Check the digital proof. Read the name slowly, inspect line breaks, and look at the preview at its displayed size. A design that looks spacious on a large screen may feel crowded on a small tag.
- Production begins. The shop prints the approved design on the chosen base and applies the relevant adhesive or attachment system. Pressure-sensitive labels are designed to bond when pressed onto a suitable clean surface.
- Delivery and application. The tags arrive ready to apply, peel, wrap, or attach. The final result depends on following the product's application instructions, especially for fabric labels.
Digital customization differs from printing a sheet at home. You don't need to align a home printer, find compatible stock, or cut every label by hand. If you're comparing online design workflows with printable sheets, these label templates for printing show why layout and material selection matter before ink ever reaches the surface.
Personalization Options That Make Tags Readable and Fun
A name tag has two jobs. It should look appealing enough for a child to recognize, and it should let a teacher, caregiver, or coach read the name quickly. The best design balances both.
Compare design choices side by side
Font: A simple sans-serif or clean rounded typeface is usually easier to scan than a highly decorative script. If the name is long, choose a font with open letter shapes and avoid squeezing the text to preserve a style that no longer reads clearly.
Color: High contrast works better than a pale name on a pale background. Dark text on a light field is a dependable choice, while a strong colored border can help a child spot the tag without competing with the name.
Icon: One familiar icon can help a young child identify belongings before reading independently. A rocket, dinosaur, animal, or flower can act like a visual shortcut, but too many illustrations can crowd the name.
Layout: Put the name in the most prominent position. Add a second line only when it serves a clear purpose, such as a classroom identifier or an allergy alert supplied according to the relevant care instructions.
A short first name may fit comfortably on a small bottle label. A longer name, hyphenated surname, or two-name layout may need a wider rectangle or a larger text area. Before you choose a themed pack, consider the smallest item you need to label. The design must remain readable there, not only on a roomy lunchbox.
The video below offers another visual reference for thinking about name-label layouts and personalization.
Let the child help without giving up clarity
Children often remember a label better when they help choose its color or icon. Give them a limited choice between designs that already meet your practical requirements. For example, you might offer a bold animal pattern and a bright geometric pattern, then let them select the favorite.
For adults in a classroom, consistency helps. Using the same name placement and a similar contrast level across bottles, bags, and containers makes belongings quicker to sort. Keep personal information limited to what caregivers need, and review every name before you approve the order.
Choosing the Right Material Size and Style for Every Item
The surface controls the label choice. A curved plastic bottle, a cotton shirt, a smooth lunchbox, and the inside of a shoe don't create the same conditions for adhesion or wear. Treat each item like a different doorway. The tag needs the right key.
Match the material to the surface
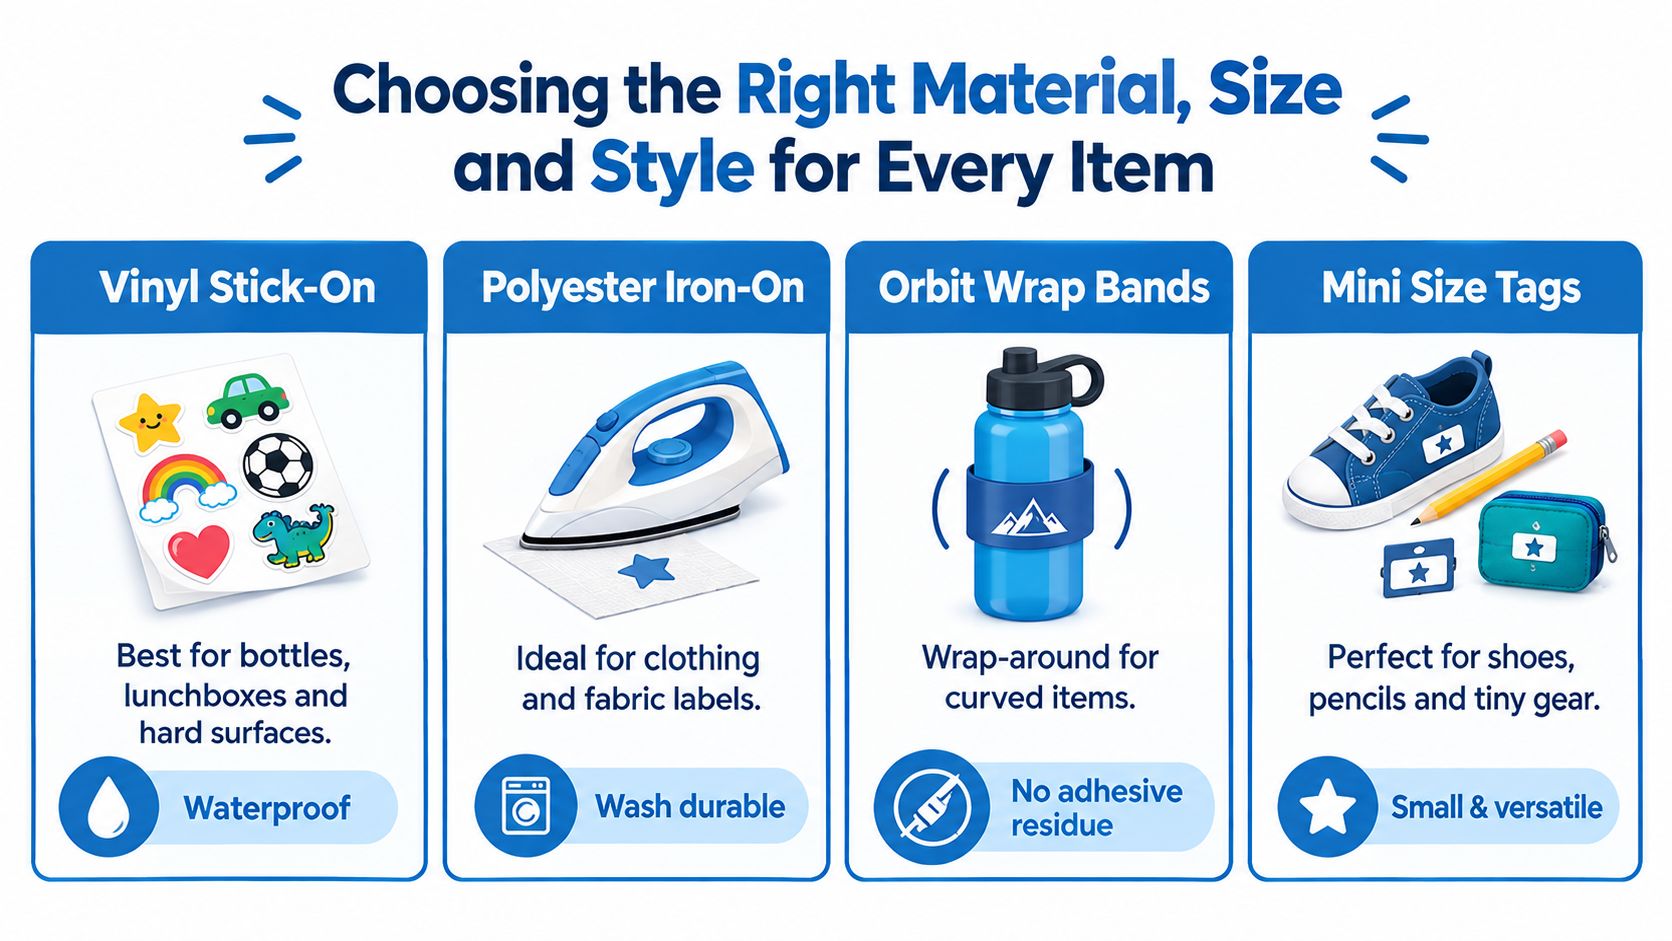
Vinyl stick-on labels suit smooth, hard goods such as bottles, lunchboxes, storage containers, and some bags. A glossy vinyl face with a suitable permanent adhesive is especially relevant when the item faces water or repeated handling.
Woven polyester labels are designed for clothing and fabric. The woven structure resists fraying, which makes it a practical baseline for garments that move, stretch, and go through regular laundering.
Orbit-style wrap bands fit around curved items such as bottles. Because the band wraps rather than covering a flat panel, it can be easier to position on a rounded surface and remove without leaving the same type of adhesive residue associated with a sticker.
Small identifiers work inside shoes, on pencils, or on compact gear. A large label may peel at the edges when forced onto a tiny or uneven area, while a mini tag can sit within the available space.
| Item Type | Best Tag Style | Why It Works |
|---|---|---|
| Water bottle | Vinyl stick-on or wrap band | Matches smooth plastic and curved surfaces |
| Lunchbox | Waterproof vinyl label | Provides a visible name area on a hard surface |
| Shirt or jacket | Woven polyester or fabric label | Built for fabric contact and laundering |
| Shoes | Mini identifier or ShoePal-style tag | Fits a small interior area |
| Backpack | Medium or large stick-on label, or bag tag | Offers visibility on fabric or an attached loop |
| Pencil or small gear | Mini size tag | Avoids excessive material on a compact item |
Measure the usable area, not the entire object. On a bottle, measure the straight section where the label will sit. On clothing, check the care label or a smooth fabric area. For shoes, inspect the interior surface and confirm that the tag won't sit beneath a child's heel or rub against the foot.
Families preparing several item types may find a bundle more efficient than choosing every label separately. The important point is still the match. A bundle saves effort only when it includes the formats your actual gear requires. For a broader classroom connection between materials, making, and practical product design, Design and Technology offers useful educational context.
Before ordering, compare the available dimensions with the surface you measured. This guide to name tag label size can help you avoid placing a wide label on a narrow bottle or choosing a tiny tag for a large bag.
Durability That Survives Dishwashers Washing Machines and Daily Wear
Durability isn't a single feature printed on a product page. It comes from the relationship between material, adhesive, surface preparation, heat, water, detergent, and handling. A label that performs well on a dry backpack may face a much harder test on a lunch container that enters a dishwasher repeatedly.
Dishwasher exposure is a specific test
For dishwasher-exposed items, high-tack glossy vinyl and permanent adhesives are the primary choices to investigate. Low-temperature eco cycles are gentler than hot, heavy-duty cycles, while harsh alkaline or bleach-containing detergents can speed up adhesive and ink degradation. Repeated exposure will shorten label life compared with use on a dry surface, even when the label is designed for washing.
The safest approach is to validate the label against the exact routine your household uses. If the bottle goes through a hot cycle with strong detergent, test the label there. If the container usually uses a gentler program, test that program instead. A product described as dishwasher-safe should still be applied to a clean, dry surface and checked at the edges after early washes.
Dishwasher rule: The label and the cleaning routine must be treated as a pair. “Waterproof” describes resistance to water, not unlimited protection from heat and detergent.
For more practical guidance on choosing labels for containers, consult this resource on dishwasher-safe name labels.
Fabric labels need bonding time
Clothing creates a different problem. Fabric bends and stretches, and washing puts stress on the tag's edges. Woven polyester is a strong technical baseline because its fiber structure resists fraying and it tolerates hot laundering better than softer constructions such as satin.
Independent product guidance places good-quality polyester labels in the 50+ wash range, while some home-laundry claims extend to 80 to 100+ washes when the label is applied correctly and fully cured, as described in guidance on iron-on clothing labels. Those figures are product and application dependent, so they shouldn't replace the care instructions supplied with the label.
The first wash deserves special attention. The adhesive continues bonding to fabric fibers during the first 24 hours, and washing before that cure window can increase edge lifting and early failure. Apply the label to the recommended fabric area, press it securely, and wait through the full stated cure period before laundering.
How to Measure Order and Get Fast Shipping Without Mistakes
A smooth order starts away from the website. Gather the items you need to label, group them by surface, and measure the usable areas before choosing a design. This prevents the common mistake of ordering one attractive size for every object.
Build a quick measurement list
For flat items, measure the height and width of the clean area where the tag will sit. For curved items, find the straightest section and check whether the surface narrows, flares, or includes ridges. A wrap band may suit a bottle better than a flat label if the available area curves continuously.
Keep a simple list such as:
- Hard containers: Record the flat panel or straight section.
- Bottles: Note the diameter and any grip texture, seams, or grooves.
- Clothing: Identify a smooth fabric area that won't fold heavily.
- Shoes: Check the interior location and available space.
- Bags: Decide whether a stick-on label or hanging bag tag is more practical.
Next, prepare the personalization details in one place. Copy names carefully, decide whether each item needs a first name or a fuller identifier, and check capitalization. If a provider offers a digital preview, inspect every line break and icon placement before adding the order to your cart.
Review the order like a packing list
Use the checkout stage to verify:
- Spelling and order details. Read every name letter by letter.
- Tag size. Confirm it matches the smallest relevant surface.
- Quantity. Include current items plus a few planned replacements or new belongings.
- Material. Check that hard-surface and fabric labels haven't been mixed up.
- Shipping option. Compare the stated processing time with the delivery window you need.
- Application instructions. Save them so the tags are applied correctly when they arrive.
Fast shipping can't rescue a wrong size or misspelled name. If the order is for a new daycare term, leave enough time to review the proof and apply the labels before the first morning. Store unused tags flat, dry, and away from heat, and keep a small spare set with your household supplies. When a new cup or jacket appears, you'll be able to label it immediately instead of starting the whole process again.
How to Evaluate Vendors and Order With Confidence
A reliable vendor should make the practical information easy to find. Look for clear descriptions of the material, adhesive, intended surfaces, and cleaning conditions. “Waterproof” and “fade-resistant” are useful starting points, but they don't answer every question about dishwasher heat, detergent, fabric care, or microwave use.
Check the information before the artwork
A strong product page should help you answer:
- Surface fit: Is the tag designed for plastic, metal, fabric, shoes, or curved items?
- Cleaning guidance: Does the vendor explain dishwasher or washing-machine use?
- Safety details: Are material claims, such as BPA-safe construction, stated clearly where relevant?
- Personalization preview: Can you inspect names, fonts, icons, and line breaks before approval?
- Customer evidence: Are reviews verified and specific about readability, application, and wear?
- Ordering value: Are bundles available for the mix of bottles, clothing, bags, and shoes you own?
- Support: Can you contact the shop if the preview or application instructions are unclear?
Testing language matters more than broad promises. A vendor that explains how products are evaluated gives you more useful information than one that only lists attractive colors. You can also review a provider's description of product durability testing to understand which wear conditions it considers.
InchBug offers personalized stick-on labels, Orbit bottle bands, TagPal clothing labels, ShoePal identifiers, bag tags, allergy alert tags, and themed packs for children's belongings. These products can be considered alongside other vendors by comparing the same factors: the item's surface, the cleaning routine, the application method, and the clarity of the personalization preview.
The simplest decision checklist is: measure first, choose the surface-appropriate material, prioritize readable text, inspect the proof, and verify care instructions. Cute artwork is welcome, but it should come after the tag has a fair chance of staying attached and legible.
Start with the bottles, lunch containers, clothing, shoes, and bags that cause the most mix-ups, then choose a matching InchBug label format for each surface. Visit InchBug to personalize a practical set of name tags and make your next daycare or school morning easier to manage.