

The daycare morning starts before anyone has found the missing shoe. A lunchbox slips from a cubby, a sippy cup gets yanked from a stroller, and a sunhat stays behind on the playground fence. By pickup time, everything has faced drops, rubbing, moisture, snack residue, sunlight, and the mysterious force of a toddler who has somewhere else to be.
That daily chaos is where product durability testing earns its keep. The quiet engineering behind a water bottle, name label, lunch container, or school bag helps determine whether it survives today's mess, tomorrow's wash, and the next child's turn. Parents and providers don't need a materials-science degree to evaluate those claims. They need a practical way to connect a test to real use.
The Water Bottle That Started This Whole Rabbit Hole
A preschooler's bottle can have a surprisingly busy day. It may be squeezed into a crowded backpack, knocked onto a hard floor, dragged across a table, left in direct sun, and handed to an adult who wipes it down with sanitizer. Then it goes into the dishwasher, where heat, water, detergent, and repeated movement ask a different set of questions.
The bottle itself isn't the only concern. The name label has to remain readable. Its adhesive has to stay attached around curves. The printed design shouldn't fade until the child and caregiver can't tell whose bottle it is. A product can remain technically functional while its identifying mark has already failed.
That's why “dishwasher-safe” needs a little translation. Does the claim apply to the bottle, the lid, the straw, the label, or every component? Does it describe one successful wash, repeated cleaning, or a broader durability program? A useful starting point for bottle identification is this guide to water bottle labels and waterproof use, but the larger lesson applies to almost every item in a child's routine.
Durability is a chain, not a single feature
A product usually fails at its weakest connection. A label may have durable ink but weak adhesive. A lunchbox may resist impact but warp under heat. A fabric tag may stay attached but become unreadable after detergent and friction.
Professional testing isolates failure points, then combines them to represent the way the product is used. At home, you can do something similar by asking what the item encounters repeatedly, not just what happens during a single dramatic accident.
Practical rule: Match the claim to the mess. If the item faces washing, sunlight, rubbing, and chemicals, one test result can't answer the whole question.
The useful question isn't “Will this last forever?” No honest test can promise that. Ask instead, “What stress has this product been tested against, and does that stress resemble our routine?” That shift turns durability from a vague marketing word into a buying skill.
What Product Durability Testing Actually Is
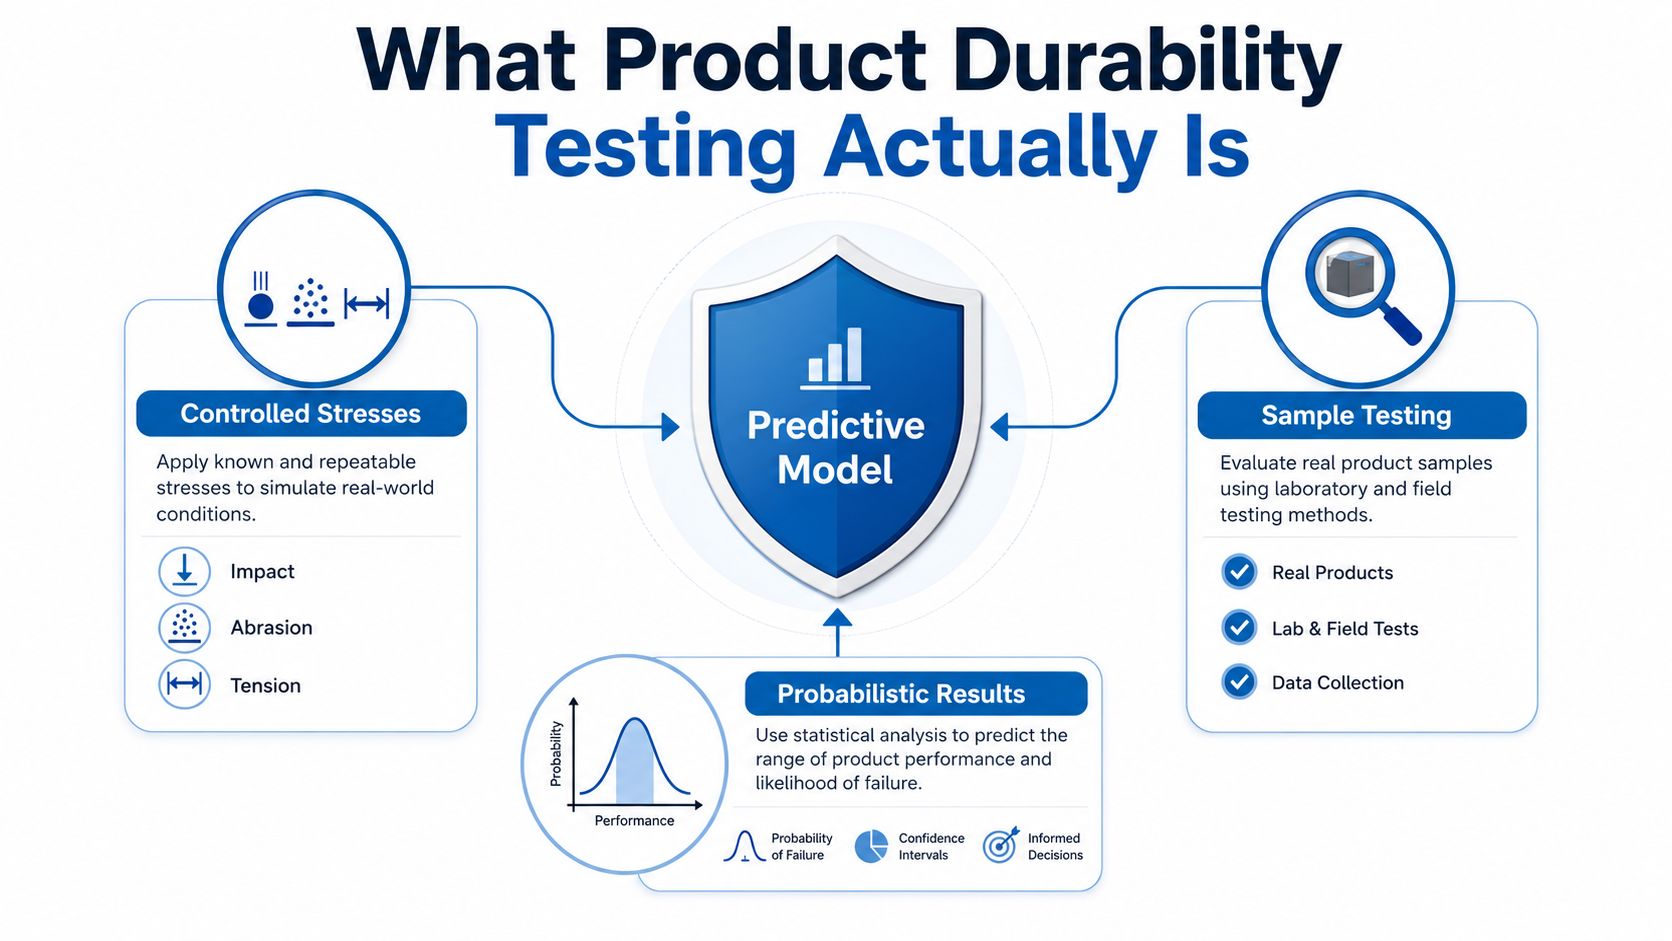
Product durability testing applies controlled stresses to a product or material sample so engineers can estimate how it will perform over time. Instead of waiting for every item to age naturally, a lab repeats the conditions most likely to cause failure, observes the changes, and uses the results to guide product decisions.
Think of a crash-test dummy. It doesn't drive every possible road for years. It stands in for a real driving experience under a controlled event. Durability testing works in a similar way. A sample stands in for a larger production run, while repeated drops, rubbing, washing, light exposure, or temperature changes stand in for everyday use.
A pass is evidence, not a lifetime guarantee
Failure is probabilistic. Two products made to the same specification may not fail at precisely the same moment, because materials, manufacturing variation, usage intensity, and environment all differ. Reliability work therefore uses statistical models, including exponential, Weibull, lognormal, and gamma distributions, to describe likely failure behavior. NIST's reliability handbook outlines these modeling tools, while HBK's reliability test design guidance explains how accelerated life tests use harsher conditions to estimate failure times sooner.
A passing result usually means the tested sample met a defined requirement under defined conditions. It doesn't mean every unit will behave identically in every home. The more useful the test report, the more clearly it states the stress, sample, environment, duration or cycles, observed failure, and pass threshold.
Function and appearance can fail separately
Durability has at least two everyday dimensions:
- Functional durability means the item still performs its job. A lid seals, a label remains attached, and a strap still carries the load.
- Cosmetic durability means the item remains acceptable to use. The surface doesn't look badly scuffed, the design stays legible, and the printed name remains easy to read.
A bottle can still hold water after its label has faded. A bag can still carry books after its lettering has peeled. Families usually need both forms of performance, especially when visual identification prevents mix-ups.
For a broader example of how materials and construction affect everyday carry products, the Urban Totes durable guide offers useful context. For labels specifically, this explanation of label durability testing helps connect laboratory concepts to repeated washing and handling.
The Six Test Types That Matter Most
A daycare product rarely faces one stress in isolation. Its label may be rubbed, washed, exposed to sunscreen, and pulled at the edge during the same week. Labs therefore use several test families, each aimed at a different failure mechanism.
| Test Type | What It Simulates | Failure It Catches |
|---|---|---|
| Abrasion | Rubbing against bags, cubbies, clothing, and tables | Scuffing, print wear, and surface loss |
| Wash and dishwasher | Repeated cleaning, heat, water, and detergent | Fading, warping, lifting, and seal failure |
| UV and fade | Sunlight on playground gear and windowsills | Color loss, brittle surfaces, and unreadable printing |
| Adhesion | Edges catching on fingers, fabric, or objects | Peeling, lifting, bubbling, and complete detachment |
| Chemical resistance | Sunscreen, sanitizer, sweat, juice, and detergent | Ink bleeding, softening, staining, and material breakdown |
| Mechanical stress | Drops, bends, twists, squeezes, and pulls | Cracks, distortion, broken closures, and separation |
Abrasion
Abrasion testing rubs a surface repeatedly to represent the low-level friction that accumulates during normal handling. A lunchbox sliding across a table, a backpack pressed into a cubby, or a name label rubbing against another container can wear away printing long before anyone notices a major tear.
A pass suggests the surface retained the required appearance or information under the specified rubbing conditions. It doesn't predict every fabric texture or dirt particle, but it gives the manufacturer a controlled way to compare materials.
Wash and dishwasher exposure
Wash testing looks beyond water alone. Heat, detergent, spray force, drying, and repeated handling can affect adhesives, inks, plastics, seals, and coatings in different ways. A product that survives hand washing may respond differently to a dishwasher's temperature and spray pattern.
For a label, the important question is whether the name stays readable and the edges remain attached. For a container, the concern may be warping or a seal that no longer closes properly.
UV and fade exposure
Sunlight can change both appearance and material properties. Playground equipment, stroller accessories, outdoor shoes, and bottles left near windows can receive repeated exposure. Accelerated weathering chambers combine UV radiation with controlled dry and wet or temperature cycles, using methods such as ASTM G154, ASTM D4329, ASTM D4587, DIN EN ISO 4892-2, and ISO 4892. K-Labor's overview of plastic aging resistance also describes post-aging checks that measure whether strength remains after exposure.
Adhesion
Adhesion testing asks how strongly a label, sticker, coating, or bonded part remains attached to its surface. A corner that catches on a child's fingernail can start a chain reaction, especially after washing has already softened or lifted the edge.
A practical explanation of this failure mode appears in InchBug's label adhesion test guide. At home, you're looking for lifting, bubbling, curling, or a visible path where water and dirt could work underneath.
Chemical resistance
Children's products meet more chemicals than parents may realize. Sunscreen, hand sanitizer, soap, juice, food oils, sweat, and cleaning products can interact with ink, adhesive, rubber, and plastic. Chemical-resistance testing checks whether the material softens, stains, bleeds, cracks, or loses its bond.
Mechanical stress
Mechanical testing includes drops, bending, twisting, squeezing, pulling, and repeated opening or closing. It targets sudden damage and fatigue damage, which develops gradually as repeated loading accumulates.
These tests work as layers. A label can pass adhesion testing but fail after detergent exposure. A bottle can pass drop testing but fail after thermal cycling. A credible durability program chooses a combination that reflects the product's real environment.
Standards and Lab Approaches That Make Claims Comparable
A stress test becomes useful when another lab could repeat it and understand what the result means. Standards define the conditions of comparison, including the material or product being tested, the applied stress, the environment, the observations to record, and the criteria for passing.
ASTM Committee G03 on Durability and Weathering has a long history. ASTM says the committee formed in 1965, published its first new standards in 1969, and built on natural weathering racks used since at least 1911. Accelerated weathering devices appeared around 1918, and the first commercial test site began in 1928. By 2025, ASTM said G03 standards were referenced or incorporated by thousands of test laboratories worldwide. These details come from the ASTM durability and weathering history.
What a lab controls
A lab may use environmental chambers to manage temperature and humidity, UV-fluorescent or xenon-arc lamps to accelerate light exposure, rubbing equipment to measure surface wear, and tensile or shear rigs to evaluate bonded components. The equipment matters, but the method matters just as much. A machine produces a meaningful result only when the lab controls the load, timing, sample preparation, and evaluation rules.
Major labs and manufacturers commonly work with ASTM, ISO/IEC, UL, SAE, Telcordia, NEBS, ETSI, MIL, and OEM-specific methods, depending on the product category. Intertek's durability and environmental testing overview describes how mechanical cycling, shock, vibration, temperature changes, and moisture exposure fit into these programs.
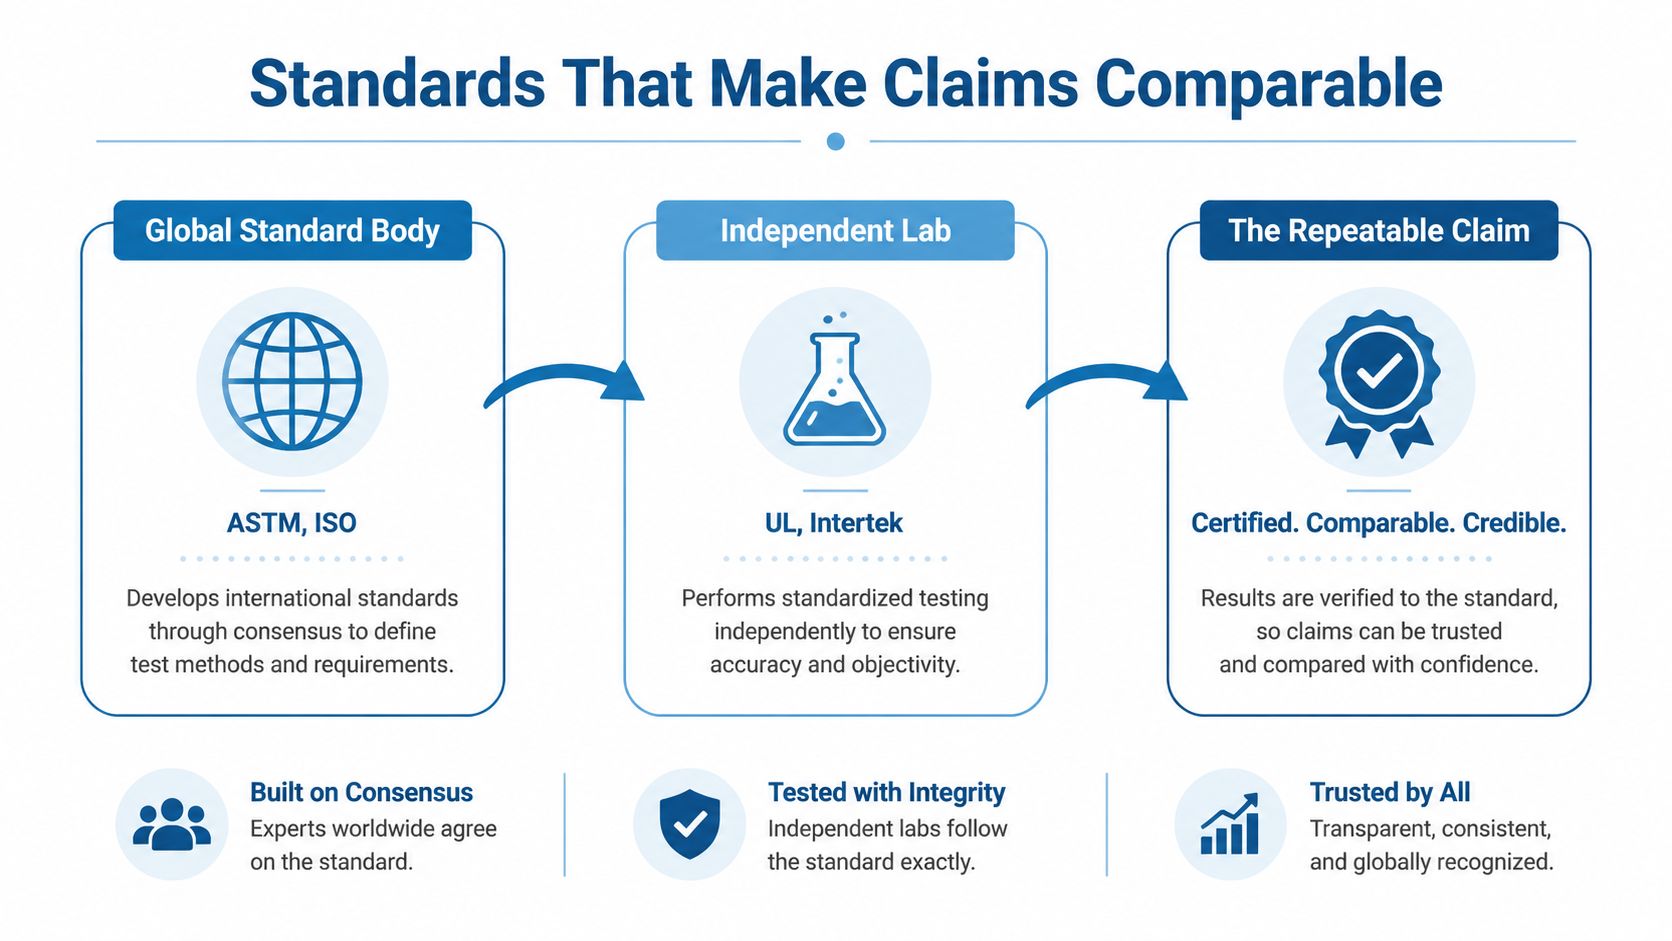
The phrase “dishwasher-safe” can therefore hide important differences. One brand may test a complete product, while another tests only a component. One may measure readability, while another measures whether the object remains structurally intact. Unless the brands identify their methods and thresholds, the claims aren't automatically equivalent.
A facility's physical setup also supports reliable work. For a closer look at a purpose-built testing environment, this lab furniture case study in Utah shows how laboratory infrastructure can be designed around material-testing needs. Families don't need to inspect a lab bench, but they can ask whether a brand provides a recognizable method and clear scope. InchBug's quality assurance process offers another example of the kind of manufacturing and quality information shoppers can look for.
DIY Durability Tests Parents and Daycare Providers Can Run
A home test won't replace a controlled laboratory program. It can still expose a mismatch between a product claim and the conditions your family creates every day. Use an extra sample or an item you're willing to retire, and never test anything in a way that could make a food-contact or child-safety product unsafe.
Start with a simple test log
Write down the product, material, date, cleaning method, and visible changes. A daycare can keep the same short log for different batches of labels or bottles, which makes comparison easier than relying on memory.
Try these practical checks:
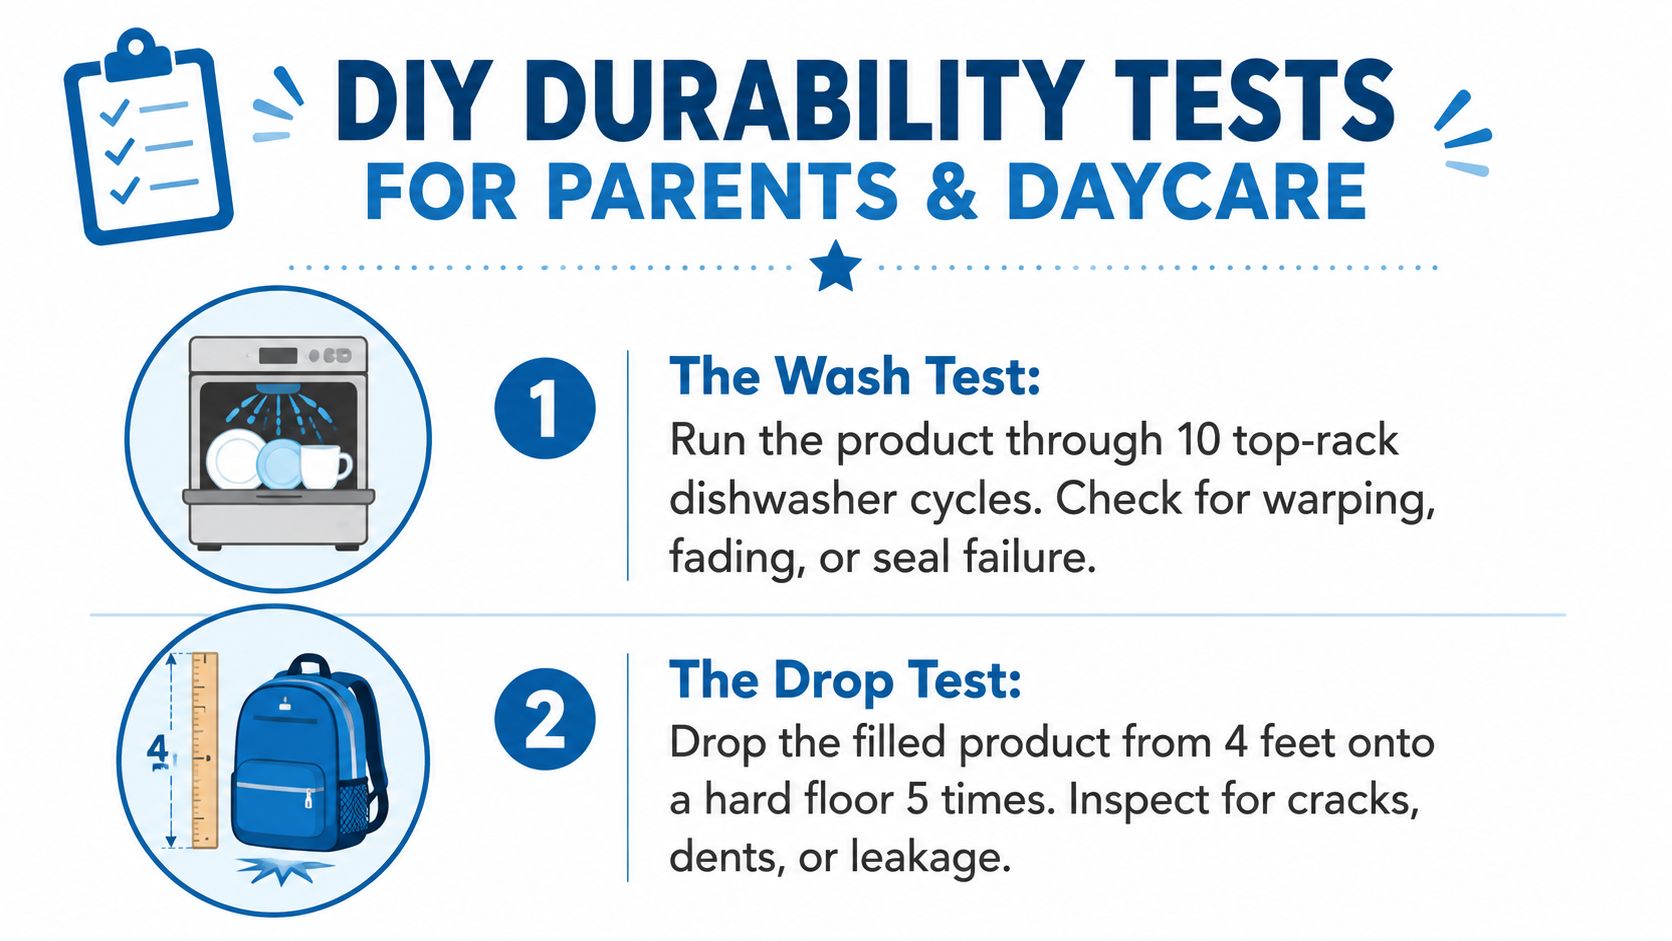
- Wash test: Use the manufacturer's permitted cleaning method. For a dishwasher-safe item, use the recommended rack and repeat the normal routine. For hand-wash products, use hot soapy water and a consistent sponge. Check for fading, warping, lifting, softening, leakage, or a lid that no longer fits.
- Rub test: Rub a damp microfiber cloth over printed or labeled areas, then try a clean pencil eraser with light pressure on a noncritical spot. Watch for transferred ink, dulling, scratches, or exposed material.
- Sun test: Place a labeled item in a sunny window for a sustained observation period, keeping an identical item in a darker location for comparison. Look for a readable name, even color, and any brittleness or curling.
- Peel test: Press a fingernail against a corner, then gently flex the surface as a backpack or child's hand might. A warning sign is an edge that lifts easily, catches fabric, or allows visible dirt beneath it.
- Chemical spot test: On a hidden or spare area, apply a small amount of the substance the item will encounter, such as sunscreen, sanitizer, juice, or diluted detergent. Follow the product's safety guidance, allow the spot to sit briefly, then inspect for bleeding, staining, tackiness, or loss of print.
The assigned infographic includes a dishwasher and drop procedure, but don't treat those instructions as universal permission. A filled container dropped on a hard floor can create hazards, and a child's product may have safety limits that make a deliberate drop test inappropriate. Follow the manufacturer's care instructions first.
Decide what counts as a warning
A pass means the item still meets your practical need. The name remains readable, the label remains attached, the bottle still seals, and the surface hasn't developed damage that could worsen quickly. A warning sign means the product still looks usable but has begun to lose the function that matters in your setting.
For more ideas on preparing identification systems before daycare starts, use this DIY daycare labels guide. The point isn't to create a scientific certification at the kitchen table. It's to notice weak points before a child's favorite cup disappears into a room full of identical ones.
How to Read Brand Claims and What to Ask
Durability language ranges from nearly meaningless to highly useful. “Long-lasting,” “strong,” and “made for everyday use” may describe a product's intended role, but they don't tell you which stress was applied or what failure threshold the maker accepted.
A specific method is more informative. A named standard tells you that the test followed a defined protocol. A stated cycle count can help you compare the claim with your routine, provided the brand also explains what it inspected afterward. Be cautious about treating a number alone as proof. A product may survive repeated washing while its print fades, or retain its print while its adhesive begins to peel.
Questions worth sending to customer service
Ask:
- Which standard or internal method did you use?
- What counted as a pass?
- How many samples were tested?
- Did you inspect the whole product or only one component?
- Does the claim cover the printed design, adhesive, material, or all three?
- Which cleaning conditions does the claim cover?
- Are there exclusions for sanitizer, heat, sunlight, or textured surfaces?
Those questions turn a marketing statement into a performance conversation. They also help you compare products that appear similar online, including bottles such as those discussed in this guide to top hydration bottles for players.
InchBug offers personalized labels and bottle bands designed for repeated dishwasher use, moisture, sunscreen contact, and the rough handling common in daycare routines. Families can use the framework above to decide which specific label format fits a bottle, lunchbox, shoe, bag, or clothing item, then verify the care instructions before ordering.
A Quick Mental Checklist You Can Carry Forward
Before buying or handing an item to a caregiver, ask five questions:
- What environment will it face? Washing, sunlight, rubbing, chemicals, drops, or all of them?
- Which test family matches that environment? A single “durable” claim isn't enough.
- Does the brand name a standard or method? Specific procedures make comparisons more useful.
- What does the evidence cover? Check whether it applies to the print, adhesive, seal, material, or complete product.
- Would a sensible DIY check support the claim? Keep notes, compare samples, and follow safety and care instructions.
Durability testing isn't just a laboratory concern. It's a practical way to choose gear that can handle your family's actual routine.
If you're organizing bottles, lunchboxes, clothing, shoes, and school bags, visit InchBug to explore personalized labels and reusable bottle bands made for everyday daycare and school handling. Use the testing checklist to match each label to its cleaning, moisture, sunlight, and wear requirements before you place your order.