

You're probably staring at a small pile of clothes right now. A hoodie, extra pants, a few shirts, maybe socks that all look identical to every other pair in the daycare cubby. You know they need names on them before Monday, but the question isn't just how to label them. It's which label belongs on which item so you're not redoing the job after the first laundry day.
That's where most frustration starts. Parents buy one type of label and try to make it work on everything. Then a corner lifts on a stretchy tee, a label peels off a fleece, or a hand-me-down gets marked in a way that's too permanent. Clothes name tags iron on labels are useful, but they are not the right answer for every garment.
I've always thought of clothing labels less as a cute personalization step and more as a household systems job. When daycare staff are changing outfits quickly, when teachers are sorting sweaters after recess, and when camp laundry turns into one big anonymous pile, the label that works is the one that matches the fabric and the use.
Why Clothes Name Tags Still Matter for Daycare and School
By the second week of daycare, most families learn the same lesson. One missing sweatshirt isn't an isolated event. Shared spaces create constant mix-ups. Jackets get pulled off in a hurry, spare clothes go home in the wrong tote, and anything unmarked can end up sitting in lost and found until nobody claims it.
This isn't a new problem. Clothing labeling in school settings has a long institutional history. A 1918 school prospectus required all clothing to be labeled with Cash's Tapes, and that same historical note explains that iron-on labels later became more common than sewn-in labels, which shows how schools and communal care settings normalized clothing identification over time (historical school labeling context from Shawnigan Lake School). That long arc matters because labeling was never just about convenience. It was about keeping order when lots of children's items moved through the same place.
Practical rule: If an item leaves your house and can be taken off, dropped, washed, or swapped, it needs a name on it.
Parents usually feel the pain first with high-confusion items:
- Layering pieces like hoodies, cardigans, and zip-ups
- Spare daycare clothes that sit in a cubby until staff need them fast
- Uniform basics that all look nearly identical
- Socks and underwear that disappear into family and school laundry
- Cold-weather gear that gets piled together at pickup
Some daycare programs require labels for exactly this reason. The policy isn't fussy. It keeps staff from guessing whose shirt is whose and helps your child's things get back to the right cubby. If you've run into that requirement, this explanation of why some daycares and preschools require personalized labels lines up with what most parents see in practice.
The main job of a clothing label is simple. It has to survive the kind of life kid clothes have. Repeated wear, repeated washing, and lots of handling by adults who need to identify an item quickly. The trick is choosing when an iron-on label deserves a permanent spot, and when a faster care-tag label makes more sense.
How to Choose the Right Label for Each Garment
The fastest way to make labeling easier is to sort clothes into two piles before you touch the iron. One pile is for garments that need a permanent bond. The other is for garments where a care-tag label is enough and often smarter.
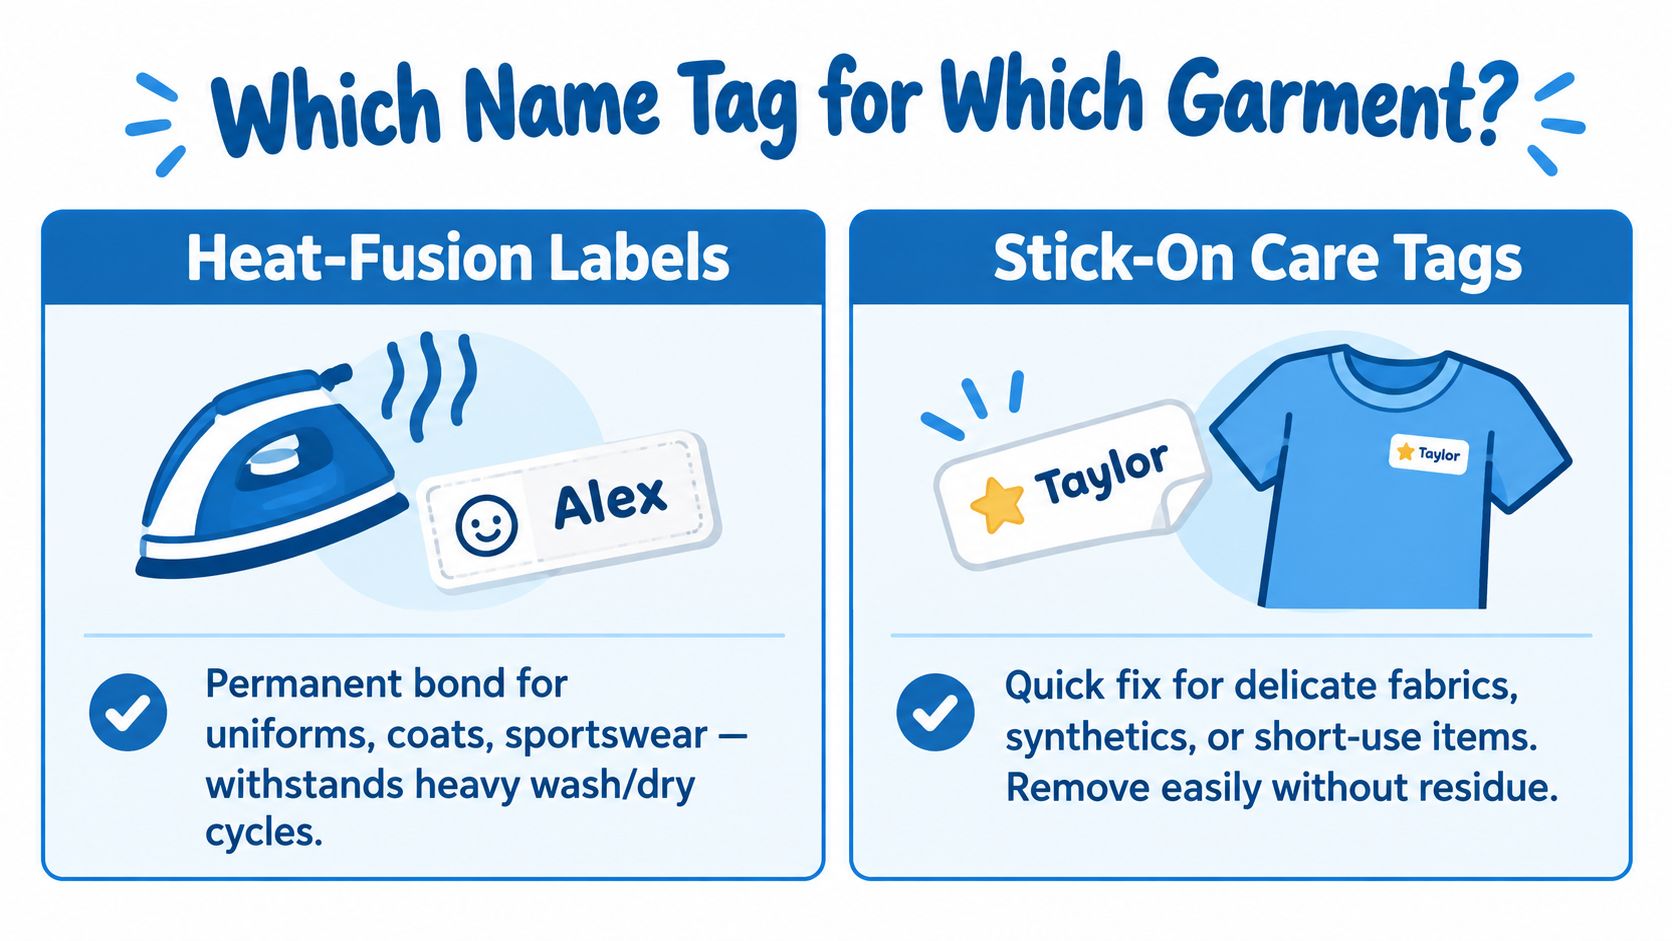
The quick decision test
Ask these questions while you're sorting:
- Will this item be washed hard and often? Uniform shirts, daycare pants, and socks usually justify iron-on labels.
- Will this be handed down soon? If yes, permanent iron-on may be too much.
- Does the item already have a good care tag? That often makes a stick-on care-tag label the easier choice.
- Is the fabric stretchy, delicate, bulky, coated, or awkward to press? Those are signs to pause before using heat.
A lot of current guidance in the label market points parents toward no-iron options for care tags when speed and removability matter, while iron-on still gets positioned as the durable choice for frequently washed clothing. That split is exactly why a one-label-fits-all approach falls apart (current product positioning around permanent and no-iron clothing labels).
Iron-On vs Stick-On Care-Tag Labels at a Glance
| Feature | Iron-On Name Tags | Stick-On Care-Tag Labels |
|---|---|---|
| Bond type | Heat-fused and intended to stay put | Adhesive applied to the garment's care tag |
| Best for | Uniforms, socks, basics, frequently washed everyday clothes | Jackets with care tags, hand-me-downs, quick labeling jobs |
| Time to apply | Slower, needs heat and setup | Faster, no iron needed |
| Fabric limits | Not ideal for every fabric or finish | Depends more on having a usable care tag |
| Hand-me-down friendly | Usually not the first choice | Better if you want a less permanent option |
| Common mistake | Using it on the wrong fabric | Sticking it to fabric instead of the care tag |
Garment by garment choices that usually work
Use iron-on for the workhorses. Cotton school shirts, uniform pants, plain tees, pajamas, and socks tend to be good candidates when you want the label to stay with the garment for the long haul.
Use care-tag labels when the tag does the job for you. Fleece jackets, some synthetic sportswear, and clothes that will move to a younger sibling often fit better in this category.
Be careful with “in-between” items. Stretchy knits, thick seams, embellished tops, and heavily worn hand-me-downs can go either way depending on the exact fabric and the quality of the application surface.
If you want examples of clothing-label formats families use across these situations, personalized name tags for clothes shows the broader category well. The useful mindset is this: pick the label that suits the garment, not the label you happen to have in the drawer.
The best label is the one that matches the fabric, the wash routine, and whether the garment is meant to stay with one child or move on.
Applying Iron-On Name Tags So They Actually Stay Put
Most iron-on failures start before the iron even touches the label. The fabric is still carrying detergent residue, the iron has steam on, or the garment area isn't fully dry and flat. Then the label seems fine for a day or two and starts lifting after wash one.
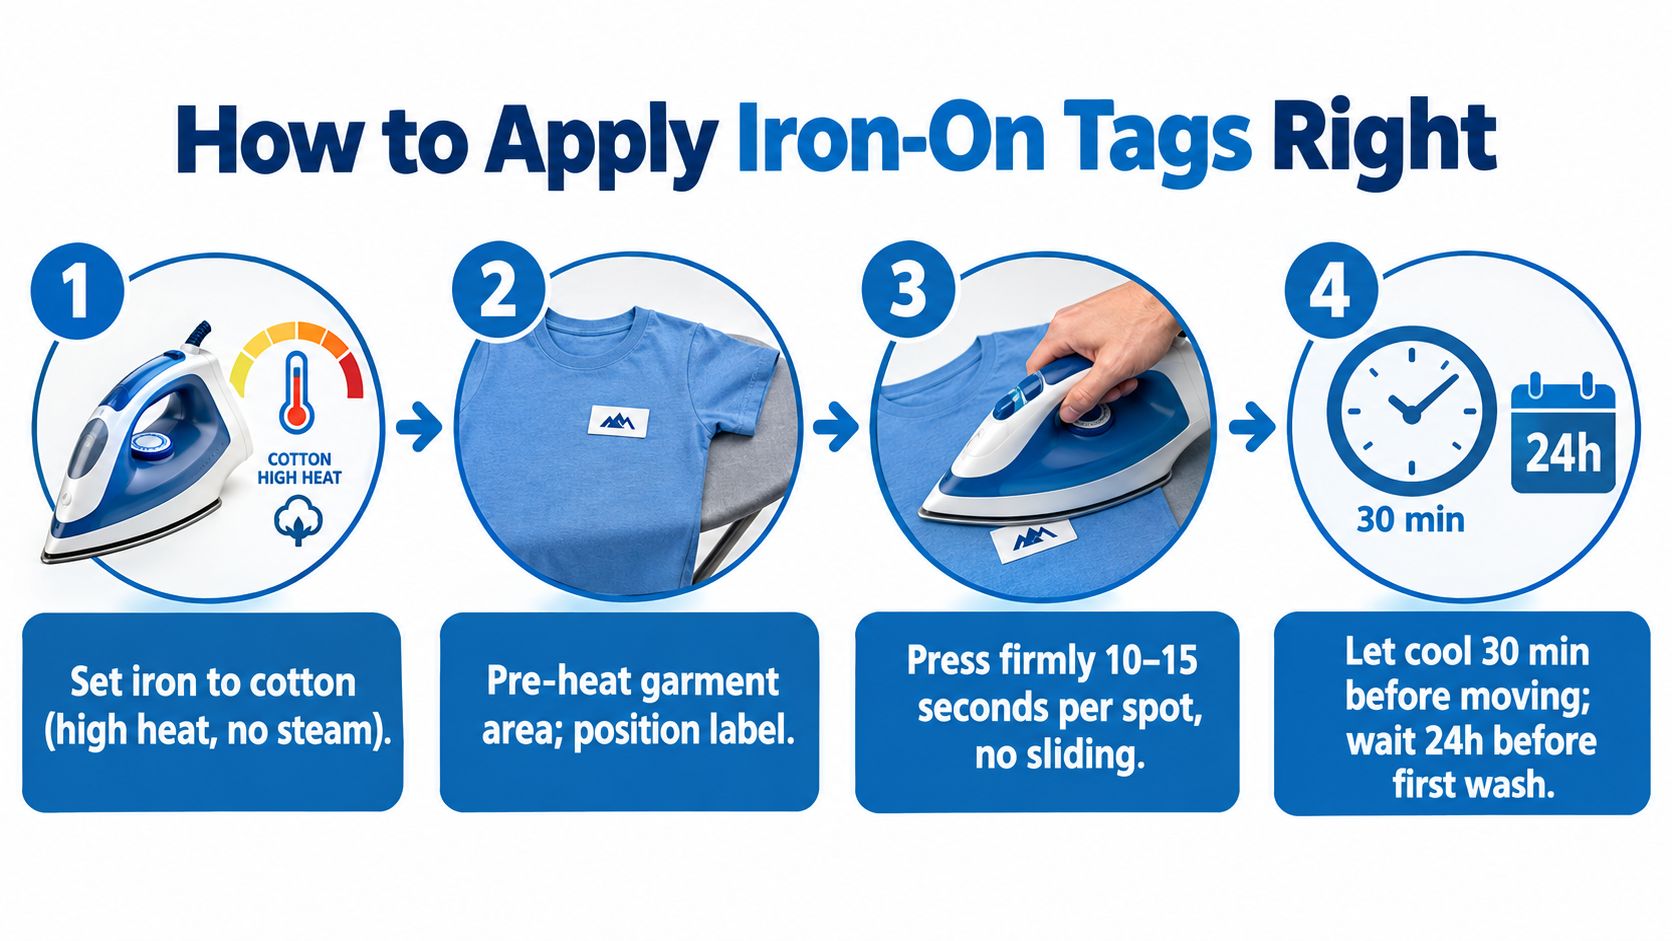
For a durable result, there's a practical workflow that matters more than brand differences. The garment should be prewashed without fabric softener, the iron should be set to a cotton cycle with no steam, the label should be pressed through parchment paper for about 20 seconds, any lifting edge should be re-pressed, and the garment should sit for 12 to 24 hours before laundering because that cure window is important for the adhesive to fully set (application guidance and durability notes from Colle à moi).
Here's a visual walkthrough before getting into the details:
Set up the fabric first
The garment surface matters more than people think. You want a clean, dry, smooth area that can take heat. If the fabric still feels coated, damp, or fuzzy, you're asking the adhesive to bond to a compromised surface.
What usually works best:
- Choose a flat zone inside the collar, waistband, or another stable area
- Avoid ridges and seams where pressure won't land evenly
- Skip softener residue because it can interfere with the bond
- Press on a firm surface instead of a squishy blanket or couch arm
If a garment is very stretchy, don't pull it taut. Let it rest naturally on the board. Stretching while applying can create edge stress later when the fabric relaxes.
Heat and pressure matter more than motion
A common mistake is ironing the label the way you iron wrinkles. Sliding the iron back and forth can shift the label and reduce concentrated pressure. Iron-on labels respond better to firm downward pressing.
Press, don't glide. The goal is contact and pressure, not a sweeping ironing motion.
With thick uniforms or layered waistbands, work in short presses and make sure every part of the label gets equal contact. If one corner sits over a bulky seam and the rest sits on flat cotton, that corner is the one most likely to peel later.
This short iron-on nametag guide from InchBug is useful if you want a quick reference while you're at the ironing board.
For parents who like to see the motion before trying it, this video helps:
Don't rush the cool-down and cure time
This is the part busy parents skip. The label looks attached, so the shirt goes straight into the hamper or backpack. That's often where the trouble begins.
After pressing, let the label cool fully. Then check the edges. If any area hasn't bonded cleanly, re-press that section before the garment goes into rotation. After that, give it the cure window before washing.
A good application should feel settled and integrated with the fabric, not loose at the perimeter. If you have any doubt on day one, fix it then. It's much easier than trying to rescue a half-peeled label after laundry day.
Washing and Drying Habits That Extend Label Life
Modern clothing labels exist in the same world as modern garment care. The apparel industry's care-label system became much more standardized with major milestones in 1960, 1963, 1971, and 1976, which helped make laundering expectations more predictable across garments and markets (care-label history and regulation overview from Wunderlabel). For parents, the practical takeaway is simple. If clothes are built to survive repeated washing, the label still has to be treated in a way that supports its adhesive.
Published guidance across label makers lands on a similar benchmark. Properly applied iron-on labels on suitable fabrics can survive dozens of laundry cycles, with examples ranging from about 50+ washes to 100+ washes depending on construction. The same comparison notes that severe conditions can cause failure much sooner, including cases where frequent-wash garments show problems in as few as 5 to 10 cycles, while lower-stress use can stretch to 15 to 30 cycles or more (iron-on versus stick-on durability comparison from Mabel's Labels).
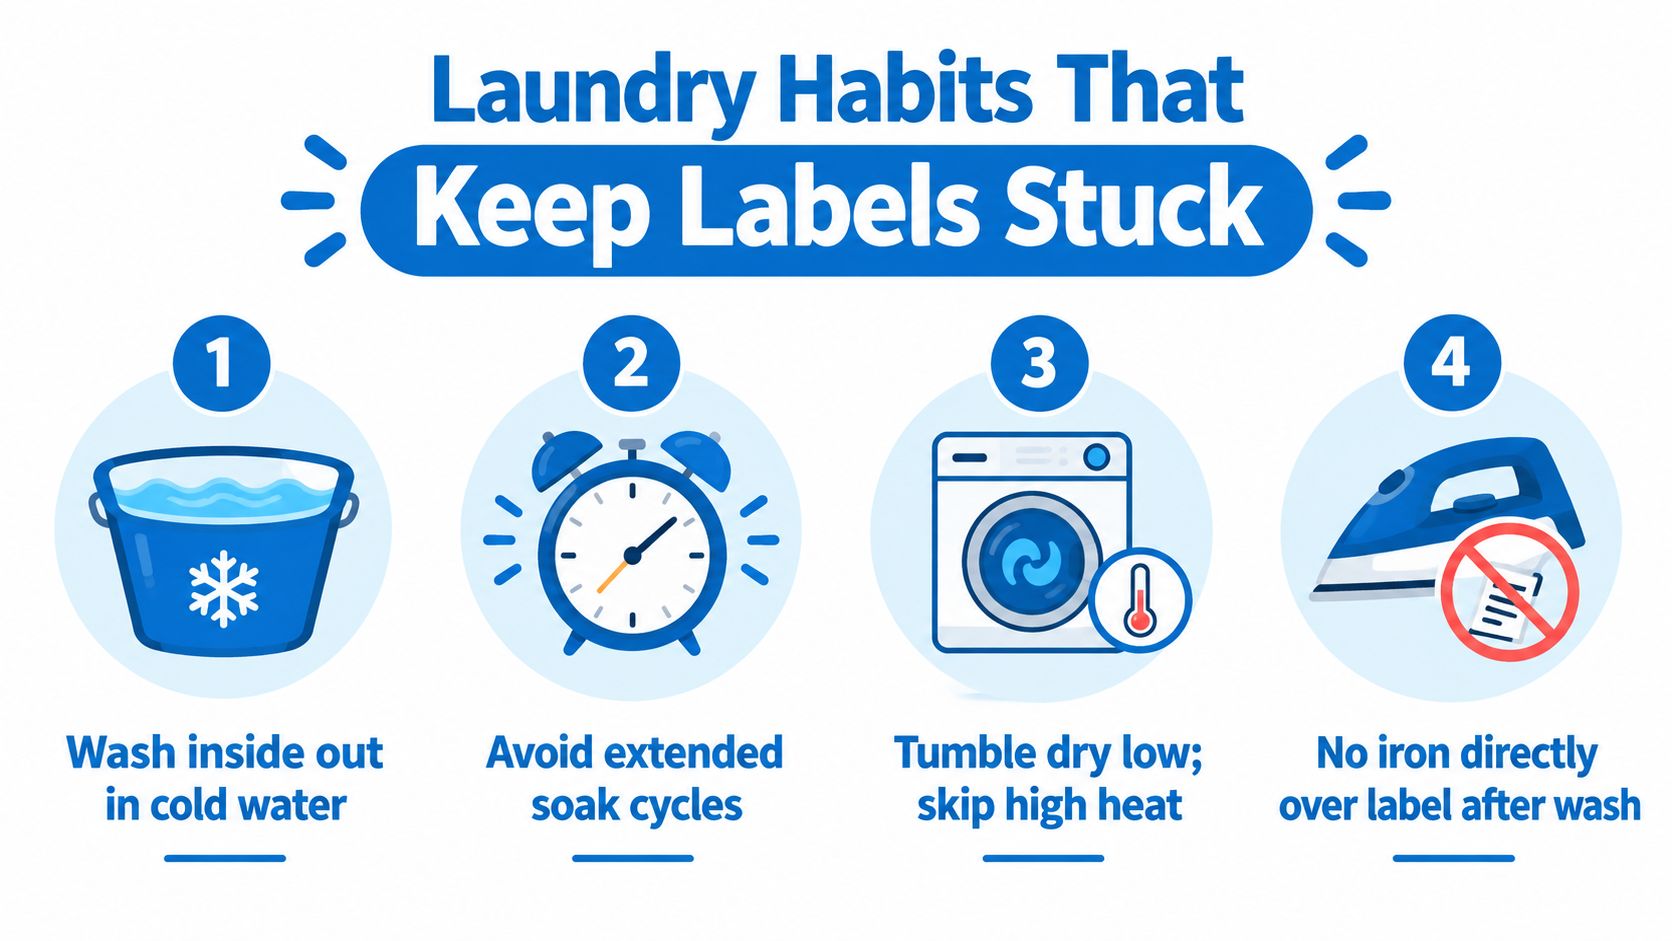
Laundry habits that help
- Go easier on heat: High-heat tumble drying is one of the biggest triggers for edge lift.
- Skip fabric softener: It's often mentioned as a factor in label failure.
- Watch repeated hot washes: Heat plus agitation is harder on the adhesive over time.
- Check labels mid-season: Especially on items washed constantly, like uniform basics and daycare pants.
What this looks like in real family laundry
You don't need a separate ritual for every labeled shirt. You just need fewer high-stress habits. If you already baby fleece and sweatshirts a bit, that tends to help labels too. If you're washing hoodies and similar layers often, these fleece hoodie care tips from SoccerWares are a useful companion read because they line up with the same low-stress handling parents use to preserve prints, fabric feel, and attached labels.
If you want general clothing-label maintenance reminders in one place, label care instructions for kid gear and clothing can be handy to bookmark.
Troubleshooting When Iron-On Tags Lift Peel or Fade
When a label fails, the label itself isn't always the issue. In many cases, the problem started with the fabric, the setup, or the garment choice.
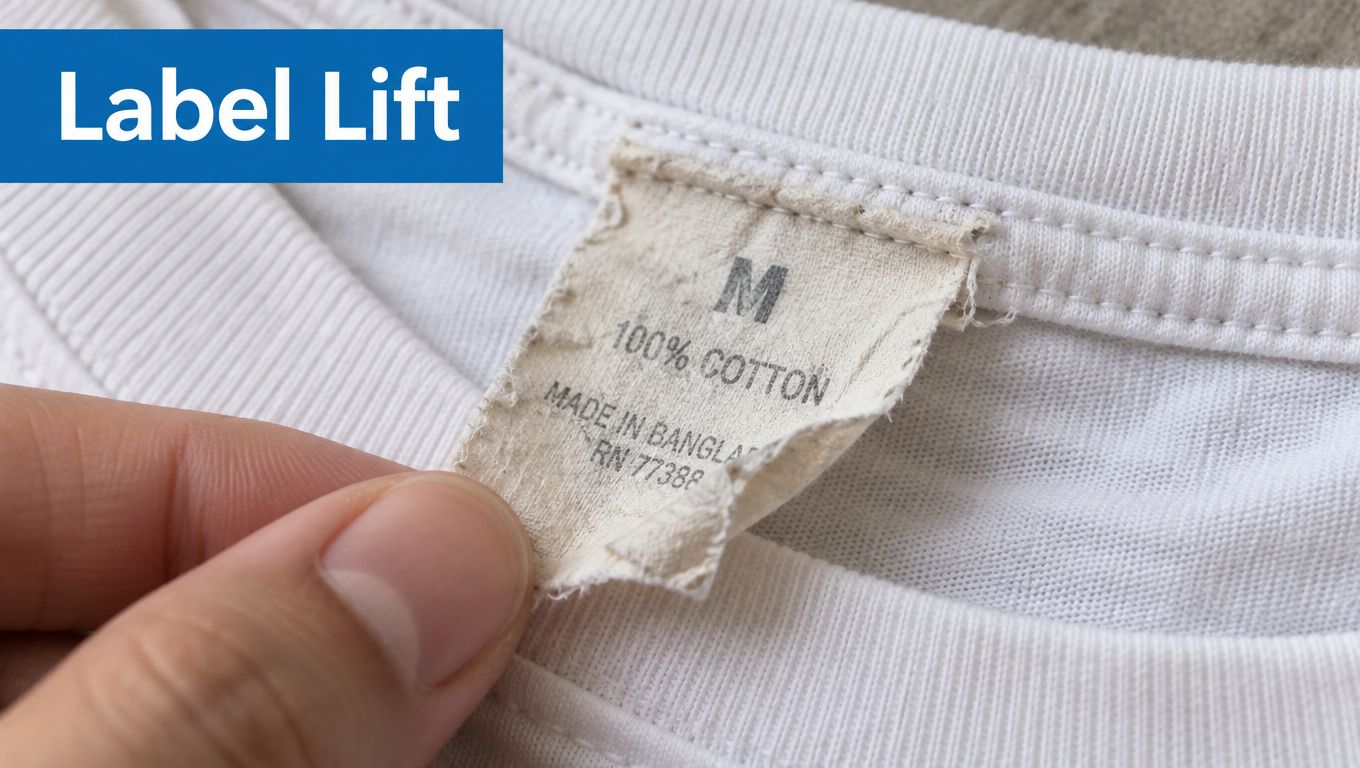
Current field guidance points to the same repeat offenders: damp or dirty fabric, steam, insufficient pressure, and skipping a peel-test after cooling. It also highlights a useful reality check. Some shoppers don't need iron-on labels at all if they're labeling care tags, because no-iron tag labels may be the better fit for that garment and use case (label troubleshooting and use-case guidance from Labels4Kids).
Fast diagnosis by symptom
The corners are lifting.
That usually points to uneven pressure, a bulky placement area, or too much dryer heat afterward. Re-press the corner through parchment paper on a firm surface, then let it cool fully before checking again.
The whole label peels too easily.
Look at prep first. The fabric may have had residue, moisture, or too little heat exposure during application.
It looked fine until washing.
That often suggests the bond hadn't fully set before the garment was laundered, or the clothing has been through a harsh heat cycle.
The item is awkward, thick, or stretchy.
Garment choice matters. Socks, thick uniform waistbands, and worn-in hand-me-down knits can work, but they need a flatter target area and more careful pressure. If the surface isn't giving you a confident bond, switch strategies.
A one-minute rescue checklist
Before replacing a label, check these:
- Surface check: Is the fabric under the label smooth, clean, and still intact?
- Placement check: Is part of the label crossing a seam, ribbing, or textured knit?
- Heat check: Was steam off, and did the iron stay in firm contact?
- Cooling check: Did the label cool before you tested the edges?
- Garment check: Should this have been a care-tag label instead?
Sometimes the smartest fix isn't reapplying the same way. It's changing label type for that garment.
That's especially true for worn hand-me-downs. Older fabric can be thinner, more textured, or less stable than a new shirt. When the fabric won't cooperate, forcing an iron-on label rarely improves the outcome.
Best Practices for Keeping School and Daycare Gear Organized
The families who get the least lost-item stress usually aren't doing more work. They're doing the work at the right moment. New clothes get labeled before first wear. Seasonal gear gets checked when it comes out of storage. Labels that are lifting get fixed before they become missing labels.
A routine that holds up
- Label at intake: The day new clothes come home, name them before they enter the weekly rotation.
- Match the label to the item: Permanent for true workhorse garments, care-tag labels for short-use or pass-down pieces.
- Do a monthly scan: Hoodies, socks, uniforms, and spare cubby clothes deserve a quick edge check.
- Use a mixed system: Clothing labels solve only one part of the problem. Bottles, bags, shoes, lunch gear, and jackets each need their own best labeling surface.
- Keep a small backup stash: Last-minute field trip gear and weather changes happen.
There's also a people side to this. Make the name easy for teachers and caregivers to spot. Put it where an adult checking a collar, waistband, or tag will find it. For non-clothing items, this broader guide on how to organize your kids' belongings better with adhesive labels is useful because it treats labeling like a family system, not a one-time shopping task.
A calm setup beats a frantic replacement cycle every time. Once you decide which clothes should get iron-on labels and which should get care-tag labels, the whole job becomes much simpler.
If you're building that system now, InchBug offers clothing labels along with labels for bottles, shoes, bags, and other school and daycare gear, so you can match the label type to the item instead of forcing one solution onto everything. It's a practical place to set up a labeling routine that holds up through cubbies, laundry, and the daily shuffle in and out of school.