

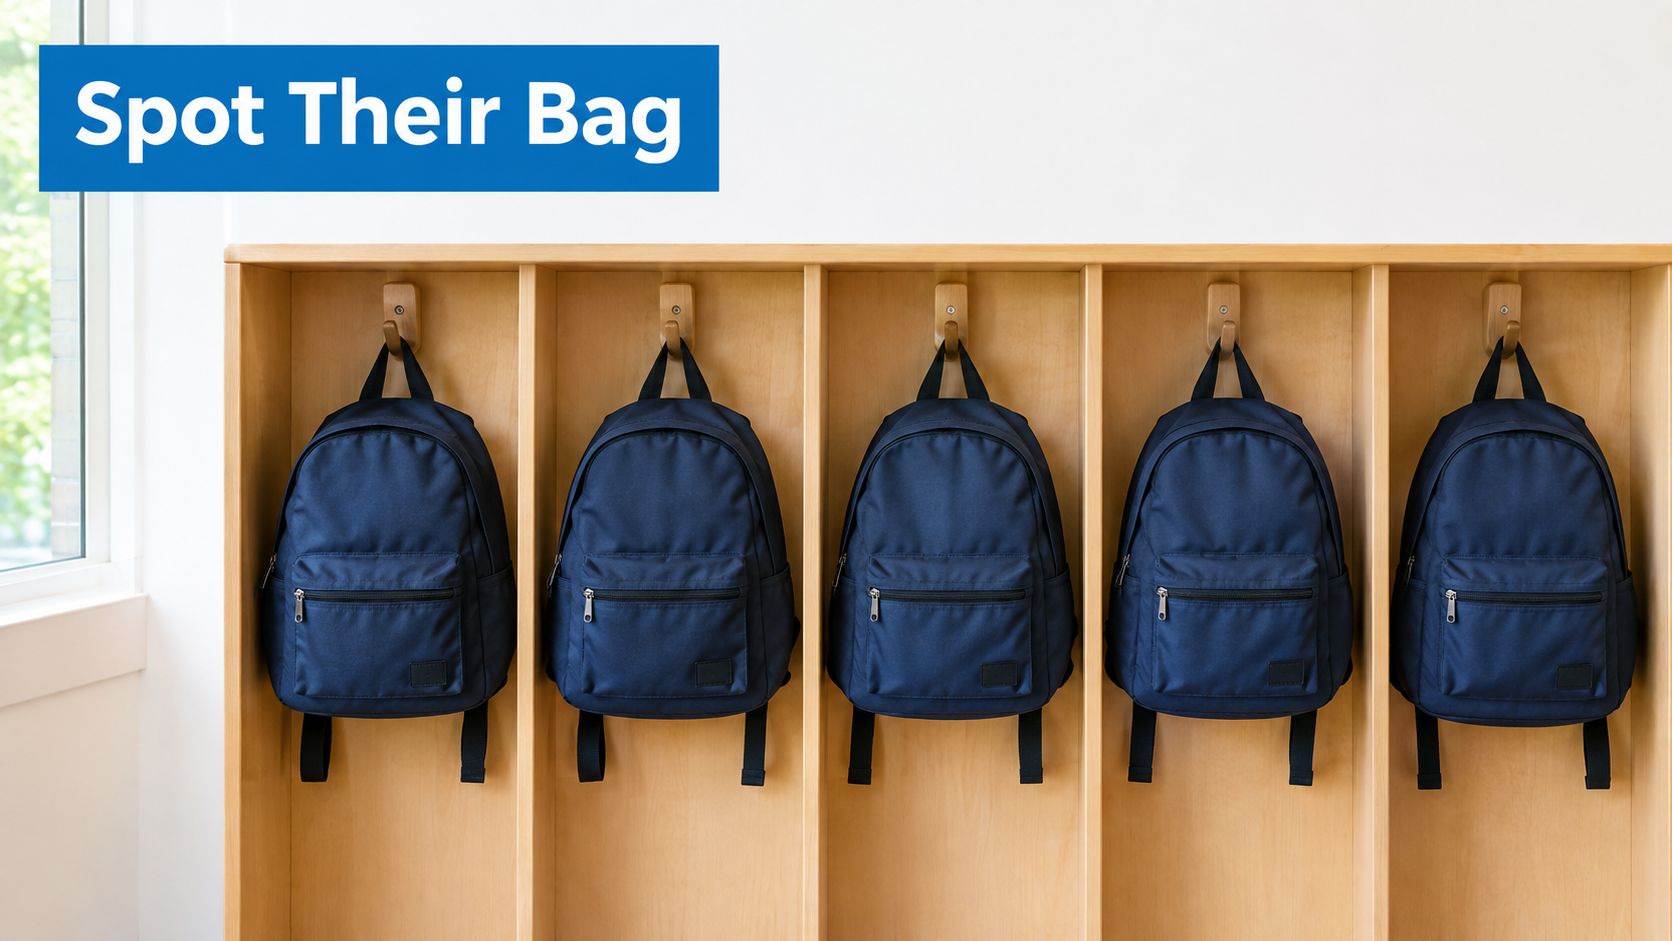
At pickup, you scan the cubbies while a child points toward a row of nearly identical backpacks. One bag has the right color, another has the familiar lunch box, and a third may belong to a child in the next room. A clear name tag hanging from a reliable bag tag loop can settle the question before everyone heads home.
The loop is easy to overlook because it's small. Yet it connects the readable tag to the bag, and that connection has to handle zippers, hooks, playground fences, car floors, washing, rain, and the occasional child who grabs the tag instead of the handle. This guide will help you choose the right loop material, understand attachment styles, match loops to different bags, and install them so names stay visible and secure.
When Every Backpack Looks the Same at Pickup
The busiest part of the daycare day often happens in a narrow space. Backpacks hang from cubbies, lunch bags sit underneath, and several children reach for their belongings at the same time. If five bags share the same navy fabric, a tiny visible tag can prevent a slow search from becoming a mix-up.
A tag only helps when it stays attached and easy to read. That's why the loop deserves as much attention as the printed name. A tag with a strong surface can still fail if its connector stretches, slips through the handle, or catches on a hook.
The small part that carries the daily load
In a daycare room, children don't always use bags as adults expect. A child may pull a backpack from a crowded hook by its tag, swing a lunch bag by its label, or tug at a zipper while trying to find a favorite toy. One school-label guide specifically recommends attaching the tag to the handle, rather than the zipper, because some children try to carry the bag by the tag itself. You can find that practical guidance in this resource about backpack tags for kids.
The handle usually gives the loop a more stable anchor and keeps the tag away from moving zipper parts. It also puts the name where a caregiver can see it quickly without opening the bag.
Practical rule: Attach the identification tag to a sturdy handle or sewn-in strap, not to a zipper pull that moves, twists, and gets pulled repeatedly.
Families preparing children for a new classroom may also appreciate a guide to Northcote Primary School when they're organizing school routines and daily gear. A simple label system can make that transition calmer, especially when children are learning which belongings belong to them.
For more ideas on choosing and placing labels, this backpack labeling guide can help you think beyond the tag itself. The useful question isn't only, “What name should I print?” It's also, “Where will this name remain visible after a child uses the bag normally?”
What Bag Tag Loops Are and How They Work
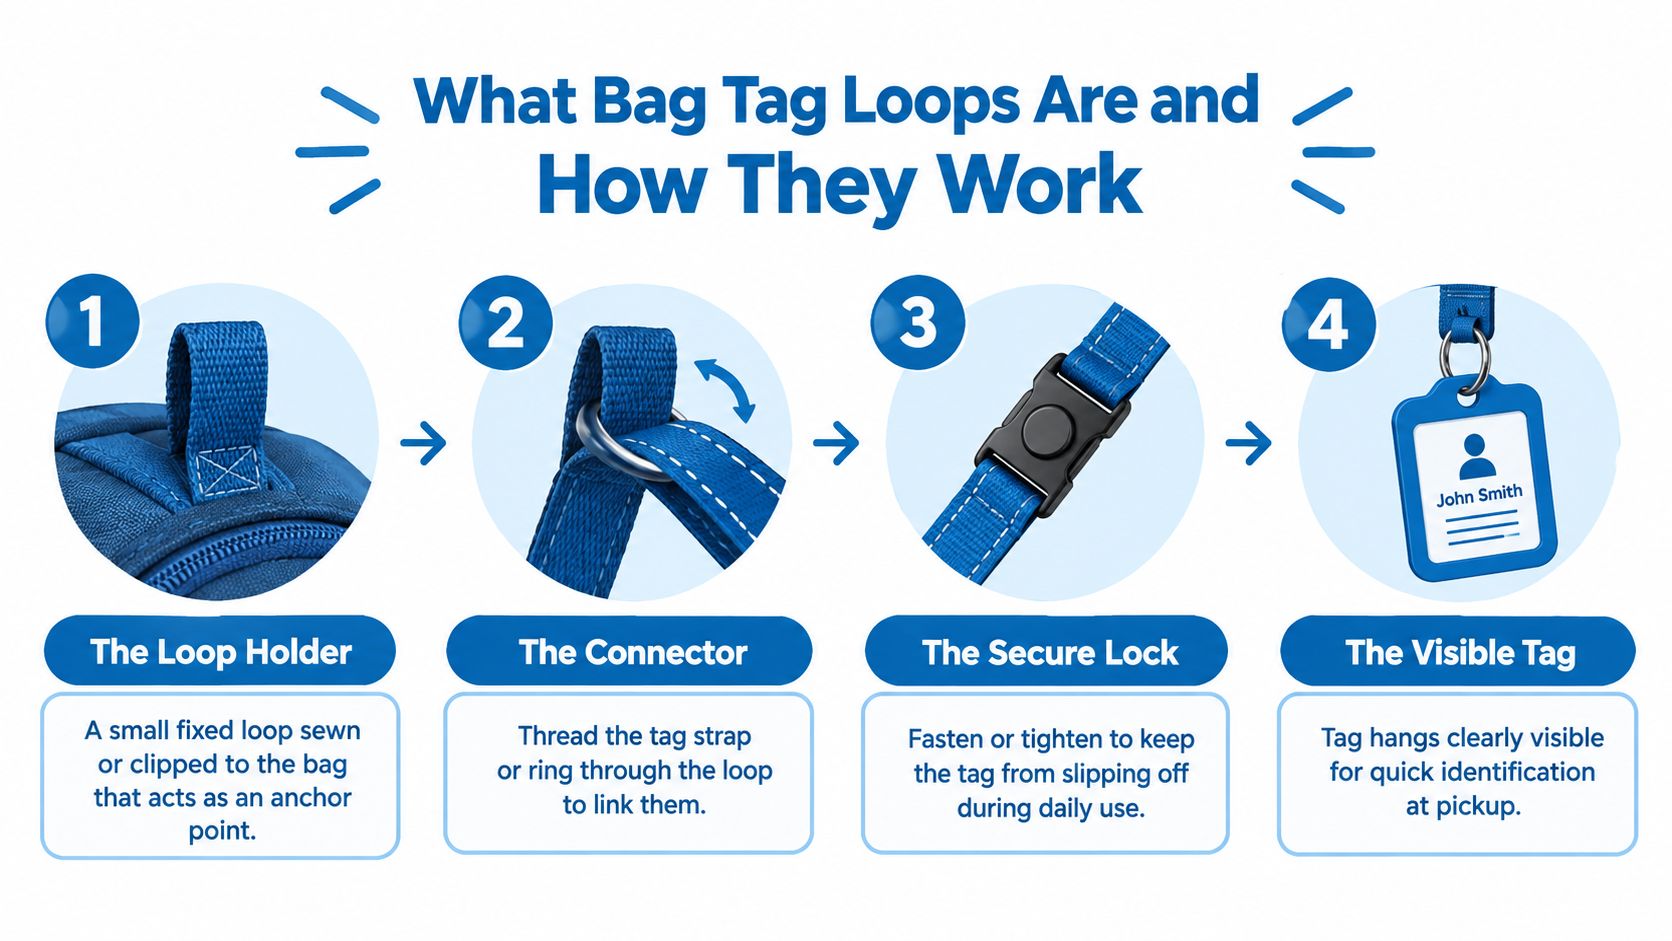
Think of a bag tag loop as a belt loop for a name tag. A belt loop doesn't replace the belt. It holds the belt in the right place so the belt stays connected to the clothing. A bag tag loop performs a similar job by giving the tag a fixed path to the bag.
The system has three working parts:
- The anchor point is the bag handle, sewn strap, grommet, or other stable section.
- The connector is the loop, strap, ring, or tie that passes through the anchor and the tag.
- The tag body displays the child's name or other identifying information.
The loop should hold the tag close enough to remain visible, while still allowing it to hang without twisting into the bag. If it's too short, threading becomes awkward and the tag may press against the handle. If it's too long, the tag can swing, snag, or disappear behind the backpack.
Four simple actions
Start by finding the bag's strongest nearby attachment point. A sewn handle is usually preferable to a thin zipper tab because it's designed to help carry the bag.
Next, pass the loop through the handle and then through the hole, slot, or ring on the tag. The connector should lie flat rather than crossing over itself. A twisted loop creates an uneven pull and can make the printed side face inward.
Then close, tighten, or secure the connector according to its design. A snap should click fully into place. A threaded loop should sit neatly without slack that allows the tag to slide off. A cable-tie style attachment should be tightened enough to prevent movement, with any excess trimmed safely away from fingers and fabric.
Finally, turn the tag outward and give the bag a gentle tug from the handle. The tag should remain attached, readable, and clear of the zipper path.
A flat name tag usually needs less space than a thicker alert tag or a rigid acrylic style. Before buying replacements, check the size of the tag hole and the thickness of the connector. Practical bag tag ideas can help if you're deciding whether to use one tag for a backpack or separate tags for lunch, sports, and travel gear.
Bag Tag Loop Materials and Styles You Will See Most
Loop materials feel different in the hand, and those differences matter once a bag faces daily use. A flexible loop may be comfortable on a soft child's backpack, while a metal option may make more sense for a duffel that gets loaded, dragged, and shared.
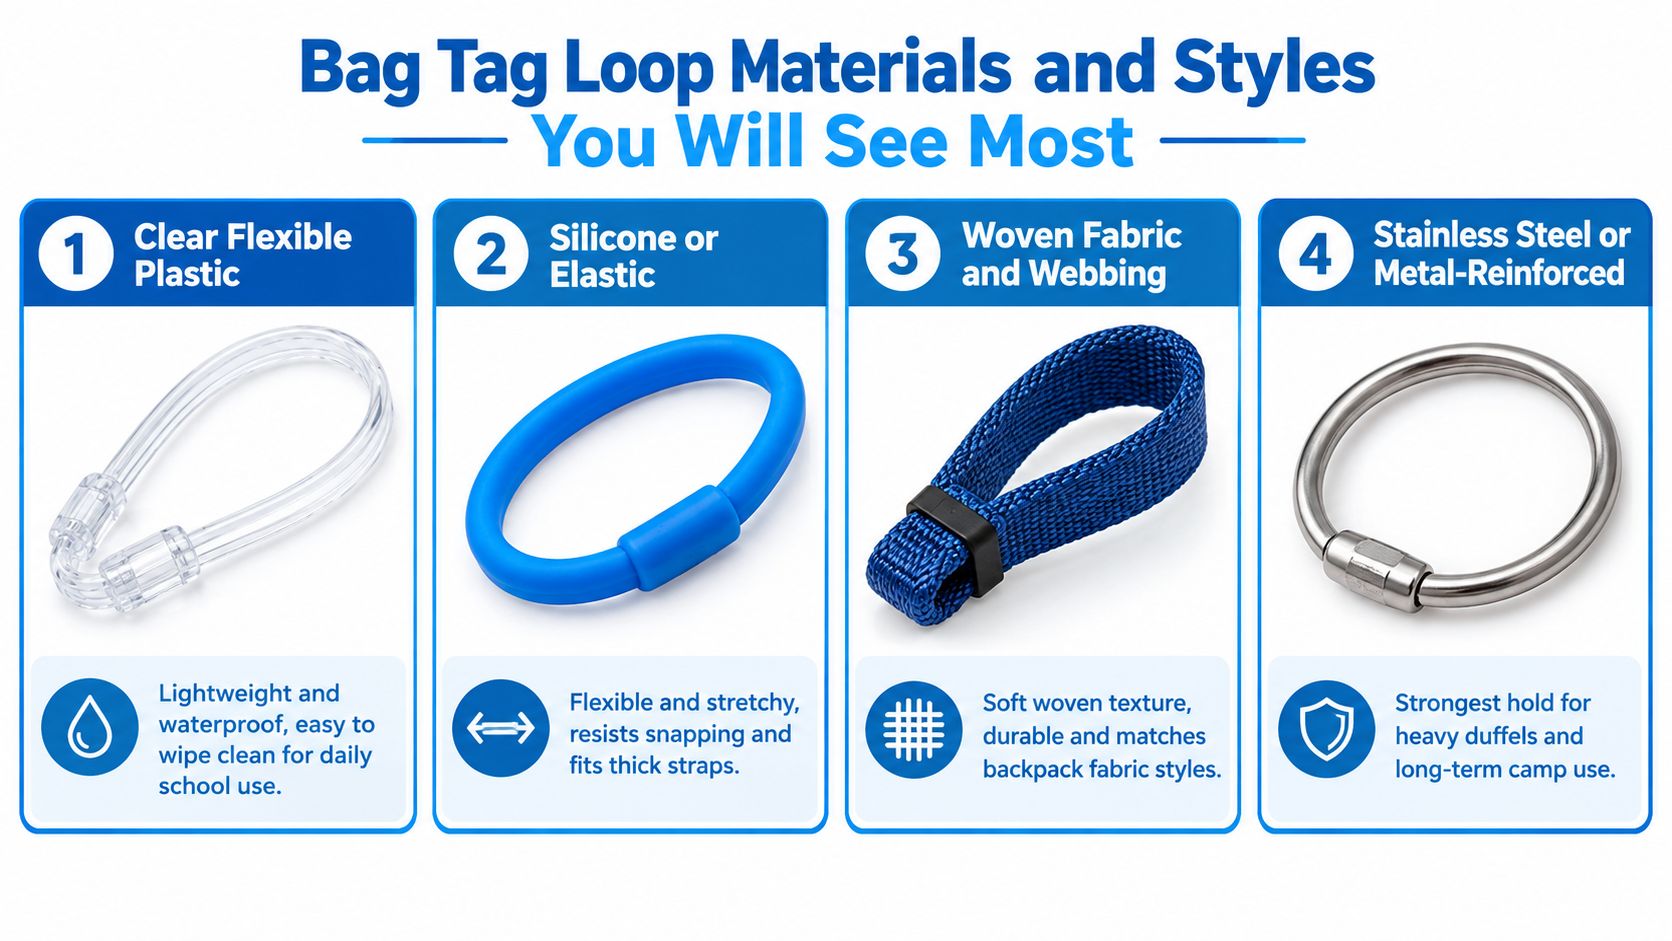
Clear flexible plastic
Clear plastic loops are lightweight, discreet, and easy to wipe clean. They're a practical choice for everyday school backpacks, lunch bags, and lighter gear because they don't compete visually with the tag.
Their main advantage is simplicity. You can see the attachment point, and the material usually stays unobtrusive against colorful backpack fabric. The tradeoff is that a thin plastic loop may not be the right choice for a bag that experiences repeated rough handling, heavy loads, or outdoor abrasion.
Silicone and elastic
Silicone or elastic connectors stretch around thicker handles and can be easier to thread when a bag has a bulky strap. They're useful when the handle changes shape or when you want a softer, more flexible feel.
Elastic can lose its shape after extended pulling or exposure, so inspect it if the loop looks stretched, shiny, cracked, or loose. Flexibility helps with fit, but it doesn't automatically mean the connector will hold better.
Woven fabric and webbing
Woven fabric and webbing feel more like a small strap than a rubbery ring. They can blend naturally with backpacks, camp bags, and sports gear, and reinforced webbing offers a broad surface that distributes pressure across the attachment area.
The loop still needs a secure closure. A strong-looking woven strap can fail at the stitching, buckle, hole, or fastening point if those parts don't match its strength.
Stainless steel and reinforced metal
Stainless steel loops suit rougher environments, shared equipment, travel-heavy bags, and hard cases. Independent guidance distinguishes clear plastic loops as practical for daily school bags and stainless steel loops as better for rougher shared or travel use. Metal may add weight and can make noise against hard surfaces, but it offers a firmer hold when a bag is repeatedly hooked, tossed, or pulled.
For a closer look at how a metal identification tag can suit older children's gear, compare options such as personalized metal tags. The right material depends less on appearance than on how the bag moves through the day.
How Bag Tag Loops Attach and Stay Secure
A connector can be strong in one direction and unreliable in another. That's why it helps to examine how each attachment method locks, releases, and responds to repeated pulling.
OSHA's shipyard standard says a tag attachment must be sturdy enough to prevent accidental removal, equivalent to a one-piece nylon cable tie, with a minimum breaking strength of 50 pounds. That industrial benchmark isn't a universal consumer product requirement, but it gives parents and caregivers a useful way to think about security. A loop should resist tugging, snagging, and vibration instead of gradually loosening.
The weakest link controls the system
A heavy-duty luggage tag specification illustrates this clearly. One example pairs polypropylene webbing rated at 1200 pounds tear strength with a UV-resistant cable tie rated at 120 pounds tensile strength, passing through a 3/8-inch grommet. Those figures come from the product specification for the No-Touchy grommet luggage tag.
The lesson is more important than the numbers. The tag face may be tough, but the loop, grommet, stitching, or closure can still determine when the system fails. Look for UV-stable materials, reinforced holes, and fastening geometry that can't easily slide back through itself.
| Attachment Method | How It Secures | Strength and Durability | Best For |
|---|---|---|---|
| Threaded loop | Passes through the bag handle and tag opening | Simple and lightweight, but depends on correct threading and a close fit | Daily backpacks and lunch bags |
| Snap or buckle closure | Closes around the handle and locks by pressure or a buckle | Convenient to remove, so closure quality and full engagement matter | Bags that need occasional tag changes |
| Cable-tie style attachment | Tightens through a locking head and resists reverse movement | Strong retention when cut to fit and protected from sharp edges | Travel, shared gear, and high-wear bags |
| Grommet-reinforced webbing | Spreads load through webbing and a reinforced opening | Better suited to repeated pulling and outdoor exposure | Duffels, sports equipment, and larger luggage |
Patent records also show that loop-tag designs have been formalized repeatedly across markets, including Japan, Sweden, Germany, and the European Patent Office. Documented examples include a Swedish loop-tag patent family dating to 1986, a Japanese baggage-tag patent with a 2001 priority date, a European multi-layer loop tag from 2007, and a German system filed in 2012 and later granted in 2017. One representative elastomeric loop record lists 120 citations, showing sustained technical attention to this small component. These records are summarized in the bag tag design history and patent overview.
For active children's sports gear, a durable attachment can matter as much as the printed design. A soccer bag tag gives a useful example of how identification needs change when bags travel between practices, fields, and shared storage areas.
Matching Bag Tag Loops to Bags and Tag Types
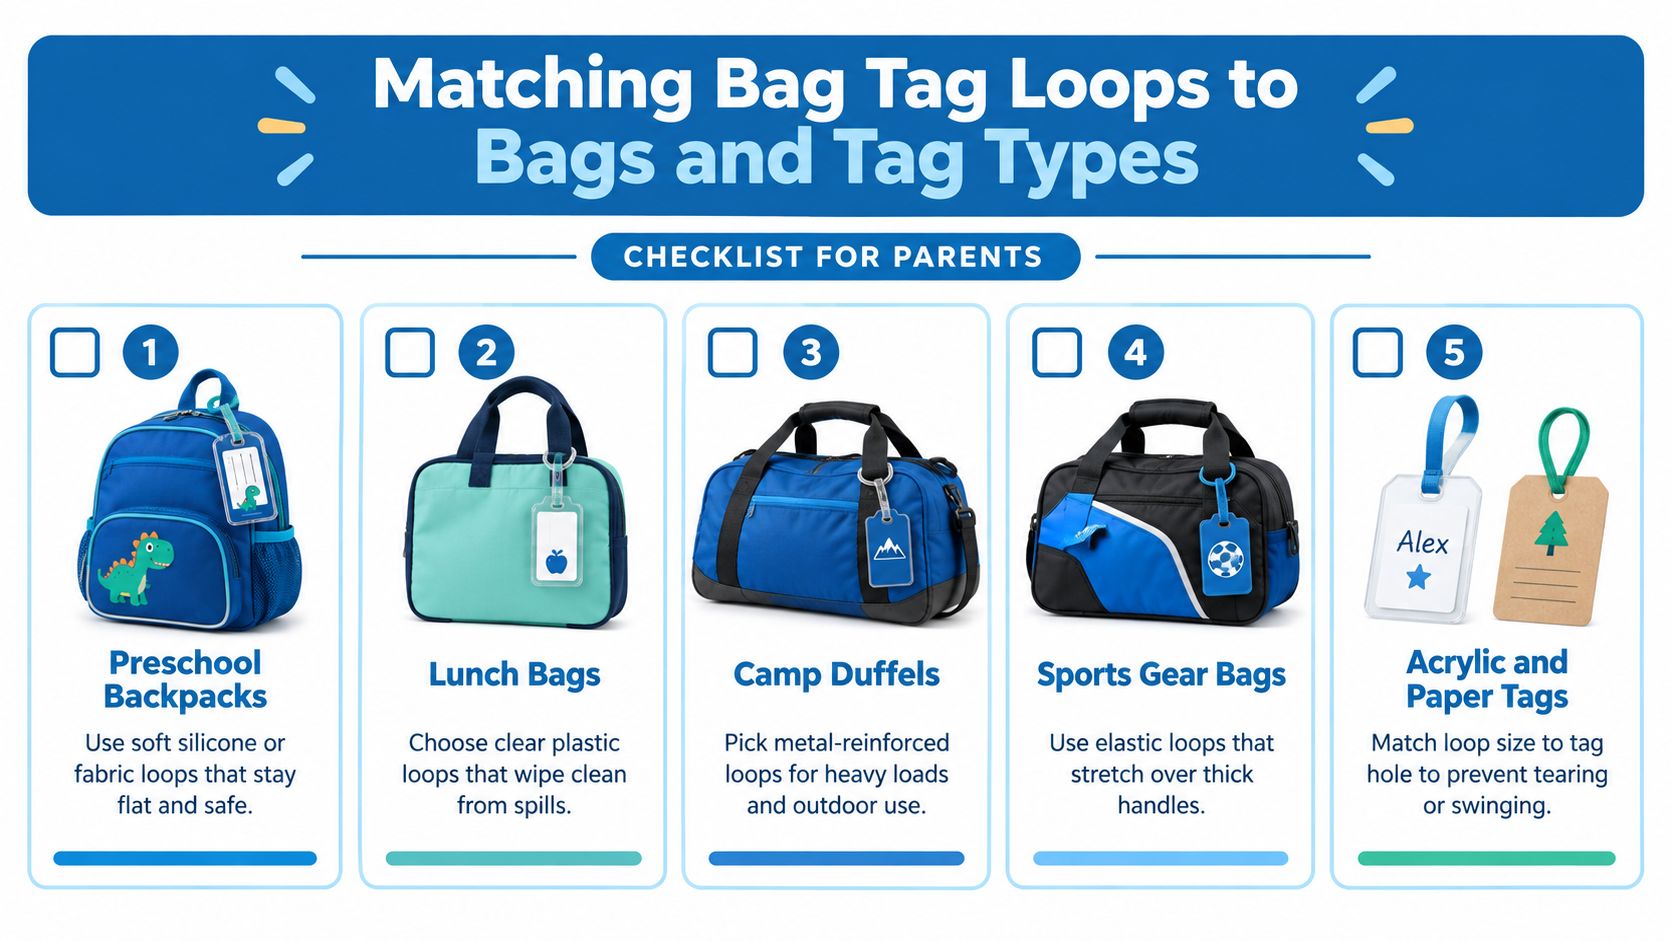
The best loop is the one that fits both the bag and the child using it. A small preschool backpack may need a soft, flat connector, while a camp duffel needs an attachment that tolerates outdoor handling. A tag loop should also fit the tag opening without forcing the material against a sharp edge.
Start with the bag's daily routine
For a preschool backpack, choose a soft silicone, elastic, or fabric connector that lies flat against the handle. Young children often pull bags from hooks quickly, so avoid a setup that leaves a long swinging tail.
Lunch bags need a different kind of practicality. Food spills and sticky fingers make wipe-clean surfaces valuable, so a clear plastic loop can be a sensible fit. Keep the tag near the handle rather than near a zipper that opens and closes throughout the day.
Camp duffels and sports bags face more handling. If adults, teammates, or siblings carry the bag by different parts, choose a reinforced or metal-supported connector and inspect the attachment after trips. Families comparing larger gear can browse backpacks while checking the handle shape, strap width, and likely tag location.
Match the connector to the tag
A flat plastic tag usually moves easily through a standard loop. A thicker acrylic tag, allergy alert tag, or rigid name plate needs a connector that fits its hole without bending the tag edge.
Use this quick decision guide:
- For a narrow tag opening: Choose a slim loop that passes through without forcing or scraping.
- For a thick handle: Use a flexible connector with enough room to close without stretching tightly.
- For a large grommet: Select a loop or tie that fills the opening well, so the tag doesn't swing excessively.
- For allergy information: Keep the alert message facing outward and position it where caregivers can see it without turning the bag.
- For rolling luggage: Favor a connector that resists snagging around telescoping handles and baggage hooks.
One behavior deserves special attention. Some children grab the tag itself when lifting a bag. That makes the handle attachment point more than a placement preference. It gives the tag a better chance of staying connected when a child uses the wrong part of the bag.
For visual identification beyond printed names, photo bag tags can help children recognize their own belongings, particularly before they can read confidently.
Simple Installation and Everyday Care Tips
A good loop shouldn't require a complicated setup. Place the tag where the name faces outward, the connector sits flat, and the bag can still hang normally.
Install it in a few calm steps
- Choose the anchor. Find the sewn handle or sturdy strap closest to where you want the tag to hang. Don't use a loose zipper pull if the handle is available.
- Check the path. Hold the tag beside the handle and make sure it won't block a zipper, cover a reflective strip, or catch on the cubby hook.
- Thread without twisting. Pass the loop through the handle and tag opening. Smooth the connector before closing it.
- Secure the closure. Snap, buckle, or tighten the loop until it no longer slides freely. Don't leave a large gap between the connector and the tag.
- Trim carefully. If the attachment is a cut-to-fit tie, remove excess material so it can't scratch or catch, but don't leave a sharp edge facing the child.
- Do a tug check. Pull the bag gently by its handle, then look at the tag. It should stay attached and face outward.
One-minute check: Handle, thread, close, tug, read. If you can complete those five actions, the tag is ready for the cubby.
Care takes very little time when it becomes part of the regular bag routine. Wipe the tag with mild soap and water after messy days, and avoid harsh solvents on printed surfaces. Examine the loop for abrasion, stretching, fading, cracks, or a closure that no longer clicks firmly.
A daycare team may also want a simple DIY school supply guide when preparing labeled materials and organizing shared classroom gear. The same habit applies to bag tags: check the small attachment before the busy morning begins.
Replace a loop when it shows visible wear, even if the tag itself still looks perfect. The connector is the part exposed to pulling, sunlight, rubbing, and repeated movement, so it can need attention first.
Choosing Bag Tag Loops That Last Through the School Year
A durable setup comes from three decisions made together. Choose the material for the environment, the attachment method for the amount of pulling, and the placement for the way the child handles the bag.
For a daily daycare backpack, a clear plastic, silicone, or woven loop may provide the right balance of visibility and comfort. For a lunch bag, prioritize an easy-to-clean connector and a tag that stays away from the zipper. For camp, travel, or shared sports equipment, move toward reinforced webbing, a cable-tie style closure, or a metal-supported loop.
Keep the decision simple:
- Where will the bag go? Cubbies, playgrounds, cars, buses, airports, and outdoor camps create different wear.
- Who will handle it? One child, several children, coaches, caregivers, and volunteers may all pull from different places.
- What must stay visible? A name, photo, allergy alert, team role, or recovery instruction needs an outward-facing position.
- What should you inspect? Check the loop, closure, hole, stitching, and tag edge, not only the printed name.
Bag tag loops aren't decorative extras. They're the working connection that keeps a child's belongings identifiable through ordinary movement and imperfect handling. When the connector matches the bag and the child, pickup becomes calmer and replacement searches become less frequent.
For an easy starting point, explore InchBug for personalized bag tags and kid-friendly labels, including options supplied with clear plastic loops for attaching to backpacks, lunch bags, gym bags, and luggage. Choose the tag style that fits your child's routine, attach it to a sturdy handle, and give it a quick tug check before the next busy pickup.