
Sending your little one off to daycare is a huge step, and you’ve probably got a mountain of tiny clothes ready to go. But welcome to the daycare black hole, where socks, sweaters, and mittens seem to vanish without a trace. If you’re a new parent, the sheer volume of stuff that goes in and out of that classroom door can be a real shock.
Let me tell you, a good system for labeling clothes isn't just a suggestion from the daycare handbook—it's a survival tactic.
Why Labeling Daycare Clothes Saves Your Sanity
A solid labeling strategy does more than just stop things from getting lost. It brings a little order to the daily chaos, saving you precious minutes during those hectic morning drop-offs and saving you money on replacing yet another missing mitten. Getting ready for a baby comes with a lot of new challenges and preparations; you can find more great tips in this guide to first-time mum essentials.
The Real Cost of Lost Items
Losing one little sock might not seem like a big deal, but trust me, it adds up. Think about that favorite hoodie that’s a guaranteed tantrum-stopper, the only pair of shoes that fit just right, or the pricey snowsuit you bought for winter. Replacing these isn't just a drain on your wallet; it's a huge, unnecessary stress.
This is a struggle for so many parents. In the U.S. alone, where over 12 million kids under six are in daycare, lost items are a daily battle. One survey even found that 70% of parents lose at least one item a month when they don't use labels. On the flip side, daycare staff say that using combo label packs can slash mix-ups by as much as 65%. It just goes to show how a tiny investment in organization can make a huge difference.
A well-labeled item is a found item. Taking ten minutes to label a new batch of clothes can save you hours of searching and hundreds of dollars over the year.
More Than Just Clothes
Beyond the money, clear labels bring a few other key benefits that make the whole daycare experience smoother for you, your child, and the teachers.
- Keeps Things Hygienic: Clearly marked items stop kids from accidentally sharing clothes, hats, or blankets. In a classroom setting, this is a big deal for keeping everyone healthy and cutting down on the spread of germs.
- Helps Out the Teachers: Daycare teachers have their hands full! When every coat, hat, and boot is clearly labeled, they can quickly figure out what belongs to who. It makes cleanup faster and ensures every kiddo goes home with the right gear.
- Empowers Your Child: As toddlers get a bit older, seeing their name on their things helps them learn about ownership and responsibility. It’s a small step, but it’s a meaningful one. You can learn more about how labels make sense for kids in our detailed article.
Choosing The Best Labeling Method For Your Family
When it comes to marking clothes for daycare, let’s be real: there isn't one perfect solution for every family. The best method really depends on your life, the kind of clothes your kiddo wears, and frankly, how much time you have on your hands. Some mornings call for a quick fix, while other times you want a permanent option for that pricey little uniform.
Let's break down the most popular choices so you can find what genuinely fits your family's needs. Understanding the good, the bad, and the why behind each option will help you build a system that actually sticks.
Sometimes, a picture just says it all. This little chart is the perfect visual for the path to daycare prep sanity.

As you can see, that one simple decision to label everything leads directly to saving your sanity—a major win for any parent navigating the wonderful chaos of early childhood.
To help you decide, I've put together a quick comparison of the most common labeling methods I've used and seen over the years.
Comparing Daycare Clothing Label Types
This table breaks down the pros and cons of each popular clothing label type, helping you quickly see which one might be the best match for your family's routine and your child's wardrobe.
| Label Type | Best For | Durability (Wash/Dry) | Application Time | Removability |
|---|---|---|---|---|
| Adhesive Labels | Quick, bulk labeling; items with clear care tags; parents short on time. | Good (when applied to care tag) | Seconds | Easy (peels off tag) |
| Iron-On Labels | Uniforms, jackets, and frequently washed items needing a strong bond. | Excellent | 5-10 minutes per batch | Difficult |
| Sew-On Labels | Hand-me-downs, heirloom items, or anyone wanting maximum durability. | The Best | 15+ minutes per item | Can be removed |
| Fabric Marker | Last-minute needs, budget-friendly labeling, items like socks. | Fair (can fade over time) | Seconds | Permanent |
Each method has its place in a busy parent's toolkit. It’s all about matching the tool to the job at hand!
Adhesive Clothing Labels: The Quick and Easy Win
Adhesive labels, like InchBug’s TagPals, are an absolute lifesaver for busy parents. Think of them as super-durable stickers made specifically for the satin care tag on clothes. You don't need an iron or a needle, which makes them an incredibly fast solution when you've got a mountain of tiny clothes to get through.
The biggest pro here is speed. You can honestly label a whole week's worth of outfits in just a few minutes, and they hold up surprisingly well in the wash. The trick is making sure you apply them correctly—they must go on the care tag, not the fabric itself, to get that staying power.
Iron-On Labels: The Semi-Permanent Solution
If you're looking for something with a bit more staying power than a sticker, iron-on labels are your answer. Using a hot iron, you fuse these labels right into the fabric fibers. This creates a really durable name tag that can handle a ton of wash cycles without budging.
I find this method is fantastic for items that see heavy action, like coats, snow pants, or school uniforms. The trade-off is the time it takes. It's definitely more involved than peel-and-stick; you have to get the iron hot, press firmly, and make sure you get a complete seal.
Sew-On Labels: The Ultimate in Durability
For true, will-never-come-off permanence, you can't beat a classic sew-on label. This is the old-school method for a reason: stitching a fabric tag onto a garment is by far the most durable option out there. It’s practically guaranteed not to fade, peel, or wash away.
Sew-on labels are my top pick for special items—think hand-me-downs you want to pass on again, that expensive winter jacket, or handmade pieces. Of course, the biggest hurdle is the time and skill it takes. Unless you're comfortable with a needle and thread, this can feel pretty slow and tedious.
The sheer volume of kids' clothing is staggering. In 2023, the global apparel industry produced over 74 billion clothing items. For parents, just making sure their child's handful of pieces don't get swallowed by the daycare lost-and-found is a huge priority.
Fabric Markers: The Instant Fix
Sometimes, you just need it done now. A permanent fabric marker is the most direct, no-fuss, and budget-friendly way to mark clothes. You just grab the marker and write your kid's name on the care tag or an inside seam. It's fast, simple, and you don't need any special supplies.
The main drawback is that marker ink tends to fade over time with lots of washing. It can also bleed on certain fabrics, so I always recommend doing a little test spot somewhere hidden first. But for that brand new pair of socks you bought five minutes before leaving for daycare? A marker is perfect. If you're still weighing your options, our guide on which daycare labels you should buy offers some more great comparisons.
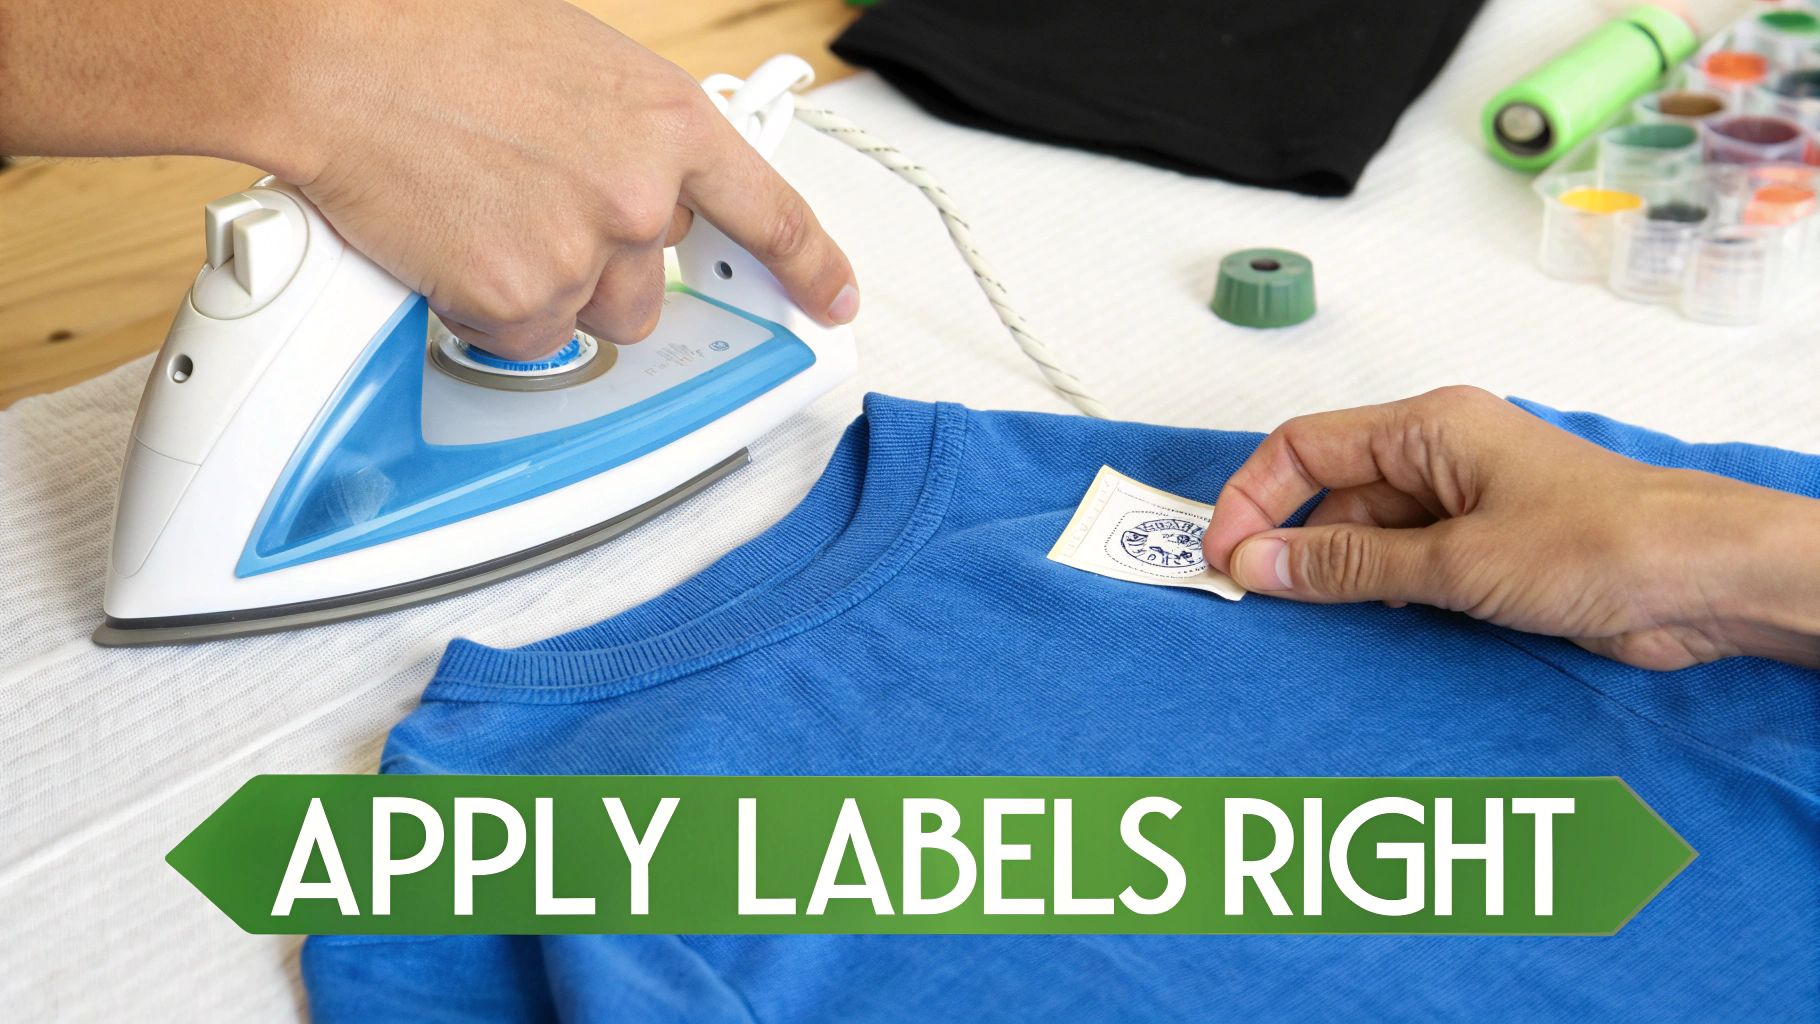
How To Apply Clothing Labels That Actually Last
Picking out the perfect label is a great start, but how you put it on is what makes it stick around through daycare adventures and endless laundry cycles. I learned this the hard way! Proper application is the secret ingredient, and taking a few extra moments now can mean the difference between a label that peels off after one wash and one that stays put until your kiddo outgrows the clothes.
Before you do anything, make sure you're working with clean, dry clothes. Any lingering dirt, oils, or even fabric softener residue can mess with the adhesive, whether you're using an iron-on or a sticker. A quick wipe of the area can work wonders.
Mastering Iron-On Label Application
Iron-on labels are durability champs, but they do require a little bit of patience. Don’t rush this part—the goal is to literally melt the label's adhesive into the fabric fibers, creating a permanent bond.
- Prep Your Iron: Turn your iron to the temperature suggested by the label maker. This is usually a medium-high setting, and—this is important—make sure there’s no steam. Steam adds moisture, which is the enemy of a good seal.
- Get It in Position: Lay the label on a flat part of the garment, like just below the back collar or on an inner seam. Cover it up with the little piece of parchment paper that came with the labels (or just use a thin, dry cloth).
- Press and Hold Firmly: Now, press the hot iron down flat and firm right on top of the covered label. You'll want to hold it there for about 15-20 seconds. The key is direct, even pressure—don't slide the iron around like you're getting wrinkles out.
- Let It Cool, Then Check: Let the spot cool down completely. Once it's cool to the touch, try to gently pick at a corner with your fingernail. If it lifts at all, just repeat the pressing step for another 10 seconds.
This method is fantastic for all those cotton and polyester-blend t-shirts, pants, and daycare uniform pieces.
Smart Placement for Maximum Visibility
Where you stick the label is just as important as how you stick it on. You need a spot that's easy for a busy daycare teacher to find but won't be scratchy or annoying for your child. I’ve found that consistency is everything; if you always put labels in the same spot on shirts, pants, etc., you make life easier for everyone.
- T-Shirts and Sweaters: The satin care tag at the neck or side seam is prime real estate for adhesive labels. For iron-ons or a fabric marker, the fabric right below the collar on the back is perfect.
- Pants and Shorts: That care tag is your best friend again. If the tag is missing, the inside of the waistband near the back is a nice flat, out-of-the-way surface.
- Socks: Ah, the dreaded sock labeling! I've had the best luck applying a small iron-on label to the sole of the sock, right in the arch. If I'm using a marker, a quick initial on the bottom works, too.
- Jackets and Coats: Check for the manufacturer's tag or a fabric loop for hanging. The inside lining near the bottom hem is another great spot that stays hidden during wear.
Pro Tip: For tagless clothes, you can create your own "tag" by putting an iron-on label on an interior seam. This gives you a smooth surface to stick an adhesive label onto later if you need to re-label.
Tips For Other Label Types
If you're going a different route, a few little tricks can make all the difference.
When using a fabric marker, try to write on the care tag first. The ink is way less likely to bleed on that slick material. If you absolutely have to write on the fabric itself, do a tiny test dot on an inside seam to see how it behaves.
For classic sew-on labels, using a strong polyester thread will give you the most bomb-proof result. You don't need to be an expert seamstress; a simple running stitch around the edge is all it takes to keep it secure for years.
Making Sure Those Labels Actually Last
Okay, so you’ve applied the labels. Now for the real test: daycare. This is where labels face their ultimate challenge—mud puddles, playground shenanigans, and the never-ending spin cycle of the washing machine. Making sure that little label stays put is what makes all this effort worth it.
Your first line of defense is how you do the laundry. I’ve found that one tiny habit makes a huge difference: turning labeled clothes inside out before tossing them in the wash. It’s a small step, but it protects the label from getting snagged by zippers, buttons, and just general friction.
Also, think about the temperature. Heat can be the enemy of many adhesives and inks. Whenever you can, choose a cold or warm wash cycle. Hot water can really weaken the bond of iron-on and stick-on labels over time.
Smart Drying and Quick Fixes
The dryer is another place where things can go wrong. I learned this the hard way! High heat is notorious for making adhesive labels peel at the corners or causing iron-on labels to bubble up. Your safest bet is to tumble dry on a low or medium setting.
If you have the time and space, air-drying is the absolute best way to make a label last forever. I especially do this for outerwear or items with those more delicate iron-on labels.
Even with the best care, you might see a label starting to give up. Don't worry, it's usually an easy fix.
- A Peeling Sticker: If you notice a corner of an adhesive label lifting, just wait until the garment is dry and press it down firmly. Most of the time, just reapplying that pressure is enough to get it to stick again.
- Fading Marker: A fabric marker is going to fade a bit with washing. It just happens. A quick touch-up every couple of months is all it takes to keep your kid's name easy to read.
- Curling Iron-On Edges: Don’t panic if an iron-on label starts to curl. Just grab some parchment paper, place it over the label, and press it again with a hot, dry iron for 10-15 seconds. This usually reactivates the adhesive and seals it right back down.
When it comes to sew-on labels, their durability really boils down to your supplies. The longevity of your hard work often depends on choosing the strongest sewing thread you can find.
Built for the Daycare Grind
Some labels are just made tougher than others. Products like InchBug's waterproof and fade-resistant laundry labels are engineered specifically for this kind of wear and tear. They use materials that are designed to stand up to detergents and countless wash cycles. You can learn more about these specialized laundry-safe clothing labels that are built to last.
Keep in mind that the care tags on clothing aren't just suggestions; they provide the essential washing instructions that preserve the garment—and the name label you've attached to it. The global market for these tags was valued at US$543 million in 2024 for a reason!
By putting a little thought into how you apply your labels and how you launder the clothes, you can make sure your labeling system works all school year long.
Creative Labeling Strategies For Daycare Pros
Once you've got the basics down, it's time to level up your organization game with a few strategies that seasoned parents absolutely swear by. These aren't just about slapping a name on a tag; they’re about creating a foolproof system that makes everything from chaotic morning drop-offs to sorting that mountain of laundry a whole lot easier. Smart labeling is really about making life simpler for everyone.
This kind of organization is more than just a nice-to-have. The kids' clothing market is expected to grow from USD 272 billion in 2025 to 344 billion by 2032, and that's a lot of tiny clothes to keep track of! Parents report up to 80% fewer lost items with a good labeling system, which is a massive win.
Tailor Labels to Your Child's Age
One of the smartest things I learned was to customize labels for my child's developmental stage. A simple name is fine for older kids, but toddlers are pre-readers, and a different approach works wonders.
- For Toddlers and Preschoolers: Use labels that have their name plus a simple, recognizable icon—think a star, a car, or a dinosaur. This little trick empowers them to spot their own belongings, which cuts down on mix-ups and gives them a sweet little boost of independence.
- For Multiple Kids: If you're juggling more than one kid at the same daycare, color-coding is an absolute game-changer. Just assign each child their own color for their labels. You'll be amazed how fast you can sort clothes, bottles, and bags. It's a lifesaver for daycare staff, too.
Create a Dedicated Labeling Station
Here's a tip that will make marking clothes a seamless part of your routine: set up a small "labeling station" at home. It doesn't need to be anything fancy—a little drawer or a basket in the laundry room is perfect.
By keeping all your supplies in one spot, you eliminate that frantic, last-minute search for a marker or a sheet of labels when you realize a new jacket needs to be prepped. It honestly turns a chore into a quick, two-minute task.
Stock your station with your labels of choice (adhesive, iron-on, etc.), a fabric marker for quick fixes, and whatever other tools you use. Make it a habit to take new clothes straight to the station for labeling before they even hit the closet.
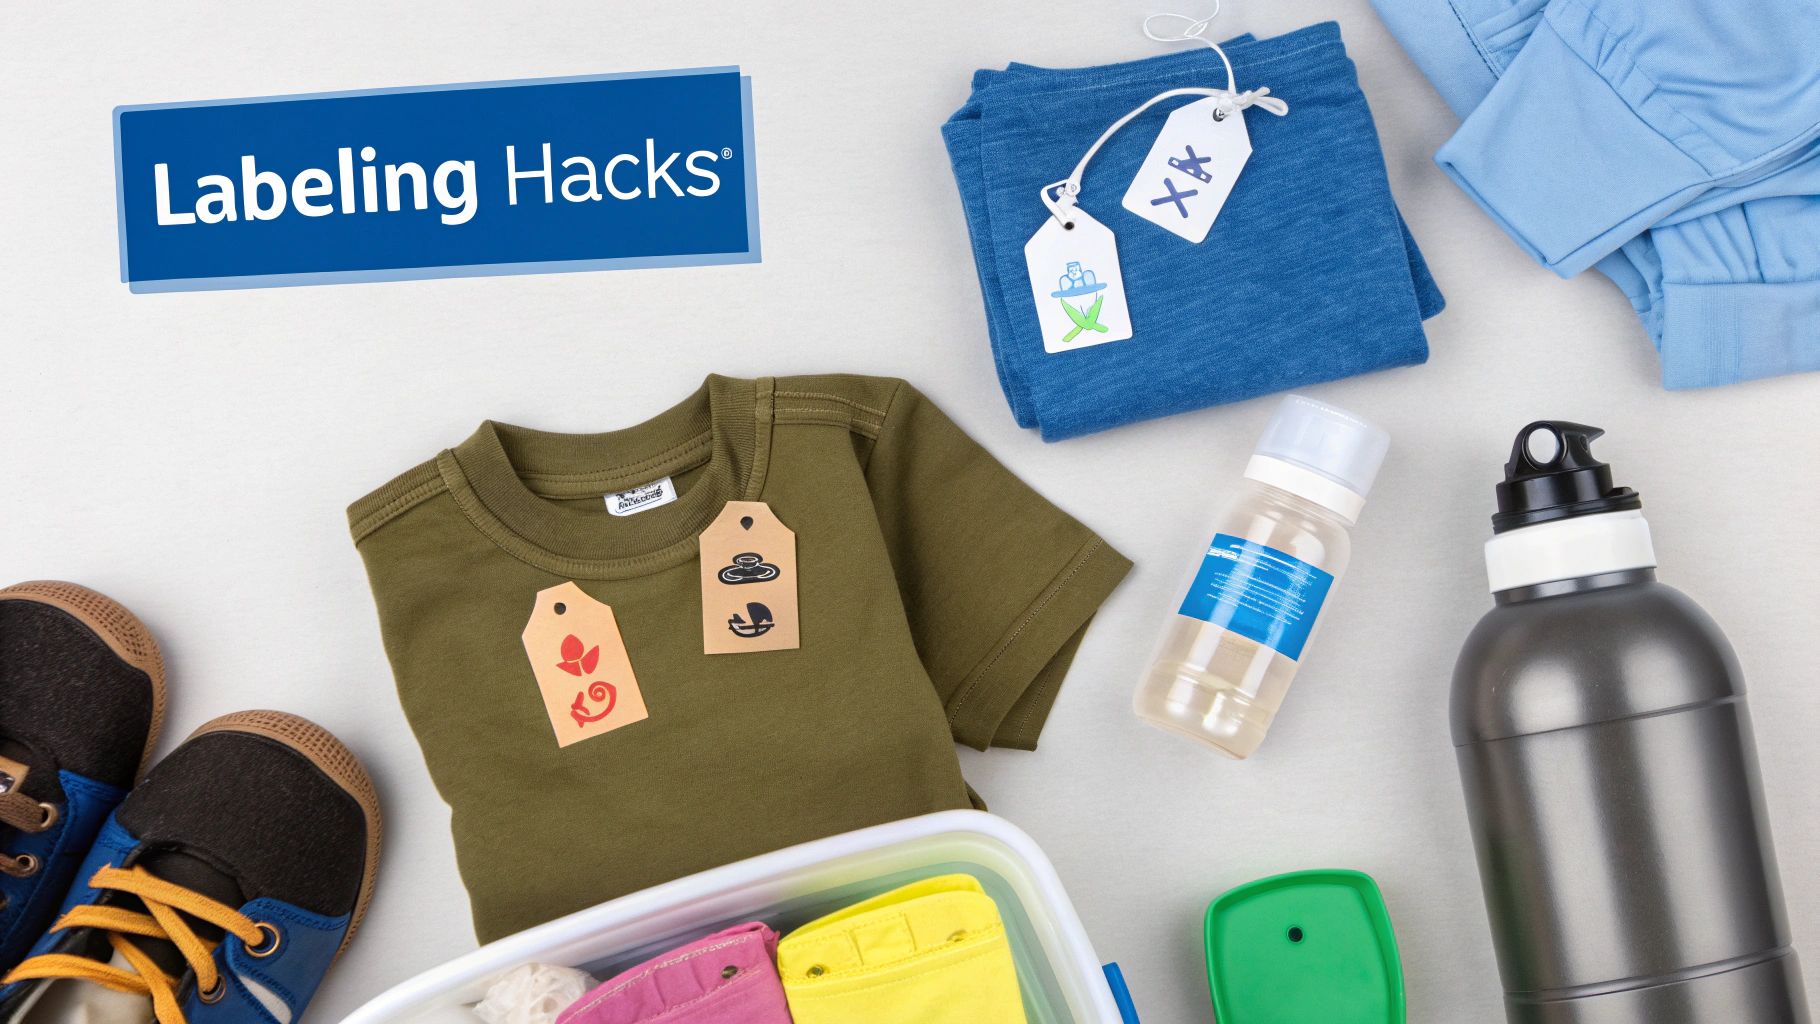
Labeling Beyond The Clothes
Your organizational system shouldn't just stop with t-shirts and pants. As any daycare parent knows, you have to label pretty much everything that leaves the house. Luckily, versatile labels make this pretty simple.
- Shoes: Products like InchBug's ShoePals are designed to fit perfectly inside a child's shoes. They're great because they not only mark ownership but can also help little ones learn left from right.
- Bottles and Lunch Gear: For water bottles and sippy cups, a reusable, stretchy band like an Orbit Label is a fantastic non-adhesive solution. It’s super durable and can be moved from one item to the next as needed.
- Bags and Backpacks: Don't forget the bag itself! A sturdy bag tag with your child's name and an emergency contact number is an absolute must-have for their daycare bag.
When you extend your labeling system to all your child's gear, you’re creating a cohesive strategy that gives everything the best possible chance of making it back home.
Your Top Questions About Marking Daycare Clothes, Answered
Even with a plan, you'll inevitably run into a few tricky items when you're facing that mountain of tiny laundry. I get it! Let's tackle some of the most common questions I hear from parents when it comes to getting those names to stick.
How Do I Label Tagless Clothes?
It seems like more and more kids' clothes are tagless these days, which is great for comfort but a real pain for labeling. That little satin care tag is the perfect spot for an adhesive label, so what do you do when it's gone?
My go-to solution is an iron-on label. Find a smooth, out-of-the-way spot on the inside of the garment, like right below the printed tag on the collar or along an inner side seam. This gives you a permanent label that won't irritate your child's skin. A fabric marker works well in these same spots, too.
What Is The Best Way To Label Socks?
Ah, the dreaded sock pile. They stretch, they don't have tags, and they disappear into another dimension in the wash. I’ve found the most reliable method is a small iron-on label applied right to the sole of the sock, in the arch area. This spot gets less friction from the shoe, which helps the label stay put way longer.
If you're in a hurry, a permanent fabric marker is your best friend. A quick initial on the bottom of each sock is all it takes to prevent mix-ups.
How Can I Remove Old Labels For Hand-Me-Downs?
Passing clothes down is one of the best parts of having kids—it saves money and is so much better for the planet. Getting those old labels off is just part of the hand-off.
- Adhesive Labels: Most good-quality adhesive labels, like TagPals, are designed to be removed. Just get a corner started and peel it off slowly. If there's any sticky stuff left behind, a dab of rubbing alcohol on a cotton ball will take it right off.
- Iron-On Labels: These are tougher by design, which is great until you want to remove them! You can usually get them off by placing a thin, dry cloth over the label and pressing it with a hot, steamless iron for about 15 seconds. While it's still hot, carefully use tweezers to peel it off.
- Sew-On Labels: The easiest of all! A seam ripper or a pair of small scissors is all you need. Just carefully snip the threads holding the label in place.
When you're passing clothes along, putting a fresh, new label on is just as important as taking the old one off. It keeps things clear at daycare and gives the next little one a sense of ownership.
Will Regular Permanent Markers Work?
You can definitely use a regular permanent marker if you're in a pinch, but it’s not a great long-term solution. The ink in standard markers tends to fade fast in the wash and can bleed through thinner fabrics, leaving a messy-looking shadow on the outside.
For a name that actually lasts, always go for a laundry-specific fabric marker. The ink is formulated to be waterproof and stand up to detergent and high heat, keeping that name clear and readable for a lot longer.
Ready to conquer the daycare chaos with labels that actually last? InchBug offers a full range of durable, kid-friendly labeling solutions—from our famous TagPals to versatile Orbit Labels for bottles. Check out all our daycare labeling solutions.