

You're halfway out the door when you spot the problem: your child's bottle is clean, but the name label has a lifted corner. The lunchbox went through the dishwasher, and part of the name has faded or peeled away. A school shirt comes out of the dryer with an edge curling up. Suddenly, the small system meant to prevent mix-ups has become another thing to fix before drop-off.
Label care instructions work best when they follow the item, not just the symbol on the package. Bottles, lunchboxes, shoes, bags, and clothing face different combinations of moisture, heat, detergent, friction, and stretching. The right routine for a reusable bottle label isn't automatically the right routine for a garment label.
Why InchBug Labels Sometimes Peel and How to Stop It
A peeling label usually isn't random bad luck. It's evidence that one part of the application or washing routine didn't match the surface. I've seen the same pattern repeatedly: a sippy cup comes out of the dishwasher with one corner curling, while a lunchbox label loses its name around the lid where water and detergent collect.
Four causes account for most early failures:
- Surface contamination: Lotion, sunscreen, grease, dust, and detergent residue prevent the adhesive from contacting the material directly.
- Premature washing: Water reaches the edges before the adhesive has finished bonding.
- Heat stress: High dishwasher or dryer temperatures soften the adhesive and encourage edges to lift.
- Partial application: A label pressed only in the center can leave corners vulnerable to moisture and friction.
Pressure-sensitive adhesive needs three things to perform reliably: a clean substrate, firm pressure, and enough time to establish its bond. Applying a label to a bottle that has just come out of the dishwasher creates a poor starting point because the surface may still be warm or damp. Rushing straight from application to the first wash creates a similar problem.
Practical rule: Treat the first day after application as part of the label-care process, not as waiting time you can skip.
The InchBug label adhesion test is useful when you're trying to understand whether a label is failing because of the product, the surface, or the routine. In everyday use, the fix is usually straightforward: clean and dry the item, apply at room temperature, press across the entire label, and protect it from washing until the adhesive has cured.
The rest of the process depends on the item. Bottles need careful dishwasher placement, clothing needs a lower-friction laundry routine, and reusable labels need a clean reset rather than repeated repositioning.
Preparing Surfaces Before You Apply Any Label
The first wash often decides whether a label becomes a reliable part of a child's gear or starts lifting before the week is over. Surface preparation matters more than pressing harder after contamination has already formed a barrier between the adhesive and the item.
Start with a simple four-step routine:
- Wipe the application area with isopropyl alcohol, or rinse it with mild dish soap.
- Remove any soap or cleaning residue.
- Dry the surface completely.
- Check that the item is at room temperature before applying the label.
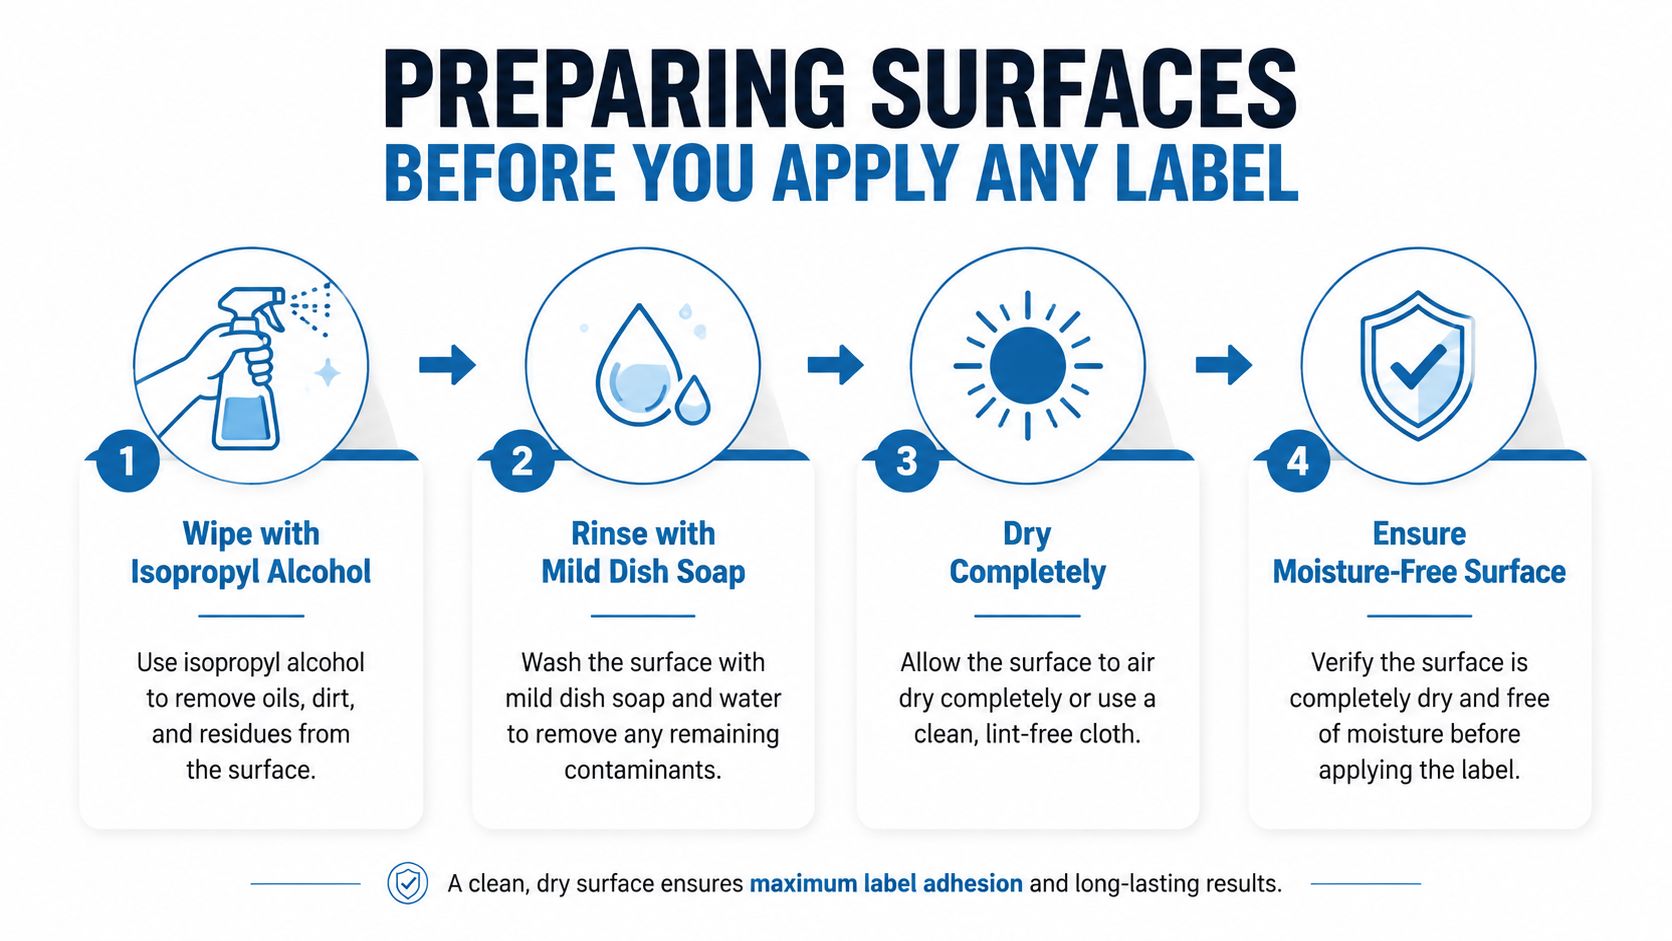
Moisture trapped beneath a label gives the adhesive an unstable surface. A warm bottle from the dishwasher can also soften the adhesive before it has formed a strong initial bond. Let the bottle, lunchbox, shoe, or bag cool naturally, then apply the label when both the item and the surrounding room feel comfortably dry.
Press the edges, not just the middle
Place the label carefully, then press across the whole surface for 30 seconds, paying extra attention to the perimeter and corners. Those areas face the first contact with water, detergent, pocket friction, and repeated handling.
For bottle application, the InchBug guide to applying labels to bottles provides a useful reference for positioning and adhesion. Avoid applying across ridges, deep curves, seams, or textured sections when a smooth nearby area is available. A flat surface gives the adhesive more consistent contact.
Protect the cure window
Most InchBug labels need roughly 24 hours at room temperature before their first wash. That delay feels inconvenient when you're labeling everything the night before daycare, but skipping it is one of the most common reasons an otherwise correctly applied label fails in the dishwasher.
Use the same approach for clothing labels. Clean and dry the care tag, apply the label smoothly, press firmly, and let it sit before laundering. If the morning rush leaves no time for curing, apply the next batch after the evening wash instead of exposing fresh labels immediately.
Dishwasher and Microwave Safe Habits
Dishwashers and microwaves create different problems, but they belong in the same household workflow. Both can expose a label to heat and steam, while the dishwasher adds detergent, spray pressure, and prolonged soaking.
For bottles and lunchboxes, the top rack is usually the safer position because it places items farther from the heating element. Avoid sanitize settings when possible. The plan notes identify these cycles as often running above 150°F, which can soften adhesive edges and speed up lifting. Commercial or steam-cycle dishwashers used by schools and daycare facilities can be even more demanding than a home machine.
Detergent also matters. Chlorine bleach, citrus boosters, abrasive powders, and harsh alkaline formulas can shorten label life. Standard dishwasher tablets or powder are generally a gentler choice than adding extra cleaning agents. The relevant durability benchmark, EN 12875-1 and EN 12875-2, evaluates repeated dishwasher exposure and includes inspection for visible damage after set cycles. A practical threshold cited for dishwasher-safe performance is 125 cycles, while more demanding durability claims may test 250 or 500 cycles. See the European dishwasher-resistance testing reference for the testing framework.
A shared heat and moisture routine
Microwave use needs a little judgment. Steam can collect beneath a label, especially when a lid is sealed during reheating. Vent the lid according to the container's instructions, and consider placing a paper towel over the label area when reheating food in a labeled container. Short reheating periods, kept under two minutes when practical, reduce prolonged heat exposure.
| Appliance habit | Safe practice | Avoid |
|---|---|---|
| Dishwasher placement | Use the top rack whenever possible | Direct exposure near the heating element |
| Cycle selection | Choose a standard wash cycle | Sanitize, commercial, or steam cycles |
| Detergent | Use a standard tablet or powder | Chlorine bleach and citrus boosters |
| Microwave use | Vent lids and cover the label area with a paper towel when suitable | Sealing steam against the label |
| Inspection | Check edges after washing | Ignoring early lifting |
For a product-specific reference, review InchBug dishwasher-safe name labels. A label that starts lifting at the edge should be replaced or reset promptly. Waiting allows water and detergent to travel farther beneath the adhesive.
Laundry and Clothing Label Care
Clothing labels need a separate routine because garments experience agitation, twisting, detergent contact, stain treatment, and dryer heat. A bottle stays rigid. A shirt bends and stretches with every wash.
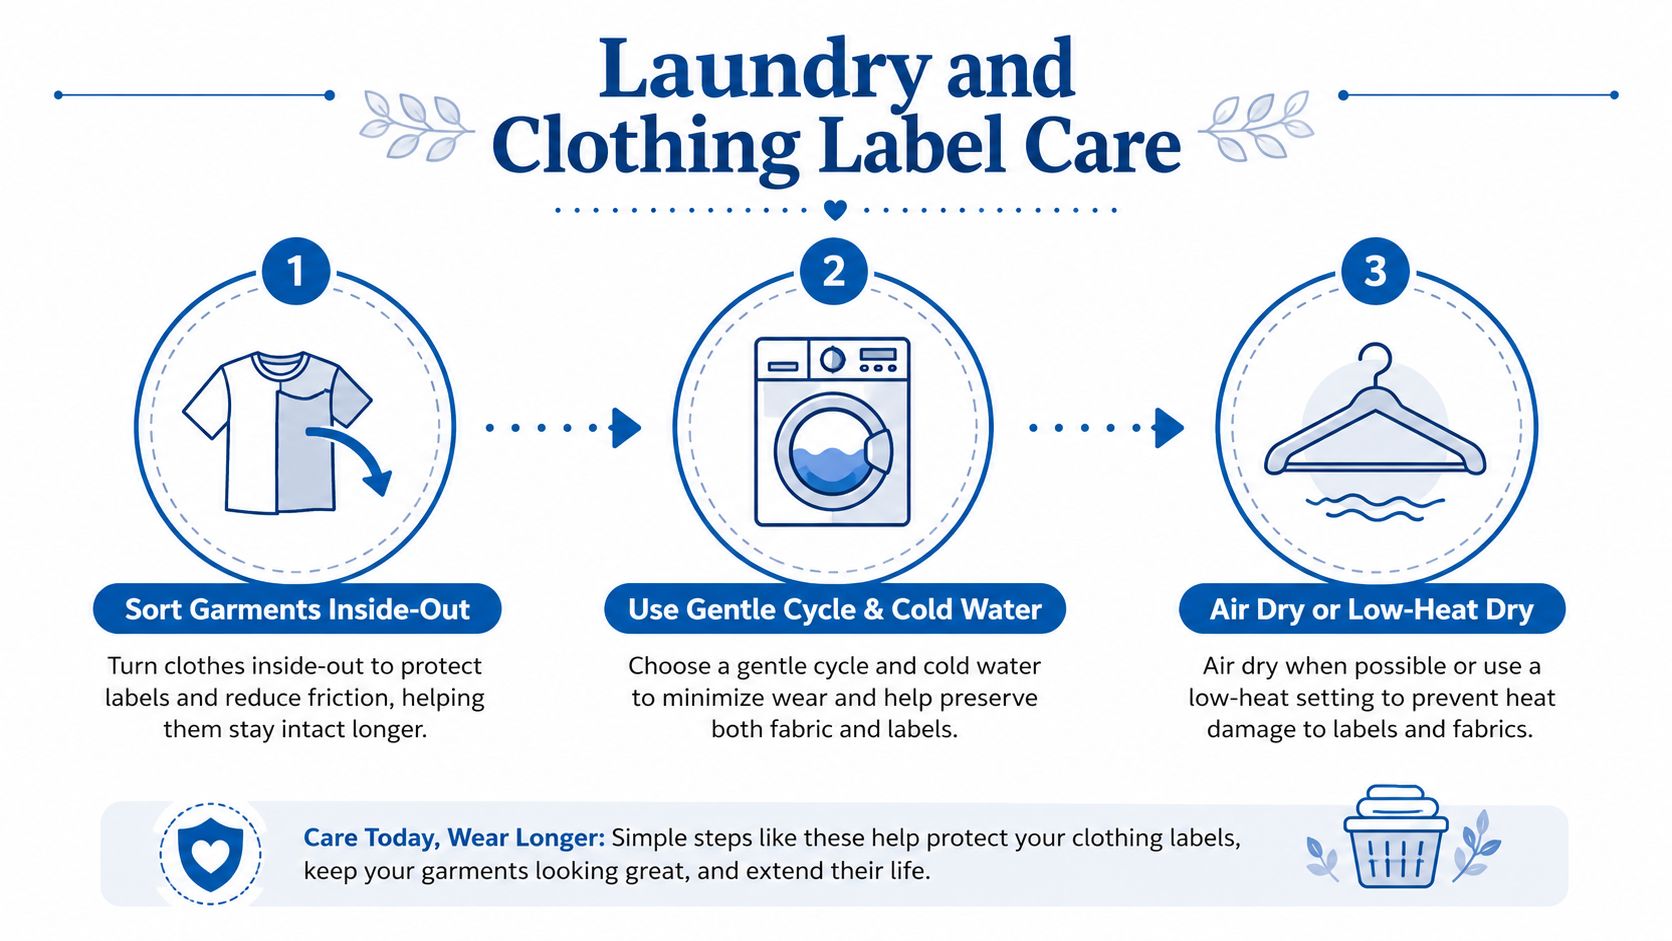
Turn labeled garments inside-out before washing. This places the plain fabric against much of the friction inside the machine and keeps the printed label area from rubbing directly against other garments. Use cool or warm water, and skip hot cycles above 130°F. Standard detergent is suitable for routine washing, but keep bleach and oxygen brighteners away from the label area whenever possible.
Match the label to the garment
For TagPal-style iron-on or stick-on labels used on uniforms, application pressure and cure time both matter. Press the label firmly onto the care tag or intended surface, then wait a full 24 hours before the first wash. That cure period gives the adhesive time to settle before water and agitation test the bond.
Drying is often where a good application starts to fail. Choose a low-heat tumble setting or hang the garment to dry. High dryer heat softens adhesive and encourages curling, especially at exposed corners.
Oil-based stains deserve careful treatment. Apply stain remover to the fabric away from the label boundary rather than saturating the label itself. Scrubbing directly across the printed face can cause abrasion, while aggressive rubbing at an edge can create the first lift.
Check clothing labels visually each month. A corner that has just started to rise may respond to firm re-pressing, provided the surrounding tag is clean and dry. If the label is blurred, damaged, or no longer attached across most of its surface, replacement is more dependable than trying to rescue it. InchBug machine-washable labels are designed for the repeated laundering that school clothing requires, but the care routine still determines how long the application remains readable.
Removing, Reusing, and Resetting Old Labels
A label that falls off during the school day often tells a useful story. The surface may have had lotion on it, the application may have been damp, or the item may have gone into a hot wash before the adhesive cured. The label is showing you where the routine broke down.
Remove an old label slowly. Lift one corner with a fingernail or plastic scraper, keeping the tool nearly parallel to the surface rather than digging downward. Plastic is safer than a metal blade for bottles and lunchboxes because it reduces the risk of scratches.
Once the label is off, deal with residue before applying anything new:
- Use a soft cloth: Put a small amount of rubbing alcohol on the cloth, not directly across the item.
- Work gently: Rub the adhesive residue without scraping the plastic.
- Rinse promptly: Remove any remaining alcohol and residue, then dry the surface fully.
- Inspect the substrate: Look for grease, texture, cracks, or a curved area that may have caused the first failure.
Reusable labels need a fresh application mindset. Warm the sticker slightly with a hair dryer on low to relax the adhesive, then move it to a dry, grease-free surface. Press firmly across the label for 30 seconds, concentrating on the corners.
Reusing a label doesn't mean skipping preparation. The second application still needs a clean surface and a full cure.
The reset process isn't complete until the label has had 24 hours before water exposure. If you transfer it in the morning and send the bottle straight through the dishwasher that evening, the same failure can happen again. The InchBug reusable labels for bottles can help when a bottle changes hands or a child moves between containers, but reuse works best when the adhesive and receiving surface are treated carefully.
What to Do and What to Avoid With Every Label
Most label failures come from quiet habits rather than dramatic mistakes. A parent applies a sticker over sunscreen, washes a freshly labeled bottle that evening, or uses an abrasive sponge on the printed face. Each shortcut seems harmless until the name becomes unreadable or the edge catches on a lunchbox zipper.
The most reliable routine is simple: clean first, press thoroughly, allow the adhesive to cure, reduce unnecessary heat, and act quickly when an edge lifts.
| Do | Don't |
|---|---|
| Clean the surface with rubbing alcohol or mild dish soap before application | Apply over lotion, sunscreen, grease, or detergent residue |
| Wait 24 hours before the first wash | Put a newly applied label straight into water |
| Use the top dishwasher rack | Run labels through sanitize cycles above 150°F |
| Wash clothing inside-out in cool or warm water | Use hot cycles above 130°F for labeled garments |
| Dry clothing on low heat or hang it up | Use high dryer heat on labels |
| Press the full label, especially its edges | Press only the center and leave corners loose |
| Replace a label when a corner lifts significantly | Ignore lifting until water reaches beneath it |
| Wipe residue with a soft cloth and rinse | Scrape plastic with a metal blade |
| Keep bleach and abrasive cleaners away from the printed face | Scrub directly across the lettering |
The Federal Trade Commission's care labeling guidance reinforces the broader principle behind these habits: care information needs to remain complete and legible throughout an item's useful life. For children's belongings, that means a label must stay readable under the actual routine it faces, not merely look intact on application day.
A Simple Care Routine for the Whole School Year
A good label routine shouldn't require a weekend project. A short Monday check catches small problems before they become a full relabeling job.
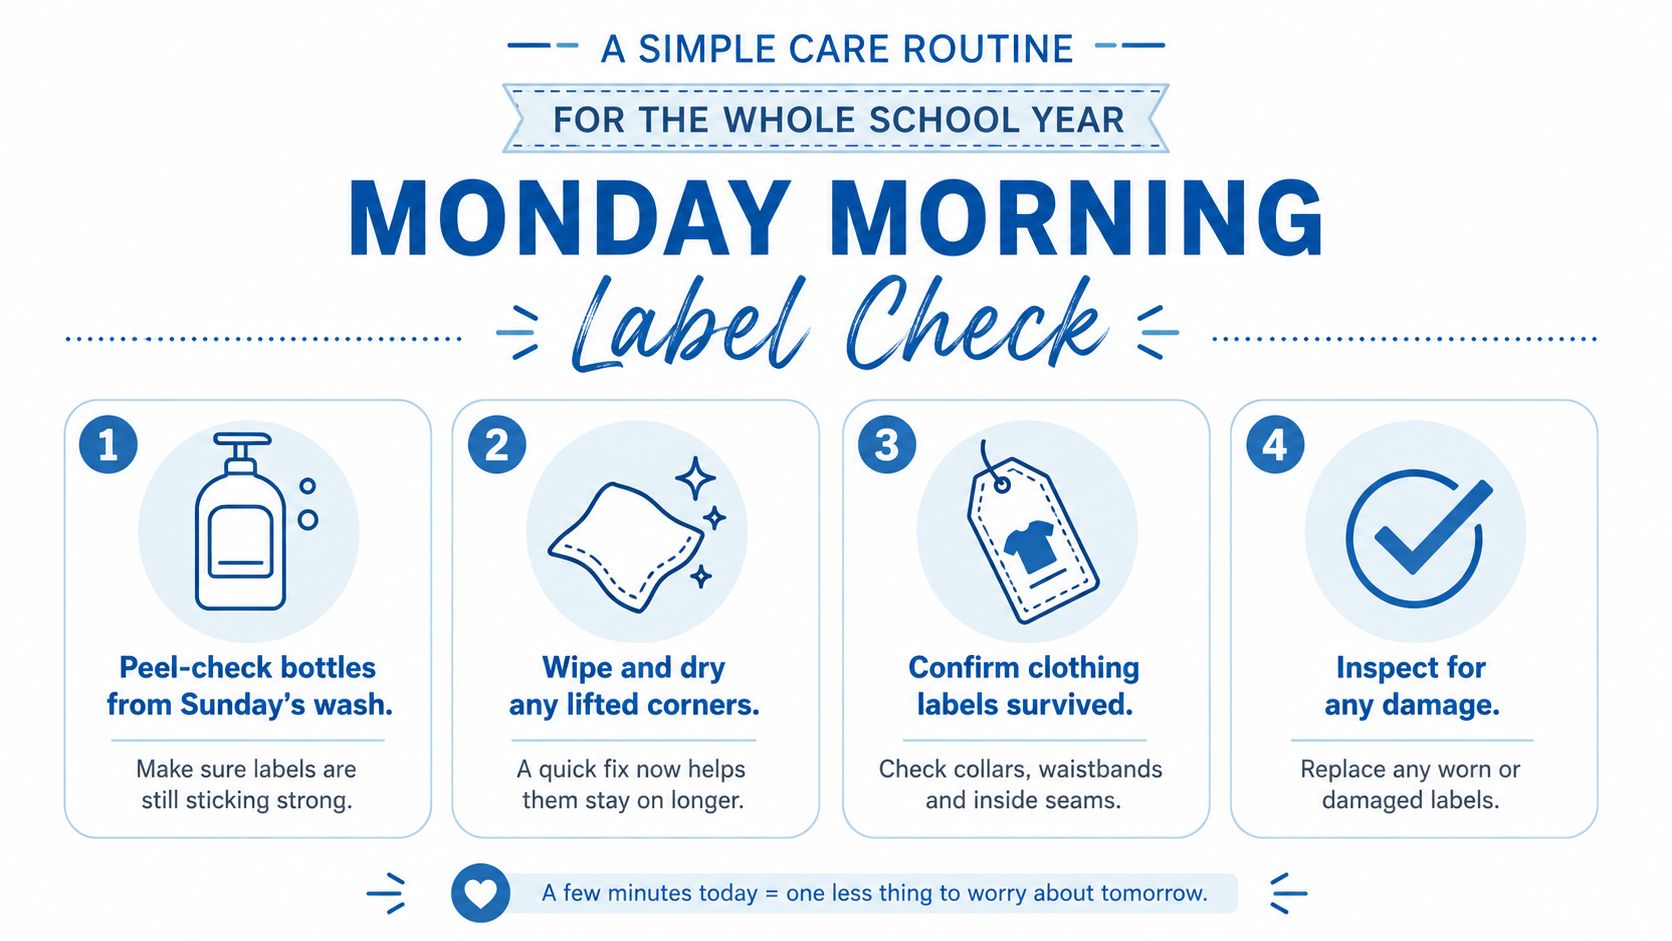
Start with the items that went through Sunday's wash. Look at bottle labels, lunchbox edges, shoe identifiers, and clothing tags while you're already unloading laundry and dishes. If a corner has lifted, wipe the area, dry it, and decide whether re-pressing or replacement makes sense.
The Monday morning check
- Peel-check bottles: Inspect items from Sunday's dishwasher load before filling them.
- Wipe lifted corners: Clean and dry any area where the label has started to rise.
- Confirm clothing labels: Check that names remain attached after the last laundry load.
- Inspect for damage: Look for fading, blur, tearing, or adhesive residue that could make the name hard to read.
- Restock the label drawer: Keep replacement labels, a soft cloth, and rubbing alcohol available.
- Reapply before urgency builds: Replace worn labels before the next field trip, sleepover, or clothing hand-me-down.
These checks take moments when they're part of the normal Monday rhythm. They take much longer when you wait until a child's entire lunch set, outerwear collection, and school uniform need attention at once.
A consistent routine also makes care instructions easier to follow because each item gets the treatment that suits it. Bottles stay on the top rack, garments go inside-out, and newly applied labels stay dry during their cure window. Over a school year, those small decisions keep names legible and reduce the chance of a daycare mix-up.
InchBug offers personalized labels for bottles, lunchboxes, clothing, shoes, bags, and school gear, including dishwasher- and microwave-safe name labels and TagPal clothing labels. Visit InchBug to create a set matched to the items your child uses every day, then apply each label with the care routine above.