

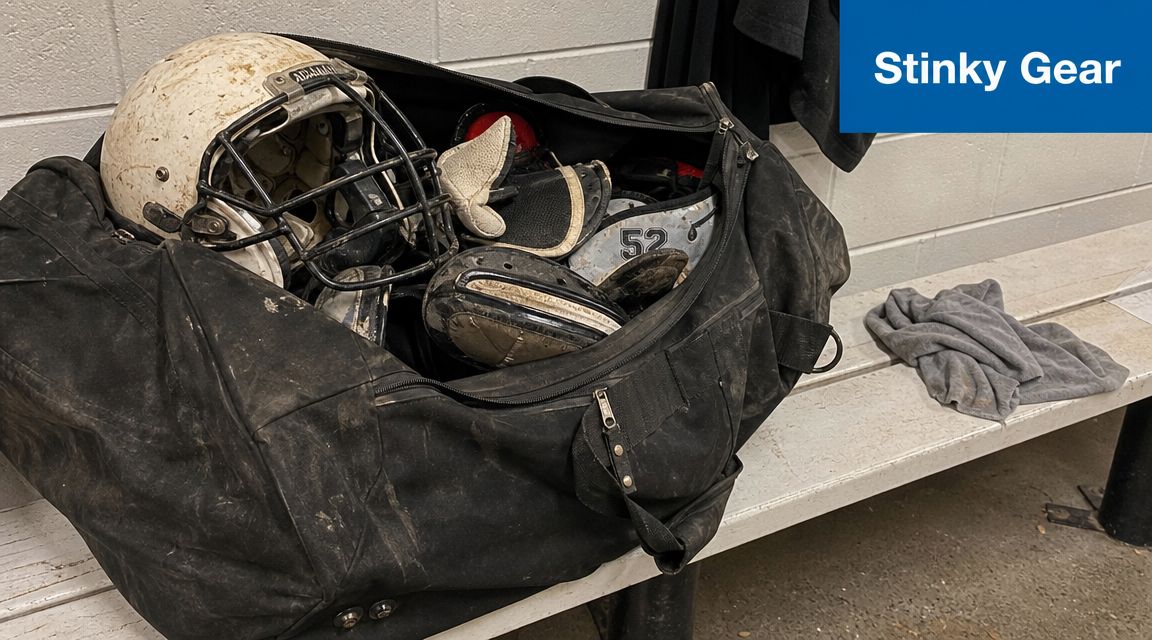
You unzip the gear bag after practice, and the smell hits first. Then you see the helmet. Dried sweat around the chin strap, grass on the shell, and that damp padding inside that never seems to fully air out on its own.
Most parents start cleaning a football helmet because of odor. That's reason enough. But once you've dealt with football gear for a season, you realize the smell is only part of the problem. A dirty helmet also hides wear, traps moisture, and makes it easier to miss the small issues that matter when your child puts that helmet back on.
Why Cleaning Your Helmet Matters More Than You Think
A football helmet doesn't just get dirty. It collects sweat, dirt, skin oils, and whatever got dragged into the bag after practice. If that moisture sits, the helmet starts to smell, the pads stay clammy, and the whole thing feels less safe and less cared for than it should.
Parents already think this way about cold and flu season. The same common-sense routine that helps with family hygiene habits during sick season also applies to sports gear. Clean what gets touched often, dry it fully, and don't let damp equipment sit in a dark bag.
Cleaning is part of safety care
Modern football helmet care isn't just about making the shell look better. Current guidance treats cleaning as part of safety maintenance, with regular checks for loose screws, cracks, and worn padding during the cleaning process, as noted in this football helmet maintenance guide from Scheels.
That shift matters. When you're already handling the helmet, wiping it down, and removing parts, you're in the best position to notice what's changed since last week.
Practical rule: A clean helmet is easier to inspect. Dirt and odor can distract you from the real question, which is whether the gear is still in good condition for the next practice.
Odor control protects the gear too
A lot of parents attack the smell with the strongest spray they can find. That usually isn't the best answer. What works better is a repeatable routine that keeps sweat from soaking in and gives every part of the helmet enough airflow to dry.
The win here is that this routine does three jobs at once:
- It improves hygiene by removing sweat and grime before they build up.
- It supports safety checks because you're handling the helmet carefully instead of ignoring it until it smells bad.
- It helps the helmet last because you're not using harsh cleaners or storing it wet.
If you want to know how to clean a football helmet the right way, think beyond shine. You're protecting the gear your child depends on.
The Right Supplies for a Safe and Effective Clean
Most helmet-cleaning mistakes happen before the first wipe. Someone grabs a heavy-duty cleaner from under the sink, sprays everything down, and hopes stronger means cleaner. With football helmets, that shortcut can work against you.
Equipment experts specifically advise using regular dish soap and avoiding citrus-based cleaners. They also warn against extreme heat or bright sunshine because those conditions can degrade protective pads, according to this helmet care guidance from Schutt.
Helmet Cleaning Supply Checklist
| Item | Purpose |
|---|---|
| Mild dish soap | Cleans the shell and removable parts without being overly harsh on materials |
| Warm water | Helps loosen sweat and grime during wiping and soaking |
| Soft microfiber cloth | Wipes the shell clean without scratching the finish |
| Soft brush | Reaches vents, hardware edges, and creases where dirt collects |
| Clean towel | Blots moisture off parts before air-drying |
| Small basin or bucket | Holds warm, soapy water for removable pads |
| Fresh airflow space | Lets every part dry completely before reassembly |
| Gloves if preferred | Helpful if you're dealing with a very dirty shared helmet |
What to skip
Some products feel like smart upgrades, but they create problems.
- Citrus cleaners: These are specifically warned against in helmet-care guidance.
- Abrasive scrubbers: They can scuff the shell and wear down decorated areas.
- High heat: Hair dryers, hot cars, and direct sunshine can do more harm than good.
- Full submersion: A helmet isn't meant to be dunked and left saturated.
If you're trying to balance basic cleaning with preventing germ transmission, it helps to understand that cleaning and sanitizing aren't the same thing. For helmets, plain removal of sweat, grime, and moisture is often the first job to get right.
One small organizing tip that helps
If your child has labeled water bottles, lunch gear, or practice extras, use supplies that can handle regular wash cycles and repeated wiping. That's the same logic behind durable dishwasher-safe name labels for everyday gear. Gear gets cleaned often, and anything attached to it needs to tolerate that routine.
A Complete Helmet Breakdown and Cleaning Guide
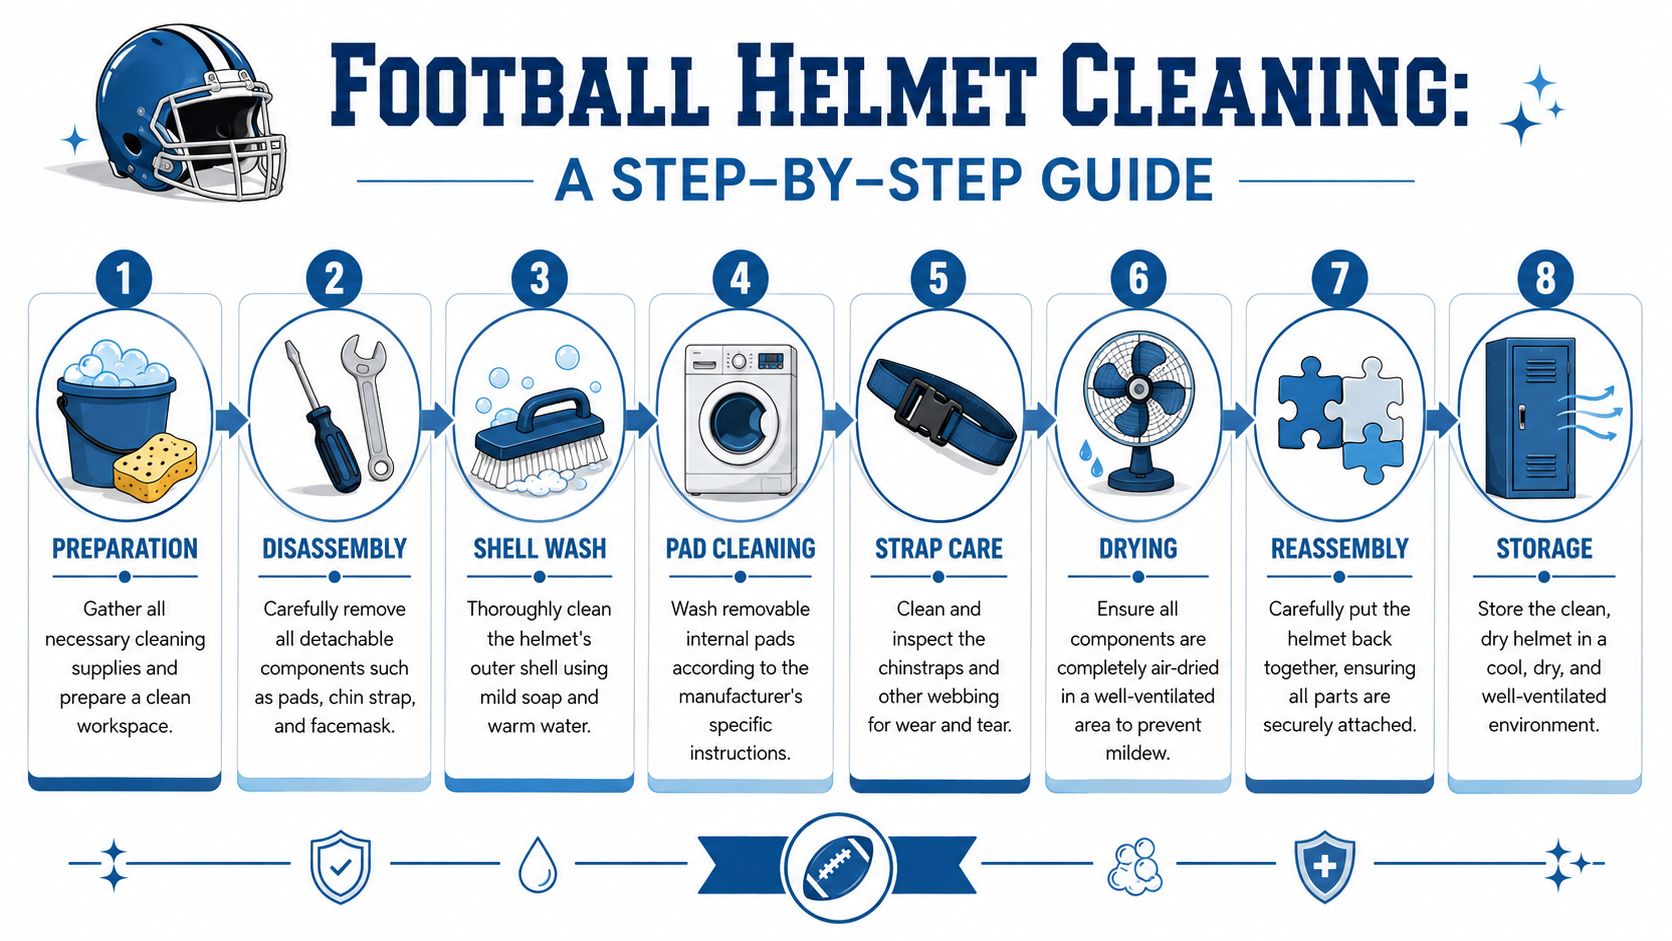
A good helmet cleaning routine isn't complicated, but it does need order. If you clean parts randomly, you'll miss hidden sweat around the padding or trap moisture when you put everything back together too soon.
Start by setting up your space and taking the helmet apart carefully.
Start with disassembly
Remove any detachable parts your helmet allows, such as removable pads and the chin strap if it comes off easily. Keep hardware together in one spot so you aren't hunting for screws later.
For a weekly deep clean, equipment guides recommend removing pads and soaking them in warm, soapy water for 10 to 30 minutes before hand-washing. That same guidance also says the helmet exterior should be wiped down after every practice or game to remove sweat, dirt, and grass before moisture contributes to mold growth, according to this Riddell helmet maintenance guide.
Don't wait until the helmet smells awful. Light cleaning after use is easier on the gear than letting sweat build up for days.
Clean the shell the safe way
Mix mild dish soap with warm water. Dip a soft cloth into the solution and wipe the outer shell thoroughly. Focus on the crown, the lower back edge, and around the ear holes where sweat and field grime often collect.
Use a soft brush for tight areas such as vents, facemask connection points, and molded seams. You want to lift dirt out, not grind it in.
Avoid these common mistakes:
- Using abrasive pads that dull the finish
- Spraying harsh household cleaners directly onto the shell
- Soaking the whole helmet instead of cleaning it in a controlled way
Wash the pads and chin strap
If the interior pads are removable, let them soak for the recommended time in warm, soapy water. Then hand-wash them gently. Press out excess water with a towel. Don't twist them aggressively.
The chin strap deserves the same attention. It sits against sweaty skin and often holds odor longer than parents expect. Wipe it thoroughly with the same mild soap solution, then rinse the cloth and wipe again to remove residue.
If your child also plays other contact sports, this same part-by-part routine is useful when cleaning bulkier equipment too. The process is similar to the one in this guide on washing hockey gear without wrecking it.
Handle non-removable interiors carefully
Some helmets don't make pad removal easy. In that case, use a damp cloth with mild soapy water and work section by section inside the helmet. Don't flood the padding.
Press a dry towel into the interior afterward to pull out as much moisture as possible. The goal is to clean the surface and reduce buildup without leaving the inside soggy.
Here's a quick visual walkthrough if you want to see the sequence in action:
Reassemble only when it's fully dry
At this point, a lot of people undo their own work. They clean the helmet properly, then reassemble it while the pads still feel slightly damp.
Wait. If any piece still feels cool or moist, give it more air time. Reassemble only after every part is dry to the touch and the inside no longer feels humid.
That patience is what turns cleaning from a temporary fix into a routine that keeps the helmet fresher.
The Secret to Banishing Odors for Good
If you've ever cleaned a helmet and noticed the smell came back fast, the problem usually wasn't the washing. It was the drying.
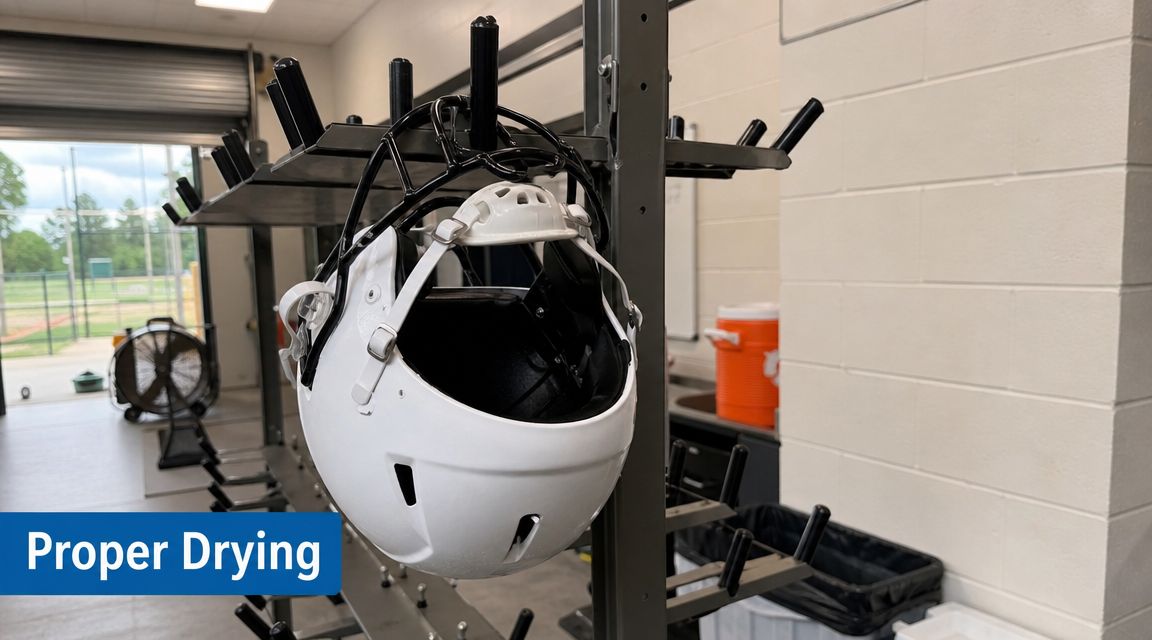
For frequently used or shared helmets, equipment guidance stresses that drying and ventilation are as important as the cleaning products used, because trapped moisture is a primary cause of bacteria and odor buildup, as explained in this football gear cleaning guide from Academy.
Airflow beats fragrance
A deodorizing spray can cover smell for a while. It can't rescue a helmet that's getting shoved into a zipped duffel bag while the pads are still damp.
What works better is simple:
- Open it up: Loosen or remove what you can so air reaches the interior.
- Choose moving air: A ventilated room is better than a closed closet.
- Keep it upright: Let moisture escape instead of pooling in the padding.
- Give it time: If the helmet was soaked during a rainy game, don't rush it back into storage.
Hard truth: Odor that keeps returning usually means moisture is still trapped somewhere inside the helmet.
What not to do
Parents are busy, so the temptation is understandable. You want faster drying. But some shortcuts damage the gear.
A few to avoid:
- Hair dryers or heaters that blast hot air into the padding
- Direct sun for long stretches when the goal is fast drying
- Sealed bins or packed bags before the helmet has aired out
- Heavy spraying that adds moisture without solving the root issue
If you've dealt with mildew in other parts of the house or garage, the same principle applies here. The fastest way to get rid of musty odors is to remove the moisture source, not just mask the smell.
A between-games routine that helps
You don't need a full deep clean every single time. Between washes, do this after practice:
- Wipe visible sweat and dirt from the shell.
- Open up the helmet as much as its design allows.
- Set it in a cool, well-ventilated space.
- Keep it out of the bag until it feels fully dry.
This is the same kind of practical drying habit that matters for other wet, smell-prone gear, including rubber rain boots that stay damp inside. Dry gear doesn't just smell better. It stays in better shape.
Beyond Cleaning Essential Safety Inspections
Cleaning time is the easiest time to catch problems. You already have the helmet in your hands, you're looking closely at the parts, and dirt isn't covering the details.
Use that moment to check three areas first.
What to inspect every time
- Shell condition: Look for cracks, deep gouges, or anything that looks more serious than surface scuffing.
- Hardware: Check facemask attachment points and screws for looseness, rust, or movement.
- Padding: Notice areas that look compressed, torn, or worn down compared with the rest of the interior.
If something looks off, don't talk yourself out of it because the helmet "still seems fine." Protective gear deserves a cautious eye.
A helmet can be clean and still be unsafe. Hygiene and protection aren't the same thing.
Why this matters for parents
Parents can't diagnose every equipment issue, and you don't need to pretend to be an equipment manager. But you can spot obvious wear before your child heads back onto the field.
It also helps to keep the bigger safety conversation in view. If you want a simple refresher on why head protection and symptom awareness matter, Highbar Physical Therapy's concussion guide gives a useful general overview. The sport in that guide is different, but the reminder is relevant. Clean gear doesn't replace paying attention to impact-related concerns.
For families managing lots of shared items, this is the same mindset behind labeling essentials like a car seat label for quick identification. You want equipment and belongings to be easy to track, easy to inspect, and less likely to be overlooked.
Keeping Personalized Helmets Looking Great
A personalized helmet needs a gentler touch than a plain one. Team decals, name stickers, and custom labels can start peeling at the edges if they're scrubbed too hard or soaked repeatedly.
The safest approach is simple. Wipe decorated areas with a soft cloth, not a rough brush, and don't let soapy water pool around edges. If dirt is stuck near a label or decal, loosen it with a damp cloth and light pressure instead of scraping at it with a fingernail.
Best practices for decorated helmets
- Clean around edges carefully: Lift grime away without catching the corner of a sticker or label.
- Blot, don't rub hard: This matters most on names, numbers, and team graphics.
- Dry fully before storage: Damp adhesive areas are more likely to curl over time.
- Skip harsh cleaners: Strong formulas can fade printed details or weaken the adhesive.
This is another reason a steady routine works better than occasional aggressive cleanups. Gentle, regular care keeps the helmet cleaner and helps personalized details last longer.
If your child's helmet is part of a larger pile of sports gear, labels matter for a practical reason too. Kids switch bags, teams share spaces, and gear gets mixed up fast. Cleaning goes more smoothly when you know exactly what's yours, and well-made labels are much less likely to become another thing you have to replace mid-season.
Keeping sports gear organized is hard enough without mystery helmets and disappearing extras. InchBug makes it easier with durable, personalized labels designed for the world of kids, school, and sports. If you want labels that can keep up with regular cleaning, busy routines, and shared spaces, it's a smart place to start.