

The daycare pickup line is moving, your child has one shoe on, and the matching shoe has disappeared into a crowded bin. You sort through tiny sneakers, sandals, and rain boots that look almost identical, hoping the right pair turns up before everyone loses patience. A small label inside each shoe can prevent that daily scramble, but only if it survives sweat, rubbing, moisture, and constant handling.
Tags for shoes aren't interchangeable. A smooth insole, a fabric-lined sneaker, a pair of cleats, and a preschool slipper each create different conditions for a label. The reliable approach isn't just choosing the prettiest name sticker. It's matching the material, attachment method, and placement to the way the shoe is really used.
The Hidden Chaos Behind Every Lost Shoe
A daycare shoe bin turns a simple identification problem into a daily search exercise. Shoes get kicked off, pushed under benches, packed into bags, and mixed with pairs from several children. Even a child who usually knows their belongings may not recognize a plain black sneaker among a dozen similar pairs.
Labeling helps, but the first product that catches your eye may not be the right tool. Parents usually encounter four broad options:
- Adhesive labels: These stick to a smooth interior, insole, tongue, or sole. They're quick to apply and discreet, but their success depends heavily on surface texture and preparation.
- Clip-on identifiers: These attach to laces, straps, or external loops. They're visible and easy to move between shoes, although anything that protrudes can catch during play.
- Printed insoles: These place the child's name or design underfoot. They offer clear identification but need to withstand moisture, friction, and repeated insertion of the foot.
- Brand-specific systems: Products such as ShoePal-style identifiers are designed around a particular placement and use case rather than functioning like an ordinary sticker.
A school-label bundle may treat footwear as one part of a larger system. One product listing includes 4 pairs of shoe labels, while another starter format includes 5–10 shoe labels. Independent daycare guidance describes a typical starter set as requiring 50–100 labels overall, including approximately 5–10 shoe labels. That context matters. Shoes are only one category in a child's daily kit, but they're a recurring source of mix-ups. See this practical guide to choosing a shoe rack for toddlers if storage is making the identification problem worse.
Practical rule: Choose the tag for the shoe's environment, not for the product photo.
An adhesive label can be perfectly suitable for a dry indoor sneaker and a poor choice for a fabric-lined sports shoe. A clip may be useful on a lace-up shoe and irritating on a soft slipper. A clear naming system also works better when storage is consistent, which is why labeling pairs and organizing their home location should happen together.
Parents looking at prevention strategies can also review loss prevention strategies for children's belongings. The central lesson is simple: the “best” tag depends on the child's routine, the shoe's construction, and how much abuse the pair receives between drop-off and pickup.
Material Matters More Than You Think
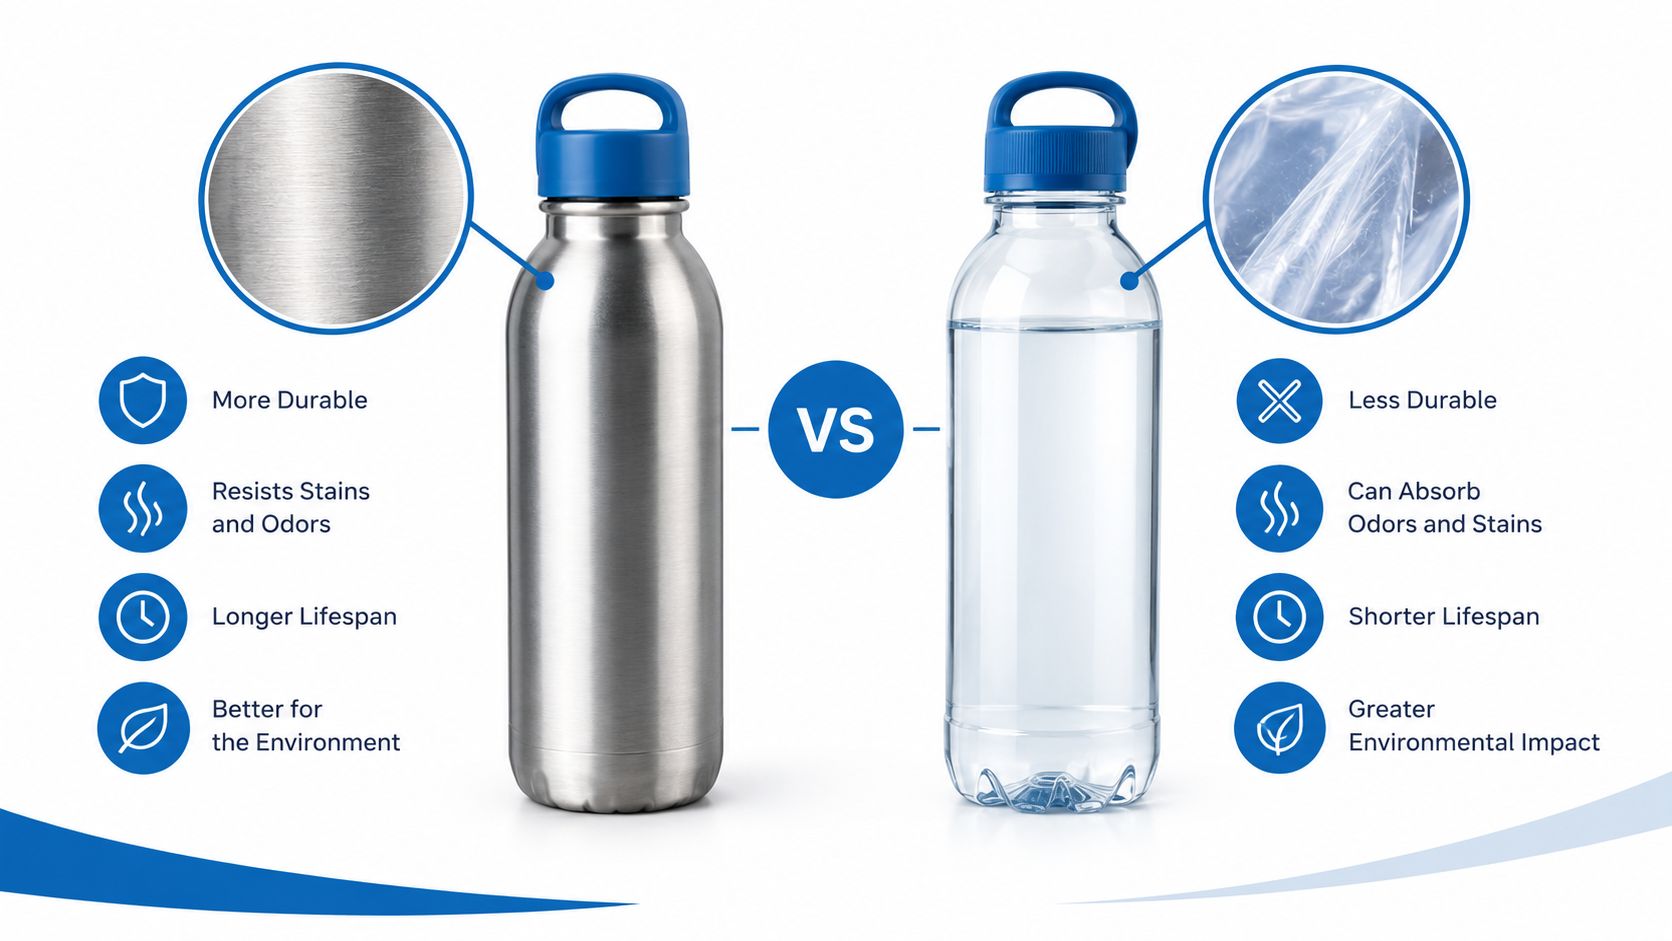
Readable printing gets most of the attention, but the substrate determines whether that printing remains useful. Paper can look crisp on application day and still soften, tear, or separate after exposure to damp socks and repeated rubbing. A shoe interior is a demanding location because moisture and pressure act on the label every time the child walks.
Waterproof plastics such as PVC and PET, along with TPU films and laminated or coated stocks, are favored for active use because they resist moisture, scuffing, and abrasion better than uncoated paper-based materials. The reason is mechanical as much as visual. A substrate with higher tear resistance and lower water uptake is less likely to deform, fade, or delaminate during handling, humid storage, or exposure to sweat and washing conditions. These material considerations are also reflected in guidance on plastic shoe tags and material selection.
What survives daily handling
A durable tag should have more than a waterproof claim. Look for a surface that resists scuffing, an adhesive or finish suited to the shoe, and edges that won't become an easy starting point for peeling. Rounded corners reduce snagging, while a laminated or coated top layer protects the printed surface from abrasion.
The weakest point is often the transition between the label and the shoe. A tough plastic tag can still fail if its edges lift or the adhesive loses contact with a textured lining. This is why a thin, well-finished label may outperform a thicker option with exposed corners.
A useful test is to inspect the shoe rather than the packaging. If the application area is damp, fuzzy, rough, or curved, the label needs more than attractive printing. In those conditions, material choice and the protective finish deserve priority over decorative designs.
Attachment Methods and Why They Fail
A label doesn't fail only because its ink fades. It often fails because the bond never matched the shoe. Sweat, flexing, friction, and cleaning place stress on the interface between the tag and the surface, so a strong substrate can't rescue an unsuitable attachment method.
Adhesive labels work well on clean, smooth, low-texture interiors and soles. They're convenient and discreet, but rough fabric and loose fibers give the adhesive less continuous contact. Pressing a sticker onto a dusty or fuzzy lining may create an initial bond that looks fine and then curls at the edges.
Iron-on labels can suit fabric-lined areas where heat creates a more permanent bond, but the shoe material must tolerate the application process. Heat can damage synthetic components or deform delicate construction, so the manufacturer's instructions matter.
Sewn, looped, and clamped tags are useful when the shoe has a suitable seam, lace, strap, or external attachment point. They can avoid the adhesive problem, but they may add bulk or sit in a location where the tag catches, rubs, or becomes uncomfortable. Guidance on shoe label attachment methods emphasizes matching the method to the shoe construction rather than treating every option as universal.
| Attachment method | Works best on | Main risk |
|---|---|---|
| Adhesive | Smooth, clean interior surfaces | Edge peel on texture or moisture |
| Heat-applied | Compatible fabric-lined areas | Heat damage or incomplete bonding |
| Sewn | Fabric panels and seams | Added labor and visible stitching |
| Looped or clamped | Laces, straps, and external points | Catching, movement, or added bulk |
For a practical comparison of everyday adhesive options, review stick-on shoe labels. The right question isn't “Which attachment is strongest?” It's “Which attachment stays stable on this exact surface without creating a new problem?”
Where to Place Shoe Tags for Maximum Lifespan
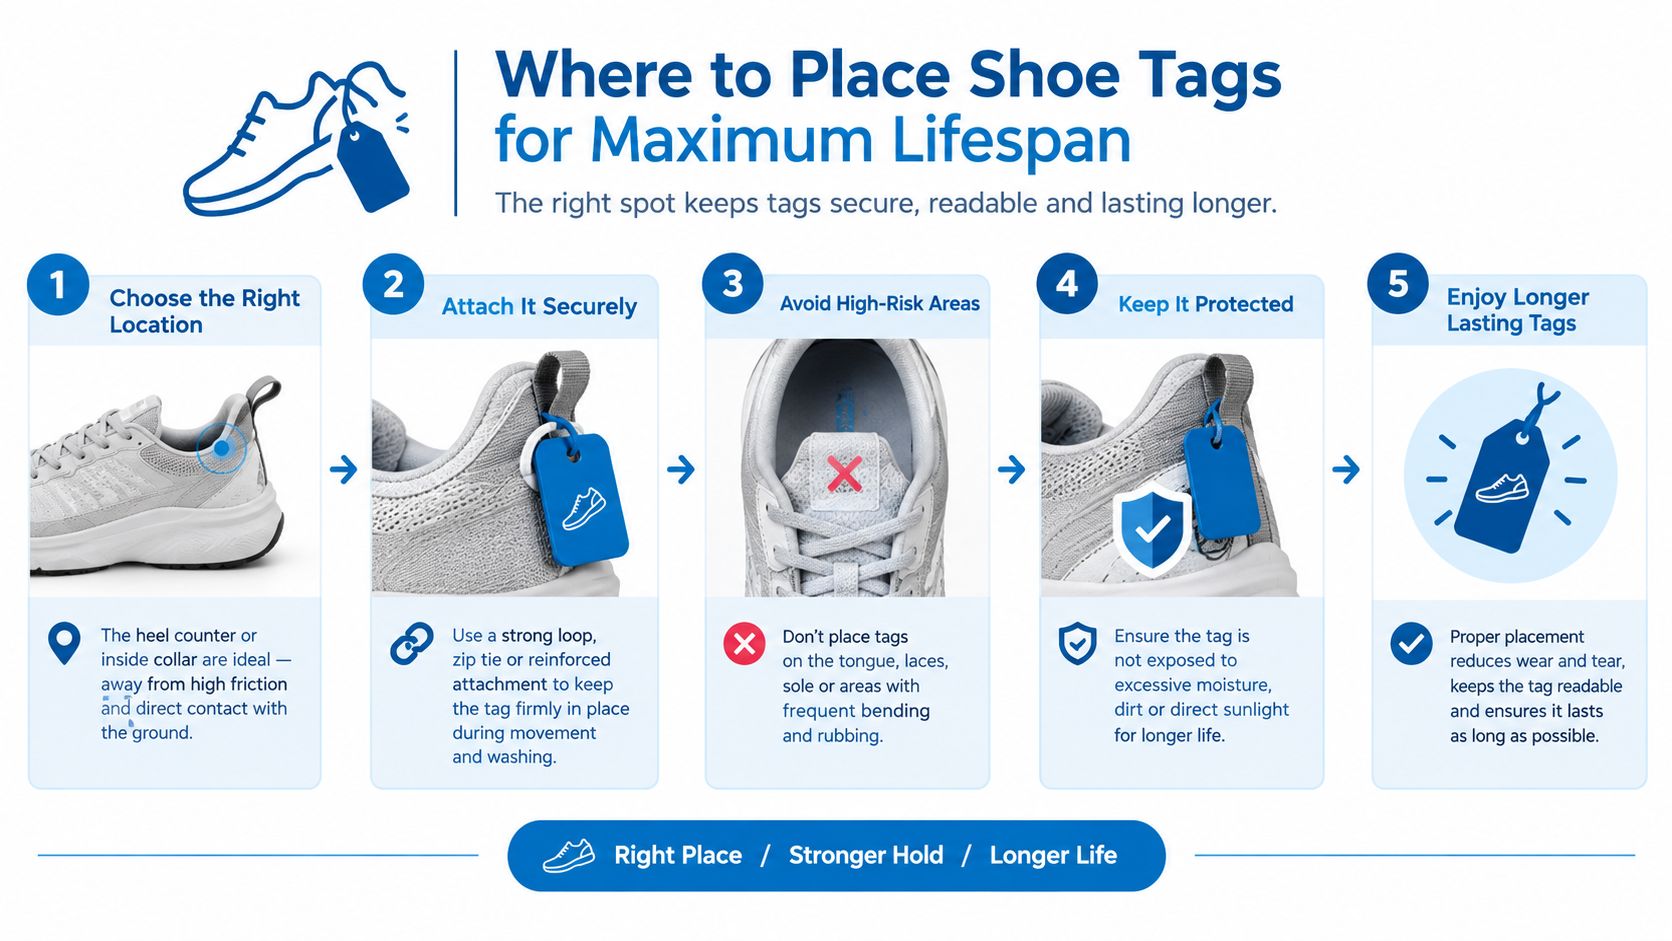
Placement controls both readability and survival. A label hidden in the wrong part of a shoe may face constant heel friction, foot perspiration, or pressure from the child's weight. A label placed inside the heel area, where it remains visible but avoids the most active contact zone, has a better chance of staying intact.
Label both shoes. A single marked shoe can still be separated from its partner, and a child or caregiver may handle either shoe first. Use this process:
- Inspect the interior. Find a relatively smooth, flat area inside the heel. Avoid loose fabric, heavy stitching, deep grooves, or surfaces that already show peeling.
- Clean and dry the area. Remove dust, lint, and residue. Adhesive cannot form a dependable bond with debris between the label and the shoe.
- Apply the tag without stretching it. Center it on the chosen area and press from the middle toward the edges, eliminating bubbles and lifting corners.
- Add a compatible protective overlay. A clear top layer can shield the printed surface from sweat and rubbing, especially when the label is placed near the heel.
- Allow the bond to settle. Keep the shoes away from heavy wear until the label's instructions say the adhesive has cured.
Why the heel area needs care
The heel is a useful identification zone because caregivers can see it quickly, but it also experiences repeated movement. As the foot slides into the shoe, the heel counter can rub against the label. Moisture from perspiration can weaken adhesive contact and affect ink or surface coatings. This is why a standard waterproof sticker isn't automatically a shoe-specific solution.
Guidance on how to label children's shoes highlights the importance of labeling inside the heel, marking both shoes, and using a protective overlay when the product requires it. The placement decision is small, but it determines whether the label becomes a stable identifier or another item to replace.
For more placement ideas, see this guide to labels for kids' shoes. A few careful minutes during application can prevent the more frustrating question later, which is why the tag failed after only a short period of real use.
Shoe Tagging for Daycare, School, and Sports
A pair of soft indoor shoes in a daycare cubby doesn't face the same conditions as cleats in a damp sports bag. The label strategy should change with the environment, not just the child's age.
Daycare and preschool
Daycare shoes are removed and replaced often, then stored beside many similar pairs. A discreet adhesive tag inside the heel is usually practical when the interior is smooth and dry. A waterproof PET or TPU-style substrate, rounded edges, and clear identification help caregivers sort pairs without adding anything that can catch during play.
A broader daycare labeling approach can keep shoes consistent with bottles, clothing, bags, and other daily belongings. The value comes from using one recognizable naming system across the child's kit, not from adding decoration to every item.
School and general use
School shoes often need a middle-ground solution. Durable adhesive tags with a smooth finish can work well for everyday sneakers and uniform shoes, provided the label sits away from the highest-friction area. Check the inside construction first, particularly if the shoe has a heavily textured lining.
Sports and outdoor use
Cleats, trainers, and outdoor shoes face sweat, impact, mud, and damp storage. An adhesive label may still work on a suitable interior surface, but an external sewn or clamped identifier can be more appropriate when interior friction is severe. External tags need to stay clear of moving parts, laces, and areas that contact the ankle.
Search interest around personalized shoe tags and adjacent footwear accessories also reflects a wider use of tags for identity, gifts, customization, and brand or inventory purposes. That doesn't make an external tag right for every child. It does show that “shoe tag” can mean more than a hidden daycare name label, so decide whether your priority is lost-and-found identification, decoration, or gear management.
Building Your Own Shoe Labeling System
A workable system should be quick enough to repeat and specific enough to prevent guesswork. Start with the shoe, not the label sheet. Ask where the pair will be worn, what kind of moisture it encounters, and which surface can accept a secure attachment.
Use this decision sequence:
- Classify the environment. Separate dry indoor shoes from footwear exposed to sweat, rain, mud, or damp storage.
- Select the substrate. For more demanding use, favor waterproof PET, PVC, TPU, or a protected laminated stock over uncoated paper.
- Match the attachment. Use adhesive on a clean, smooth surface. Consider sewn or clamped options for suitable fabric, seams, laces, or straps.
- Choose the placement. Use the inside heel when the surface is stable and comfortable, and mark both shoes.
- Protect and inspect. Apply a compatible overlay when needed, then check edges regularly for lifting or delamination.
Use one system across the child's routine
Consistency matters more than complexity. If the child's daycare shoes use one placement and sports shoes use another, keep the naming format and visual style recognizable. That makes it easier for caregivers to identify the owner and for the child to learn where to look.
Don't wait for a label to fall off completely. Edge lift is an early warning that moisture or friction has compromised the bond. Replace the tag before the name becomes unreadable, especially if the shoe pair is used in a setting where mix-ups are common.
The result is a repeatable process rather than a series of emergency fixes. You assess the conditions, select the compatible materials, apply the tag correctly, and monitor the point most likely to fail.
Care Tips That Actually Extend Label Life
Application is only half the job. A tag that survives the initial placement can still deteriorate when dirt, moisture, and cleaning residue collect around its edges. A few low-effort habits help preserve both the bond and the printed surface.
- Dry wet footwear promptly: Let shoes air out instead of sealing damp pairs in a bag. Moisture sitting against the label can weaken the interface.
- Wipe rather than scrub: Use a dry or lightly damp cloth to remove surface dirt. Aggressive rubbing can damage a coating or lift an edge.
- Respect the product limits: Don't soak labeled shoes or expose them to machine cleaning unless the label and shoe instructions allow it.
- Allow curing time: Give an adhesive label the time specified by its instructions before heavy wear, washing, or moisture exposure.
- Rotate pairs when possible: A second pair gives each shoe time to dry, reducing the amount of continuous moisture around the tag.
Detailed label care instructions can help you adapt cleaning habits to the specific product. If a tag shows peeling, bubbling, or delamination, replace it rather than pressing the loose edge down repeatedly. Once debris enters the gap, the original bond is difficult to restore.
Treat the label as part of the shoe's care routine, not as a permanent object that never needs checking. That small change prevents a readable name from becoming a faded corner hidden beneath a child's heel.
Choosing Labels You Will Actually Keep Using
The useful label is the one that fits your routine well enough that you'll apply it correctly and replace it when the shoe changes. You don't need a complicated collection of products. You need a durable tag, a compatible surface, a sensible placement, and care that matches the conditions.
For most daycare and school shoes, start by checking for a smooth interior heel area. Choose a waterproof, abrasion-resistant label with rounded or protected edges, and mark both shoes. For sports footwear, examine whether sweat, mud, and external friction make an adhesive interior label unsuitable. In that case, a sewn, looped, or clamped identifier may be more practical if the shoe has a safe attachment point.
A label should also be easy for a caregiver to interpret. Clear text matters, but readability can't compensate for a tag that curls, smears, or separates. If you're organizing shoes alongside clothing and uniforms, a size conversion reference for parents can help keep other personalized items matched to the child as they grow.
The core principle remains straightforward: durability comes from matching the tag to the environment. Choose for moisture, friction, and construction rather than relying on branding or appearance. InchBug offers ShoePal identifiers and other customizable labels for children's shoes and everyday belongings, giving parents one option for building that consistent system.
InchBug offers customizable ShoePal shoe identifiers along with labels for clothing, bags, bottles, lunch boxes, and sports gear. Visit InchBug to choose a labeling setup that fits your child's shoes, apply it in the right location, and spend less time searching the daycare bin for matching pairs.