

On a January morning, a teacher may tip an entire lost-and-found bin onto the carpet and find a jumble of markers, water bottles, pencil cases, and sweatshirts. Several children will recognize the same plain blue bottle or insist that an unmarked folder belongs to them. The adults then sort, question, wipe, replace, and repeat the process, while the class waits to begin the next activity.
Supply labels for classroom belongings won't stop every item from wandering. They can make ownership visible, shorten clean-up, and give young children a simple way to recognize what belongs to them. That matters in a setting where classroom materials are handled, shared, washed, moved between rooms, and stored in crowded spaces. The practical question isn't whether to label everything. It's what deserves a label first, which material fits the surface, and how to tell whether the label will last.
Why Supply Labels for Classroom Belongings Matter More Than You Think
A 2013 U.S. survey reported that 80% of children lost items at school during the prior year, based on responses from more than 400 parents. School supplies made up 52% of the reported lost-item category, behind hats and gloves at 57% and ahead of outerwear at 43%, according to the survey report on school supply loss and replacement spending. The same report said parents spent an average of $90 per child on school supplies annually, making a missing pencil case or lunch container more than a minor nuisance.
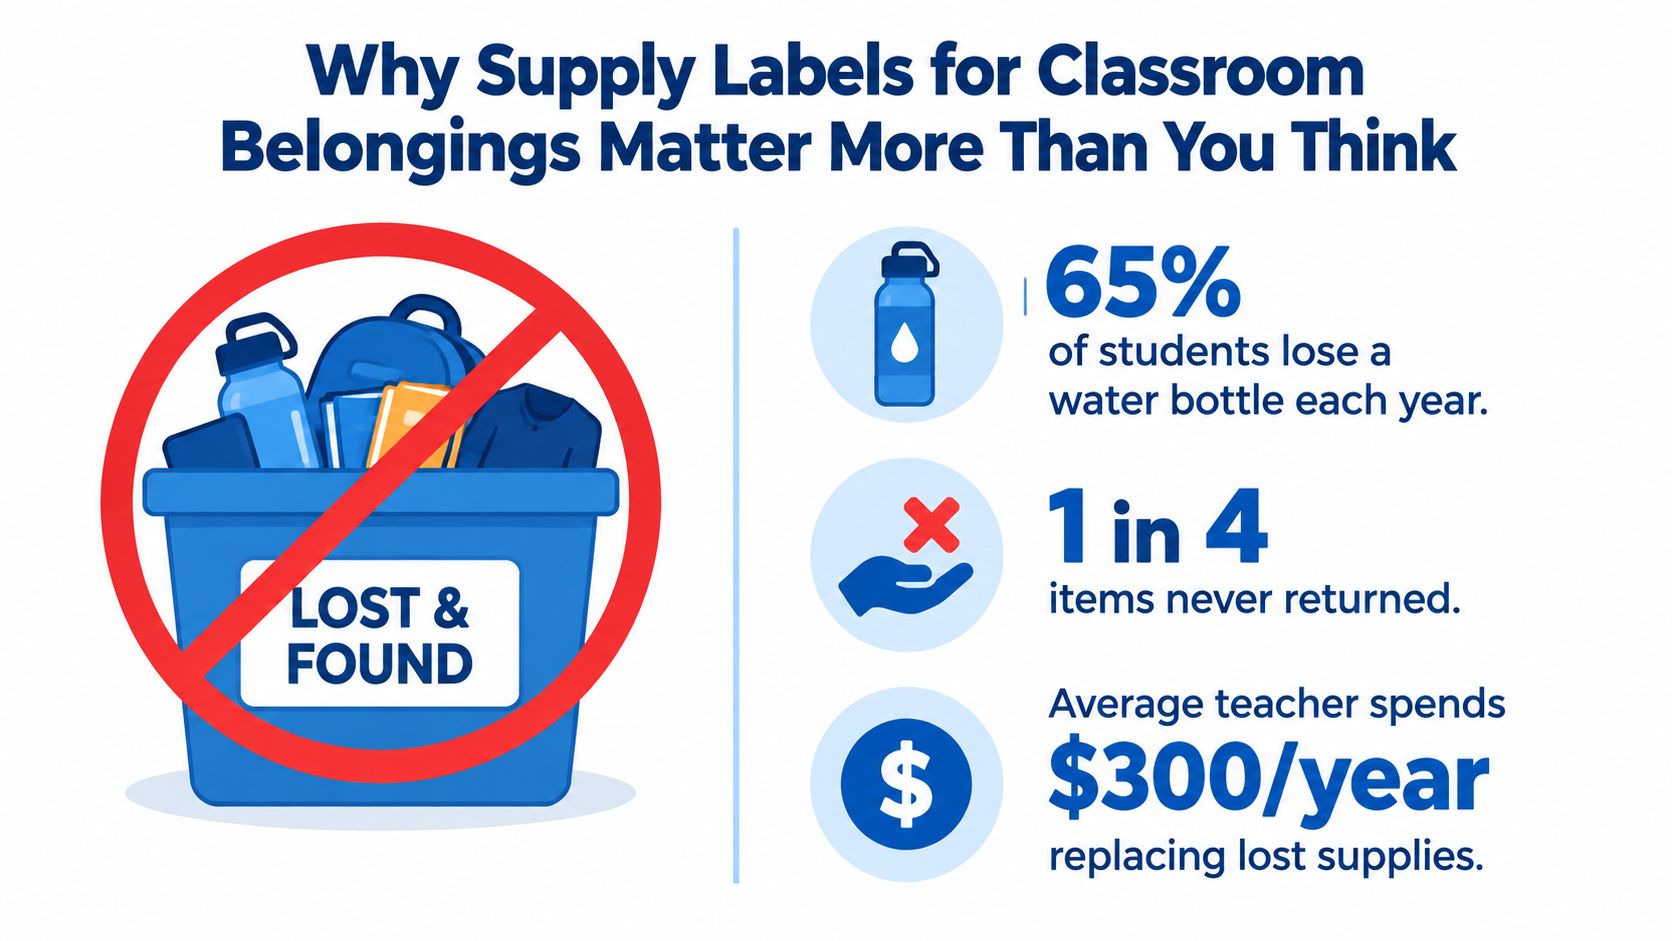
The classroom cost is larger than the item
A child who can't identify a water bottle may interrupt a teacher during a transition. A group that can't tell which bin holds its shared supplies may empty several containers while looking. One missing belonging can therefore create several small costs, including replacement spending, lost instructional minutes, and unnecessary frustration during routines.
Children also develop ownership skills gradually. A preschooler may recognize a photograph or familiar color before reading a name. An early elementary student may read a short label but still confuse identical pencil boxes. A clear name, icon, or consistent design gives each child another cue without requiring the teacher to solve every mystery.
Practical rule: Treat a label as part of the classroom routine, not as decoration. It should answer one question quickly: “Who owns this?” or “Where does this belong?”
Labels support adults as well as children
Teachers manage supplies that families purchase and materials they organize for shared use. Education-sector research reported that 95% of U.S. public school teachers spent their own money on classroom supplies without reimbursement during 2019–20, with an average out-of-pocket cost of $470 per teacher. State averages ranged from about $360 to $720, as described in the analysis of teacher-funded classroom supplies. Identification doesn't solve that funding problem, but it can help prevent duplication and clarify which materials belong to a student, teacher, or shared station.
A useful system starts with the items that travel. Label the belongings that leave the classroom, pass through a cafeteria, or get placed beside similar items. For more ideas about reducing mix-ups before they reach the lost-and-found bin, see these loss-prevention strategies for children's belongings.
The Main Types of Supply Labels and How They Behave
A label's performance depends on three choices: what it's made from, how strongly it adheres, and how it fits the object. Start with the object rather than the design. A paper label that works on a temporary folder won't behave like a synthetic label on a stainless steel bottle, and a flat sticker may struggle on a curved or textured surface.
Material comes first
Paper is economical and easy to print, but moisture and rubbing can quickly blur or weaken it. Durable classroom labels usually use synthetic face stocks, such as vinyl, polyester, or another film, because these materials resist water and routine abrasion better than paper. The material guidance in Avery's washable school supply label guide matches what teachers see in practice. Hard, washable items need a film label with an adhesive designed for that use.
Fabric requires a different approach. Iron-on or heat-activated labels bond with fibers, while no-iron fabric labels use an adhesive surface. A cotton sweatshirt and a plastic caddy shouldn't receive the same label just because both need a name.
Adhesive and shape change the result
Removable adhesive suits temporary groups, rotating centers, or folders whose contents change. Permanent adhesive is a better fit for a supply bin that students handle every day. An ultra-bond option may help with demanding smooth surfaces, but no adhesive can compensate for dust, oil, deep texture, or a label placed across a seam.
Shape matters too. A rectangular sticker gives a large readable area on a notebook. A wrap-around band can identify a bottle without relying on a flat side. A name tag works well on clothing or a backpack, while a shoe label needs to fit a small, frequently rubbed area.
| Label Family | Common Options | Best On |
|---|---|---|
| Material | Paper, vinyl, polyester, clear film, iron-on, silicone | Paper for temporary organization, synthetic film for hard surfaces, fabric options for clothing |
| Adhesive strength | Removable, permanent, ultra-bond | Changing stations, high-touch bins, and smooth surfaces needing stronger hold |
| Shape | Rectangular stickers, wrap-around bands, name tags, shoe labels | Flat containers, curved bottles, clothing, bags, and footwear |
| Print method | Inkjet, laser, thermal | Inkjet-compatible stock, laser-compatible stock, or thermal materials matched to the printer |
Inkjet printing can smear if the stock isn't designed for it. Laser printing produces sharp output but requires material rated for laser heat. Thermal labels are convenient for quick identification, though some types can fade with exposure or heavy rubbing. If you want to compare label choices for younger children and care settings, this guide to personalized daycare labels offers useful examples of how item type affects selection.
Durability and Washability What Really Holds Up
The label that looks perfect on application day still has to survive a dishwasher, wet hands, sanitizer residue, backpack friction, and repeated handling. Synthetic film plus a suitable adhesive generally performs better than ordinary paper for hard items that are wiped or washed. The consumer-lab review of labels for kids' lunch boxes and clothing reported that personalized kids' labels showed no signs of wear after 60+ wash cycles. It also noted that many custom products use a 3M Controltac-style construction advertised as waterproof and dishwasher- and microwave-safe.
That result doesn't mean every label will behave identically. The surface is often the weak point. Smooth plastic, glass, and metal give adhesive a more continuous area to grip. Textured plastic, rubberized coatings, fabric, and surfaces carrying grease or cleaning residue create more opportunities for an edge to lift.
Match the label to the punishment
A lunchbox label may face warm water, detergent, and rubbing inside a dishwasher. A bottle label may face condensation and repeated hand contact. A backpack label may endure abrasion against the floor rather than immersion. These are different tests, so “washable” should be treated as a starting description, not a promise that covers every classroom condition.
| Label Type | Water Resistance | Sanitizer Resistance | Abrasion Resistance |
|---|---|---|---|
| Standard paper sticker | Low | Low | Low |
| Laminated paper label | Moderate | Variable | Moderate |
| Synthetic film sticker | High when properly applied | Product-dependent | Good on smooth surfaces |
| Heat-activated fabric label | High through normal clothing washing | Not usually the main use case | Good on fabric when bonded correctly |
| Hanging tag | Depends on material and attachment | Depends on material | Variable, especially where it swings or rubs |
For labels exposed to cleaning chemicals, the Evright Industrial buyer's guide provides helpful background on chemical-resistant label construction. In a classroom, you don't need an industrial specification for every pencil cup, but you do need to distinguish ordinary wiping from repeated exposure to alcohol-based products.
Run a small test before committing
Apply one sample to the item itself. Clean the surface, let it dry, press the label firmly, and leave it undisturbed while the adhesive bonds. Then try a gentle soak or normal cleaning routine, followed by a careful corner-pick test.
If the edge lifts easily, change the label, location, or surface preparation before labeling the entire class set. A short trial is much less frustrating than replacing a whole batch after the first cleaning cycle. For a more deliberate process, use this label durability testing guide as a practical reference.
Matching Labels to Common Classroom Surfaces
The same label can succeed on one classroom object and fail on another. Smoothness, cleanliness, curvature, and handling determine whether the adhesive can make reliable contact. Choose the flattest useful area, then place the label where fingers, shelves, and cleaning cloths won't constantly catch the edge.
Hard plastic bins and caddies
For smooth plastic bins, use a synthetic vinyl label with permanent adhesive when the name or category should remain in place. The front is easy for students to read, but the bottom can be better for stackable bins that move between shelves. On a pencil caddy, place the label on a broad side rather than directly under the grip area.
Clean the spot with a lint-free cloth and, when compatible with the plastic, a small amount of isopropyl alcohol. Let it dry fully. Avoid ridges, molded seams, and heavily textured finishes. Adhesive doesn't have a smooth continuous surface to grip when the label bridges deep texture.
Fabric cubbies, bags, and clothing
Fabric cubbies and soft storage don't provide the same stable base as a plastic bin. A laminated name tag, hanging tag, iron-on label, or fabric-specific adhesive label is usually more dependable than forcing a hard-surface sticker onto woven material. For a sweatshirt or jacket, use a fabric label designed for laundering and place it where the child or caregiver can find it quickly.
A backpack may need a tag attached to a zipper or handle rather than a sticker on the flexible body. That approach also avoids the repeated folding and rubbing that can make a flat adhesive label curl.
Bottles and folders
Stainless steel water bottles benefit from a waterproof or dishwasher-suitable label placed on a clean, dry, relatively flat area. Curved surfaces need extra care. Smooth the label from the center outward, and don't apply it over a seam, dent, or textured coating.
Laminated folders are simpler. Place a readable label on the front or tab, depending on how the folder is stored. If the folder is temporary, a removable label may prevent damage during end-of-term sorting. More examples of hard-surface applications appear in this guide to waterproof vinyl labels.
| Surface | Recommended Label | Prep and Placement Tip |
|---|---|---|
| Smooth plastic bin | Permanent synthetic vinyl | Clean and dry the broadest flat area, then avoid the edge where shelves rub |
| Textured plastic basket | Hanging or laminated tag | Attach the tag rather than relying on adhesive over texture |
| Fabric cubby | Fabric label or laminated name tag | Place it on a stable seam or visible panel |
| Stainless steel bottle | Waterproof, wash-resistant label | Wipe clean, let dry completely, and avoid seams |
| Laminated folder | Printable or removable sticker | Use the tab or front panel, based on storage direction |
| Backpack or coat | Fabric label or bag tag | Choose a handle, lining, or interior panel that won't flex constantly |
What to Label First A Priority Framework for Teachers and Parents
“Label everything” sounds simple until a supply list arrives late, the budget is tight, and there are dozens of small items on the table. A better approach weighs three questions: How often does this item disappear? How expensive or inconvenient is replacement? Can a child or teacher identify it quickly without help?
The result is a tiered system. It lets you spend attention where a label can prevent the most confusion, rather than covering every crayon with a tiny sticker.
Must-label items
Start with belongings that travel, look like everyone else's, or are difficult to recover once misplaced. Water bottles, lunch boxes, backpacks, coats, and individual pencil cases usually belong here. If a child uses a personal supply box or a specialized tool set, label that container even when the individual contents are inexpensive.
A good first label goes on the item most likely to leave the room and most frustrating to replace.
For younger children, add a recognizable icon or color alongside the name. For older students, a readable name may be enough. Label the outside first, then consider an interior location as backup for bags or cases.
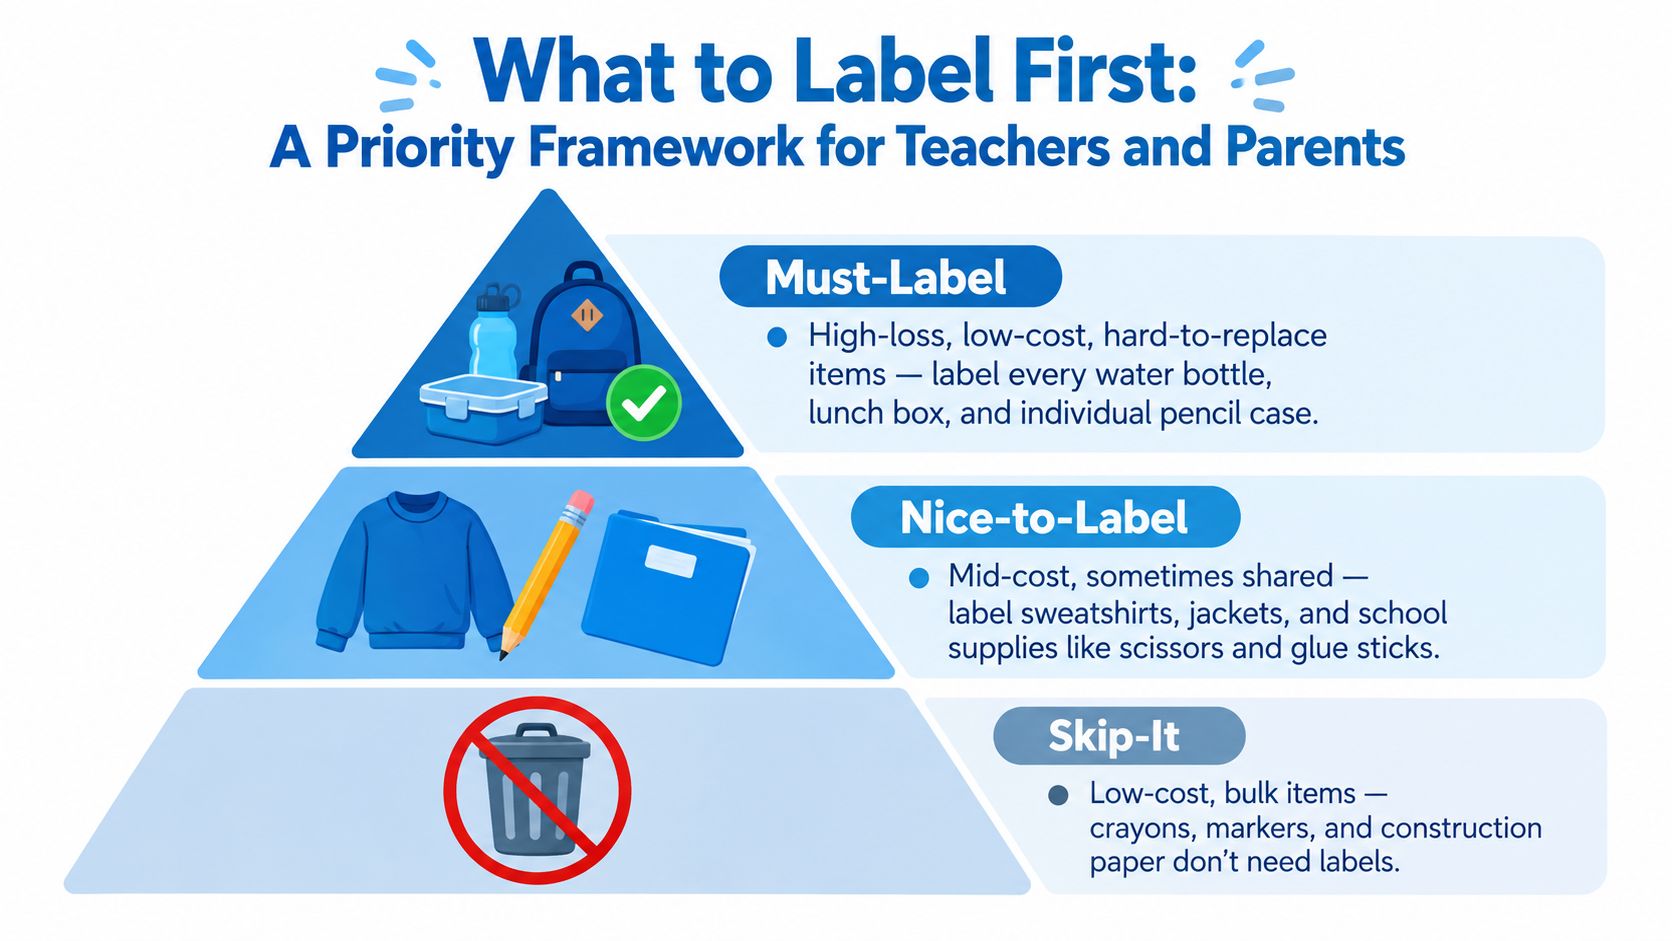
Nice-to-label items
These include folders, notebooks, headphones, sweatshirts, jackets, scissors, glue sticks, and classroom bins. The decision depends on whether the item is personal, shared, or regularly moved. A label on a shared supply bin may identify its home rather than its owner, which helps students reset the room independently.
This tier also includes materials that matter more in certain classrooms. Headphones in a listening station deserve identification because they move between students. A folder used for a short project may not.
Skip-it items
Don't spend an afternoon labeling consumables that are cheap, interchangeable, or destined for ordinary use. Loose crayons, construction paper, and bulk markers generally fit this group unless your classroom has a specific sharing or allergy-management reason to identify them.
The framework is flexible. A frequently lost item can move upward, while a rarely handled personal item can move down. For a broader school-starting checklist, use this guide to what to label before back-to-school season.
How Labeled Classrooms and Daycares Actually Run
A preschool room often reveals the value of labels during the busiest moments, not during a quiet planning period. At arrival, a child finds a cubby marked with a name and familiar picture, puts away a coat, and places a bag in the same location. At pickup, the teacher can direct the child to that visual marker instead of stopping to identify every bag by color or character.
The label doesn't replace teaching the routine. It gives the routine a fixed reference point. Children can begin checking the cubby, basket, or hook themselves, which reduces the number of ownership questions adults answer during transitions.
Daycare care becomes more orderly
A daycare provider handling bottles, blankets, spare clothing, and cots has several kinds of belongings moving through cleaning and storage. A name on a bottle helps match it to the right child after washing. A tag on a blanket gives staff a quick check before laundry is returned. A cot identifier keeps sleeping equipment in its assigned place.
These small markers work best when the whole room follows the same logic. Names go in a consistent location, photographs support children who can't read yet, and shared items carry category labels rather than personal names. The result is a room that communicates expectations without requiring an adult to narrate every step.
Elementary students can reset their own stations
In an elementary classroom, labels can shift responsibility toward students. A supply caddy marked with a short word and simple icon tells students where pencils, scissors, or glue belong. A turn-in tray with clear wording supports a predictable end-of-task routine. The teacher still checks the system, but children have a visible guide for returning materials.
Good organization also considers sensory load. Clear visual cues, uncluttered storage, and predictable locations can complement calm learning environment strategies, especially in rooms where transitions already demand a lot from students. Labels should make the environment easier to read, not add a wall of competing colors and tiny text.
The strongest label system is quiet. Children use it without needing a new instruction every time.
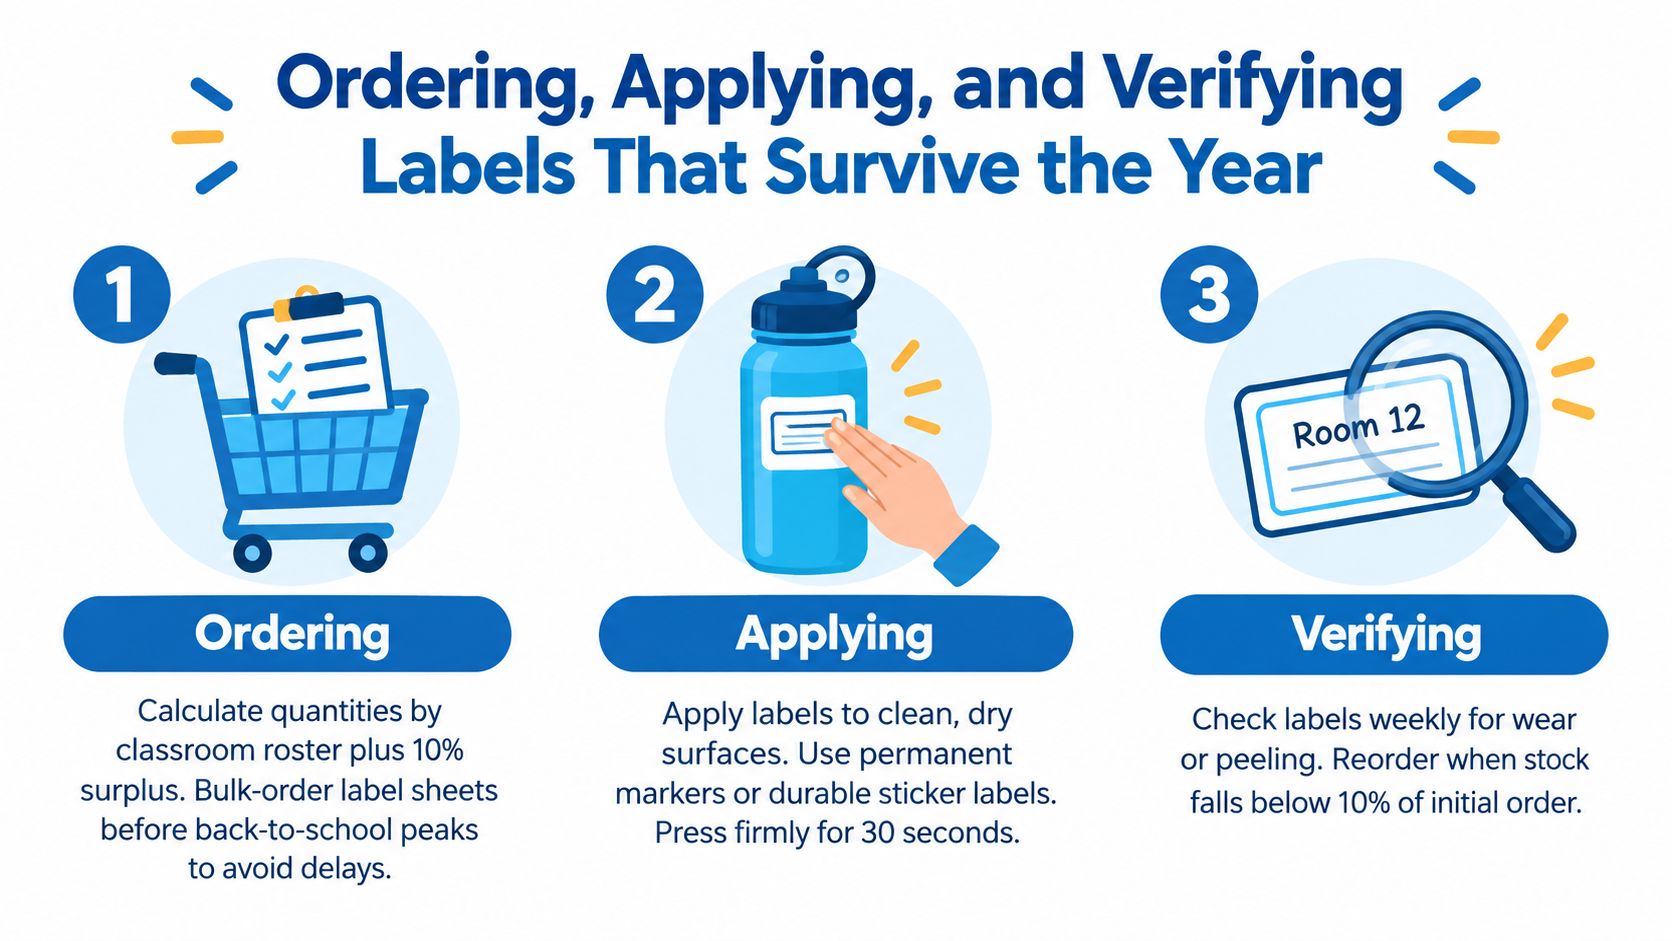
Ordering Applying and Verifying Labels That Survive the Year
Ordering works better when it begins with an inventory. Separate personal belongings from shared classroom containers, identify the surfaces involved, and decide which items need names, icons, or category words. Then order by the actual roster and planned uses rather than choosing a large mixed pack that leaves you short on the labels you use most.
The supplied ordering plan recommends calculating the classroom roster plus a 10% surplus and placing bulk orders before back-to-school demand peaks. Because this is a planning guideline rather than a universal requirement, adjust it for transfers, replacements, and the kinds of items your room handles. Check printer compatibility for printable sheets, and confirm thermal-roll sizing if you use a thermal printer.
Apply labels in a clean sequence
- Clean the surface. Remove dust, oil, and residue from smooth plastic or metal with an appropriate cleaner. Isopropyl alcohol can help on compatible hard surfaces, but let the area dry completely before application.
- Choose a stable location. Avoid seams, deep texture, sharp corners, and areas where hands or shelves repeatedly scrape the label. On a bottle, use the flattest practical section. On a bag, consider a handle or interior panel.
- Press from the center outward. Smooth sheet labels gradually to limit bubbles. Press firmly across the whole label, paying attention to the edges. The supplied application guidance recommends holding pressure for 30 seconds, especially on hard items that will receive frequent handling.
- Use fabric-specific methods. Heat-activated labels need the correct temperature and bonding process. Stick-on fabric labels need a clean, dry area and may work better on a stable interior panel than on a stretchy section.
Verify before the labels meet the whole class
Test one label on the material before preparing every item. Use a water or soak test when washing is expected, then inspect the corners after the adhesive has had time to bond. If the label wrinkles, slides, smears, or lifts, stop and change the combination rather than repeating the same mistake.
Run a quick classroom walk-around after the labels have been in use for a while. Look at bottle edges, backpack tags, bin corners, and high-touch caddies. Replace failed labels early, while you still know which surface or cleaning routine caused the problem.
InchBug offers personalized labels for school supplies, including name stickers and labels designed for items such as water bottles, lunch boxes, clothing, shoes, bags, and sports gear. Visit InchBug to choose labels that match the classroom belongings you need to identify, then start with your must-label items before expanding the system.