

Why Properly Labeling Baby Bottles Is a Must
Picture the controlled chaos of a daycare room filled with babies. Without clear names on everything, bottles can get swapped in a heartbeat. This isn't just an organizational headache; it’s a real health and safety concern.
A simple mix-up could mean your baby misses a feeding, gets the wrong amount of milk, or, in a worst-case scenario, is exposed to another child’s germs or potential allergens. This little label is your first line of defense. It guarantees your baby gets their specific milk—whether it's precious breast milk you pumped or a particular formula—right on schedule. For babies with allergies, a clear label isn't just helpful; it's absolutely critical.
The Real-World Headaches of Unlabeled Bottles
The frustration of lost or swapped bottles is more common than you'd think. It happens so often that one survey found 75% of daycare providers reported daily confusion over bottles that were either unlabeled or poorly marked. Trust me, these situations create unnecessary stress for caregivers and parents alike. For more on the baby bottle market and trends, check out the analysis from Fortune Business Insights.
Beyond the daily confusion, there's a real financial cost. Good baby bottles are an investment, and replacing them when they go missing in the daycare shuffle adds up fast. A reliable labeling system saves you both the stress and the expense.
Properly labeling your baby’s bottles transforms a potential point of daily stress into a smooth, reliable process. It’s less about being perfectly organized and more about creating a safe, predictable routine for your child’s care.
More Than Just a Name
But effective labeling is about more than just scribbling a name. Think of it as a quick, clear communication tool for your childcare provider. A good label needs to display key info at a glance:
- Child’s Full Name: This is the bare minimum. First and last name to prevent any mix-ups between kids with similar names.
- Date: This is required for breast milk, the expression date ensures it is fresh and safe to use.
- Contents: A quick "Breast Milk" or "Formula" marker helps caregivers know exactly what's inside without having to guess.
- Allergy Alerts: For any child with allergies, a big, bold allergy label is a vital safety measure that can’t be missed.
Honestly, learning how to label baby bottles the right way is a top-tier parenting hack. It protects your child, respects your caregiver's time, and safeguards your investment in all that baby gear. It’s a simple act that builds a foundation of safety and organization that everyone will thank you for.
How I Evaluated Bottle Labeling Methods for Daycare and Home
Before picking a labeling method, I judged them against the actual demands of daily childcare routines. These criteria separate methods that look good on paper from those that survive Tuesday morning rush hour.
First, wash durability was essential. Every method was tested against repeated cycles in a home dishwasher to see if the text faded, the adhesive peeled, or the silicone degraded. Second, sterilizer performance was evaluated to ensure labels wouldn't melt or warp in steam, boiling water, or UV units. Third, readability at a glance checked whether a caregiver could identify the bottle instantly while handling multiple infants. Fourth, fit on curved bottles verified that labels stayed secure on standard, wide-neck, and slender bottle shapes. Finally, I looked at whether the method supports daily date changes, a practical requirement for breast milk that most adhesive labels fail to meet efficiently.
These standards formed the basis for the comparison in this article, ensuring recommendations are rooted in real-world daycare constraints rather than generic product specs.
Comparing The Best Bottle Labeling Methods
Choosing how to label baby bottles can feel like just another overwhelming task on a very long list. You’ve got quick DIY fixes, purpose-built stickers, and reusable bands all vying for your attention. These popular methods help you pick the one that fits your real, busy life.
The best choice really comes down to what you need most: something that will last, is safe for your baby, can be used again and again, and won’t break the bank. Some options are great in a pinch, while others are an investment that will see you through the toddler years.
Based on daycare requirements and bottle safety standards, here is my recommendation hierarchy:
- Reusable Silicone Bands (Best for Daily Daycare Use): For bottles that cycle through the dishwasher and sterilizer daily, a food-grade silicone band is the only option that reliably survives without adhesive failure. They are designed for repeated washing and easy bottle changes.
- Adhesive Labels (Best for Consistent Bottle Sets): If your child uses the same bottles every day and they go straight into the top rack of the dishwasher, high-quality adhesive labels are a solid, permanent solution.
- Marker/Tape (Temporary Backups Only): These should only be used as a last resort. They lack the durability and professionalism required by most daycare centers and pose a higher risk of fading or smearing before drop-off.
H3: Temporary And DIY Labeling Solutions
The quickest solutions are usually things you already have lying around the house. A permanent marker is the old-school go-to. It’s fast, free, and you can write directly on the bottle or cap. The major downside? That "permanent" ink is no match for a hot dishwasher or sterilizer. It’ll fade, smear, or wash off completely after just a few cycles.
Another common quick fix is painter's tape or masking tape. It’s easy to write on and sticks well enough at first. But let’s be real—it’s a single-use solution. The moment it gets wet or condensation forms, it starts to peel and shred, often leaving behind a gummy, sticky mess. That makes it pretty unreliable for the daily grind of daycare.

As this daycare safety chart shows, an unlabeled bottle is a problem waiting to happen. Clear, reliable labeling is the most direct path to making sure your baby gets the right bottle, every single time.
H3: Purpose-Built Adhesive And Reusable Labels
For something you can count on, many parents opt for labels made specifically for kids' gear. Adhesive name labels are a huge step up from tape. They’re designed to be waterproof and dishwasher-safe, so they can handle repeated washing. The catch is that their staying power can vary, and they often start to peel up at the edges, especially on the curved surfaces of most baby bottles.
The most durable and versatile option, in my experience, is a reusable silicone label, like the original Orbit Labels from InchBug. These are stretchy, non-adhesive bands that grip the bottle snugly. Because there’s no glue, they can’t peel off. You can easily pop them off and move them to a new bottle as your baby’s needs change, from 4 oz newborn bottles to larger ones, and eventually to sippy cups.
I’ve found that when switching bottles, peeling the band and placing it on the new container takes less than three seconds, eliminating the frustration of reapplying sticky labels.
The real game-changer with a reusable label is its buy-it-once nature. It lasts for years and moves with your child from bottle to sippy cup to sports bottle, making it a surprisingly cost-effective and eco-friendly choice in the long run.
Comparing Baby Bottle Labeling Methods
To make the choice a little clearer, I’ve put together a table that breaks down how these methods stack up against the evaluation criteria mentioned above.
| Labeling Method | Durability | Safety | Reusability | Best For | Downside |
|---|---|---|---|---|---|
| Permanent Marker | Low (Fades in wash) | Non-toxic options available | Not reusable | Quick, temporary home use | Smears easily; not daycare compliant |
| Painter's Tape | Very Low (Peels when wet) | Generally safe | Not reusable | In-a-pinch, single-day use | Leaves residue; poor longevity |
| Adhesive Labels | Medium (Can peel over time) | BPA-free and non-toxic | Not reusable | Consistent bottle types; flat surfaces | Edges lift on curved bottles; requires 24hr cure time |
| Silicone Bands | High (Wash-proof) | BPA-free, food-grade safe | Fully reusable | Daily daycare use; various bottle shapes | Requires manual date wiping; initial cost higher |
Ultimately, the right method depends on your family’s routine. If you’re sending bottles to daycare every day, you need something that won’t fail. For us, a reusable, wash-proof system like silicone bands provides the most peace of mind and reliable performance.
If you’re still weighing your options, you can get a deeper look at how bottle bands vs bottle stickers stack up in our detailed comparison. It’ll help you see which investment makes the most sense for keeping your child’s items safe, sound, and out of the lost-and-found bin. For additional tips on making adhesives last longer on various materials, the Pinwheel Crafts LLC guide on preventing peeling offers some useful application techniques that apply here as well.
| Labeling Method | Durability | Safety | Reusability | Best For |
|---|---|---|---|---|
| Permanent Marker | Low (Fades in wash) | Non-toxic options available | Not reusable | Quick, temporary home use |
| Painter's Tape | Very Low (Peels when wet) | Generally safe | Not reusable | In-a-pinch, single-day use |
| Adhesive Labels | Medium (Can peel over time) | BPA-free and non-toxic | Not reusable | Consistent bottle types; flat surfaces |
| Silicone Bands | High (Wash-proof) | BPA-free, food-grade safe | Fully reusable | Daily daycare use; various bottle shapes |
Meeting Daycare Labeling Requirements
Navigating your daycare’s rules can feel like learning a new language, especially their strict labeling policies. I remember that feeling well! Many centers offering infant and toddler programs have very specific guidelines for how bottles must be labeled, all designed for safety and quick identification.
Trust me, getting this right from the start makes drop-off so much smoother and ensures your little one gets exactly what they need, when they need it. The rules are there for a very good reason—clear labels prevent mix-ups that could lead to your baby missing a feed or, more seriously, being exposed to another child’s allergens or germs. While each center has its own quirks, a few requirements are pretty much universal.
The Universal Daycare Labeling Checklist
Almost every daycare will ask you to label every single piece that goes into their fridge or bottle warmer. And when they say every piece, they mean it. This isn't just about the bottle itself; it’s about the entire system.
Here’s what you'll almost certainly need on every single item:
- Child’s Full Name: First and last name are a must. You'd be surprised how many Liams or Olivias are in one classroom!
- Current Date: For breast milk, this is the expression date to track freshness. For formula, it's the date you prepared it. Note that programs should not identify bottles only by cap color or location, as these methods can fail when containers look alike or move between rooms source.
- Contents (Optional but helpful): A simple "BM" for breast milk or "Formula" can be a great visual cue for busy caregivers.
And yes, this applies to all the components—the bottle, the cap, and even the little collar ring. Leaving just one part unlabeled is an invitation for it to get lost in the shuffle or swapped with another child’s bottle parts.
Think of daycare labeling as a partnership. When you make a caregiver's job easier with clear, consistent labels, you're directly contributing to a safer, more organized day for your own child.
Smart Strategies for Daily Labeling
Let's be real: the daily task of dating bottles can get old, fast. A fantastic trick I learned is to use a reusable label system, like a silicone band, where you can write the date with a wet-erase or dry-erase marker. This makes morning prep so much faster than wrestling with a new sticky label every single day.
Lost or mixed-up bottles can cost parents an average of $150 per year in replacements, and in some areas, unlabeled bottles contribute to 50% of daycare complaints. Choosing a good labeling system isn't just about convenience; it's a smart financial move. Reusable labels, which often come in affordable bundles, have been shown to slash classroom chaos by up to 85%.
Step-by-Step: The Daycare Bottle Labeling Workflow
After testing various setups with daycare providers, I’ve established a six-step workflow that satisfies the most common center policies. Follow this sequence to ensure your bottles are compliant and clear for staff.
- Check Your Center’s Written Policy: Before buying supplies, request the center's specific label policy. Requirements for font size, content, and which parts to label (e.g., nipple vs. cap) vary by region and provider.
- Apply the Child’s Full Name: Place the child's full first and last name on the bottle body, the cap, and any detachable parts like collars. Most centers require the name on at least two components to prevent mixing if parts separate. This aligns with broader requirements for durable infant products to be permanently marked with identifying information see tracking-label guidance.
- Add the Preparation or Expression Date: For breast milk, write the date it was expressed. For formula, write the date it was mixed. This is critical for tracking freshness and ensuring food safety.
- Note the Contents: Clearly mark "Breast Milk" or "Formula." This helps caregivers manage intake without opening containers or guessing.
- Include Allergy or Feeding Notes: If the center permits, add a brief note for allergies (e.g., "No Nuts," "Lactose-Free") or specific feeding instructions (e.g., "Warm Only"). Never rely solely on the center's memory for these details.
- Final Readability Check: Before drop-off, inspect the label from an arm's length away. If a caregiver cannot read the name and date quickly while holding the bottle, the label has failed its primary purpose.
This workflow distinguishes between breast milk and formula, as breast milk often requires stricter dating protocols due to spoilage risks, whereas formula is frequently prepared fresh or reconstituted on-site, making the permanent name the highest priority.
I've noticed that parents who adopt this workflow report fewer questions from daycare staff and a much faster drop-off process, as caregivers can immediately verify the bottle's contents and ownership.
How to Apply Bottle Labels for a Lasting Stick
There’s nothing quite as frustrating as carefully labeling all your baby’s bottles, only to find the names peeling or smudged after a single trip through the dishwasher. We've all been there. A label that doesn’t last is just as useless as no label at all. The secret to a lasting stick often comes down to small, but critical, application tricks that go way beyond what’s written on the package.

Getting this right from the start saves you time, money, and the headache of re-labeling everything a week later. Whether you've chosen adhesive stickers, reusable bands, or even a simple permanent marker, a few extra moments will ensure your labels stay put through countless washes and hectic daycare drop-offs. Let's walk through how to apply each type like a pro.
Mastering Adhesive Label Application
For adhesive stickers, surface prep is everything. Think of it like painting a wall—you wouldn't just slap a new coat over a dusty, greasy surface and expect it to stick, right? The same idea applies here. You need a perfect bond to withstand all that heat and moisture.
Your first move is to create a flawlessly clean and dry surface. Just washing the bottle isn't always enough, as lingering soap residue or even oils from your hands can get in the way of a good stick.
Here's my tried-and-true method:
- Wipe with Alcohol: After washing and thoroughly drying the bottle, grab a cotton ball with a little rubbing alcohol and wipe down the area where the label will go. This gets rid of any final traces of oil or residue, creating the perfect canvas.
- Apply Firm Pressure: Once you place the label, press down firmly across the entire surface, paying special attention to the edges. Use your thumb to smooth out any air bubbles, pushing them toward the sides. You want complete, flat contact.
- Let It Cure: This is the step everyone skips, and it's the most important one! Let the labeled bottle sit for at least 24 hours before its first wash. This "curing" time allows the adhesive to fully bond with the bottle, making it so much more durable.
Honestly, washing a freshly labeled bottle right away is the number one mistake I see people make. Giving the adhesive a full day to set is the single best thing you can do to prevent peeling and make sure that label is truly dishwasher-safe.
Securing Reusable Silicone Bands
Reusable bands, like the awesome Orbit Labels from InchBug, are fantastic because they don't rely on any glue. But for them to work, you need a snug, secure fit so they don't slide around or pop off in the bottle warmer.
Application is super simple: just stretch the band and slide it over the bottle. For the most secure fit, I always aim for the flattest, widest part of the bottle. Try to avoid placing it on sharply tapered sections where it could more easily slip off when wet. On a slender bottle, you'll find the band has a naturally tighter grip.
Pro Tips for Permanent Markers
If you're in a pinch and reaching for a permanent marker, placement is your best strategy for making it last.
Instead of writing on the main body of the bottle where it gets the most handling and friction, write on the plastic ring of the cap. That spot gets far less wear and tear, so the ink is less likely to rub off. To keep it from smudging into an unreadable mess, let the ink dry completely for a few minutes before you touch it.
By following these specific techniques for each label type, you can feel confident that your labels will stay put. For more insights into making adhesive labels work for all your kids' gear, our beginner's guide to adhesive labels has even more great tips.
Keeping Your Labels Safe in Dishwashers and Sterilizers
Any baby bottle label must survive the daily gauntlet of high-heat cleaning. Trust me, a label that peels, fades, or turns into a sticky mess after a few runs through the dishwasher is a total waste of time and money. I've been there. Making your labels last really comes down to two things: picking the right material and knowing how to handle it when you clean.
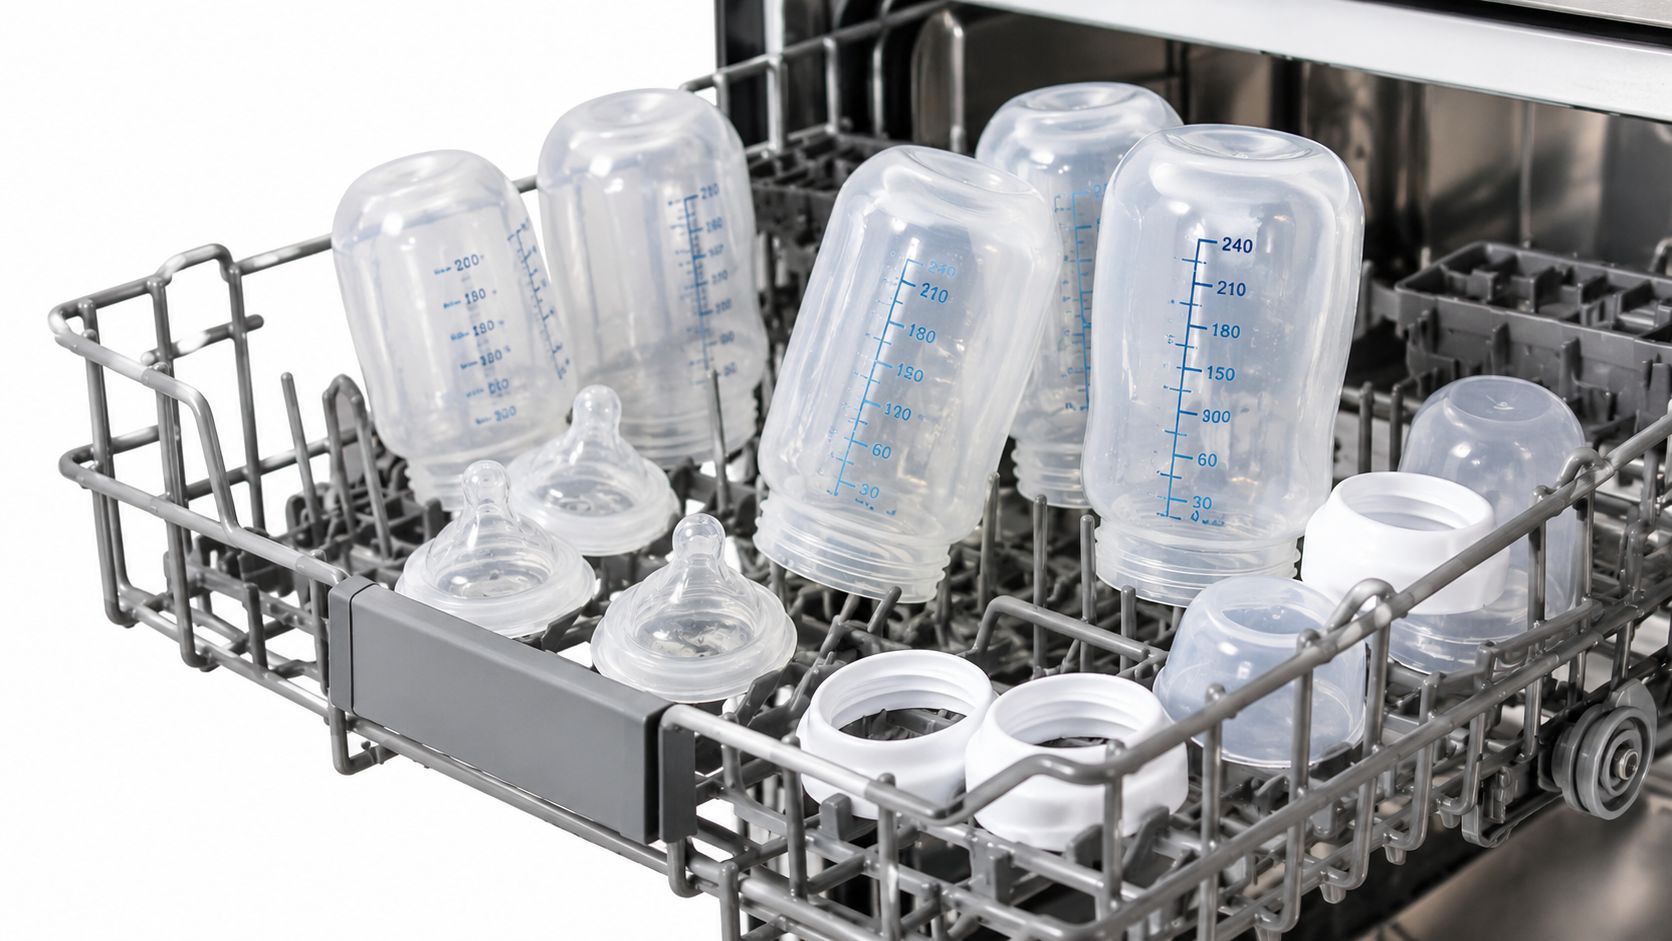
A golden rule for your dishwasher is: always place labeled bottles on the top rack. The main heating element is at the bottom, which means the top rack stays significantly cooler. This simple move protects both the bottle and your label from that direct, intense heat that causes warping, melting, or glue failure.
We’re seeing a huge demand for durable, safe products these days. With a growing awareness around hygiene, parents are actively looking for labels that can withstand over 500 dishwasher cycles without fading. This lines up with the global shift toward BPA-free products, a movement that really took off after regulations limited BPA in baby items.
Surviving Different Sterilization Methods
Sterilizers crank up the intensity even more, posing a serious challenge to even the toughest-looking labels. Not all materials are created equal, so it helps to know what you're up against with each method.
Here’s a quick rundown of how common labels fare:
- Steam Sterilizers: That intense, moist heat is brutal on most adhesive labels. You'll likely see the edges start to lift and peel away. Silicone bands, on the other hand, are completely unfazed and can be left right on the bottle.
- Boiling Water: This old-school method is extremely harsh. Submerging bottles with adhesive labels or even marker ink is a recipe for disaster; they will almost certainly peel or wash right off. Reusable silicone bands are your best bet here since they're designed to handle these high temperatures.
- UV Sterilizers: UV light is fantastic for killing germs without moisture, but it has a downside. Over time, it can cause the ink on some adhesive labels and permanent markers to fade. A high-quality silicone band, however, will keep its color.
The bottom line is that materials matter. A lot. BPA-free, food-grade silicone is the clear winner for durability. It’s engineered to withstand the extreme conditions of dishwashers and all kinds of sterilizers without degrading or leaching chemicals.
Why Some Labels Fail
Understanding why labels fail helps you avoid the common pitfalls. The adhesive on most stickers breaks down when hit with that combination of high heat, powerful water jets, and harsh detergents. The glue loses its grip. Similarly, the ink in many permanent markers isn't designed to be heat-set, so it will fade or run when sterilized.
To find a system that works with your cleaning routine, you need a label designed specifically for this job. See dishwasher-safe name labels for guidance. Investing in a durable, reusable solution from the get-go saves you from the endless, frustrating cycle of re-labeling.
Frequently Asked Questions
What are the best ways to label baby bottles for daycare?
The most reliable method is using reusable silicone bands, as they resist peeling in dishwashers and allow for daily date updates. Adhesive labels are a strong secondary choice for families who use the same bottles consistently and cure them for 24 hours before washing. Avoid tape and markers for daycare use, as they often fail compliance checks and durability tests.
How do you label for daycare safely and effectively?
Always label the bottle body, the cap, and the collar ring with the child's full name. Include the date of preparation or expression and clearly state whether the bottle contains breast milk or formula. Check your specific center's policy, as some require additional allergy notes or specific font sizes for readability.
What are the labeling rules at daycare?
While rules vary by center, most require the child's full name on all removable parts to prevent mix-ups. Breast milk must typically be dated to ensure freshness, and formula should be marked with its preparation date. Centers generally prohibit labeling by cap color alone, as colors can fade and identical bottles make visual identification risky.
Can I use permanent marker or painter's tape for daycare bottles?
Most daycare centers do not accept permanent markers or painter's tape because these methods are not durable enough for daily sanitization. Marker ink smears during washing, and tape leaves sticky residue and peels off. These methods are suitable only for temporary home use, not for a professional childcare environment.
How do I make my bottle labels last longer in the dishwasher?
For adhesive labels, clean the bottle with alcohol and let the label cure for 24 hours before the first wash. Always place labeled bottles on the top rack of the dishwasher to avoid the intense heat of the bottom heating element. For the longest lifespan, switch to reusable silicone bands, which are designed to withstand hundreds of wash cycles without degrading.
Ready to end the labeling chaos for good? The original InchBug Orbit Labels are reusable, dishwasher-safe, and personalized just for your child. They stretch to fit everything from baby bottles to sippy cups and sports bottles, making them the only label you'll ever need. Check out all the options at InchBug today!