

The bottle on the daycare shelf looks exactly like three others. Your child is already late, the lunchbox is still on the counter, and the temporary paper name tag has curled into a damp strip after a few washes. By pickup time, someone has taken home the wrong bottle, and you're back to writing names on belongings that should already be labeled.
DIY waterproof labels can solve that problem, but only when you treat them as a small materials and application project, not just a printable craft. The label needs a suitable face stock, ink that won't run, a protective layer, compatible adhesive, careful surface preparation, and enough curing time before the item meets water, detergent, heat, or rough handling.
Why DIY Waterproof Labels Matter for Busy Families
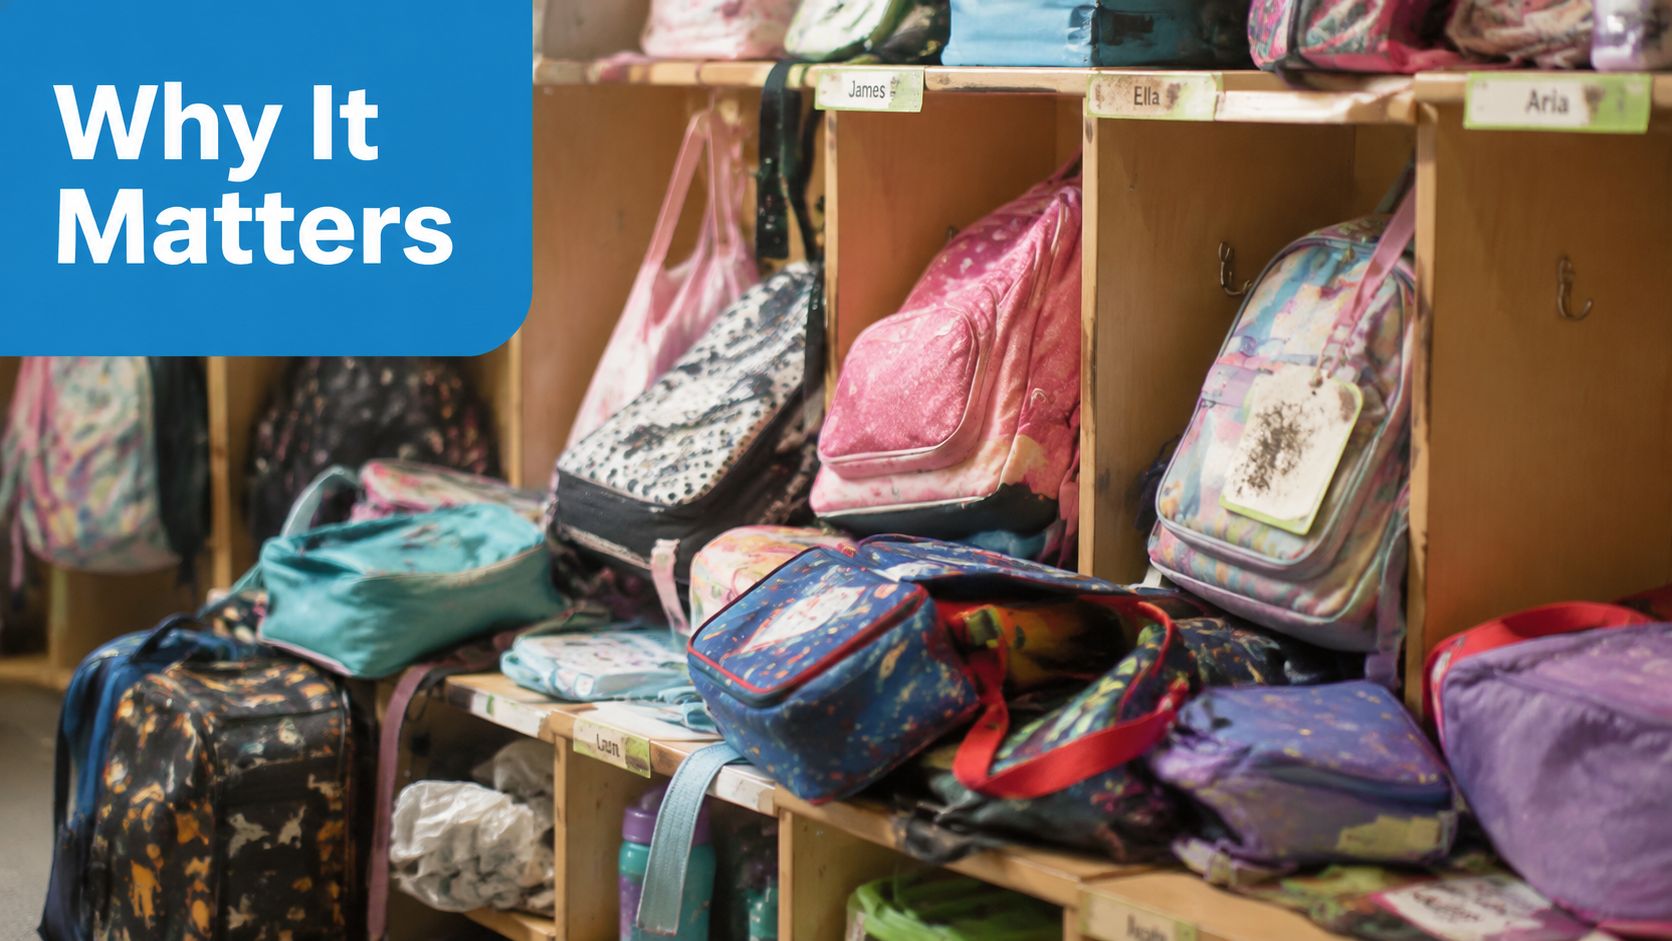
Daycare gear rarely gets a gentle life. A water bottle rolls around in a bag, a lunch container goes through the dishwasher, and a jacket label rubs against skin, zippers, and washing-machine drums. Shoes collect grit and moisture, while bags get dragged across floors and stuffed into crowded cubbies.
A basic paper sticker may look fine when you apply it in the morning. It usually has a harder time with condensation, handwashing, food residue, and repeated friction. Once the edges lift, children pick at them, and the label can disappear before the next school note comes home.
Practical rule: Waterproofing the printed surface isn't enough. The finished label must also stay attached to the item.
Modern personalized labels for children's bottles and clothing reflect a move away from simple paper tags toward adhesive film systems designed for multiple surfaces. A review discussed in the SSRN research item on personalized labels describes products marketed with waterproof, dishwasher-safe, and microwave-safe durability claims, including labels using 3M Controltac materials. That history matters because parents now expect one label system to cope with school, daycare, laundry, and kitchen routines.
The useful target for a home project is not an unrealistic promise that every label will last forever. A well-built label should remain readable, resist ordinary splashes, and stay attached longer than an unsealed paper tag. Its actual life depends on the surface, detergent, heat, handling, and how carefully you apply it.
The failure usually starts before the first wash
Most early failures come from predictable shortcuts:
- Dirty surfaces: Lotion, food oils, dust, and manufacturing residue weaken contact between adhesive and item.
- Uncured ink: Laminating too soon can smear the design or trap moisture beneath the film.
- Sharp corners: Corners catch on fingers, dish racks, and bag contents more easily than rounded edges.
- Rough or curved items: A label that works on a smooth metal tin may lift from textured plastic or wrinkle around a narrow bottle.
For clothing, the material choice changes again. If you're labeling garments rather than hard gear, this guide to finding durable clothing labels offers a useful comparison point, while daycare labeling guidance can help you think through which belongings need names before the morning rush.
Choosing the Right Materials and Tools
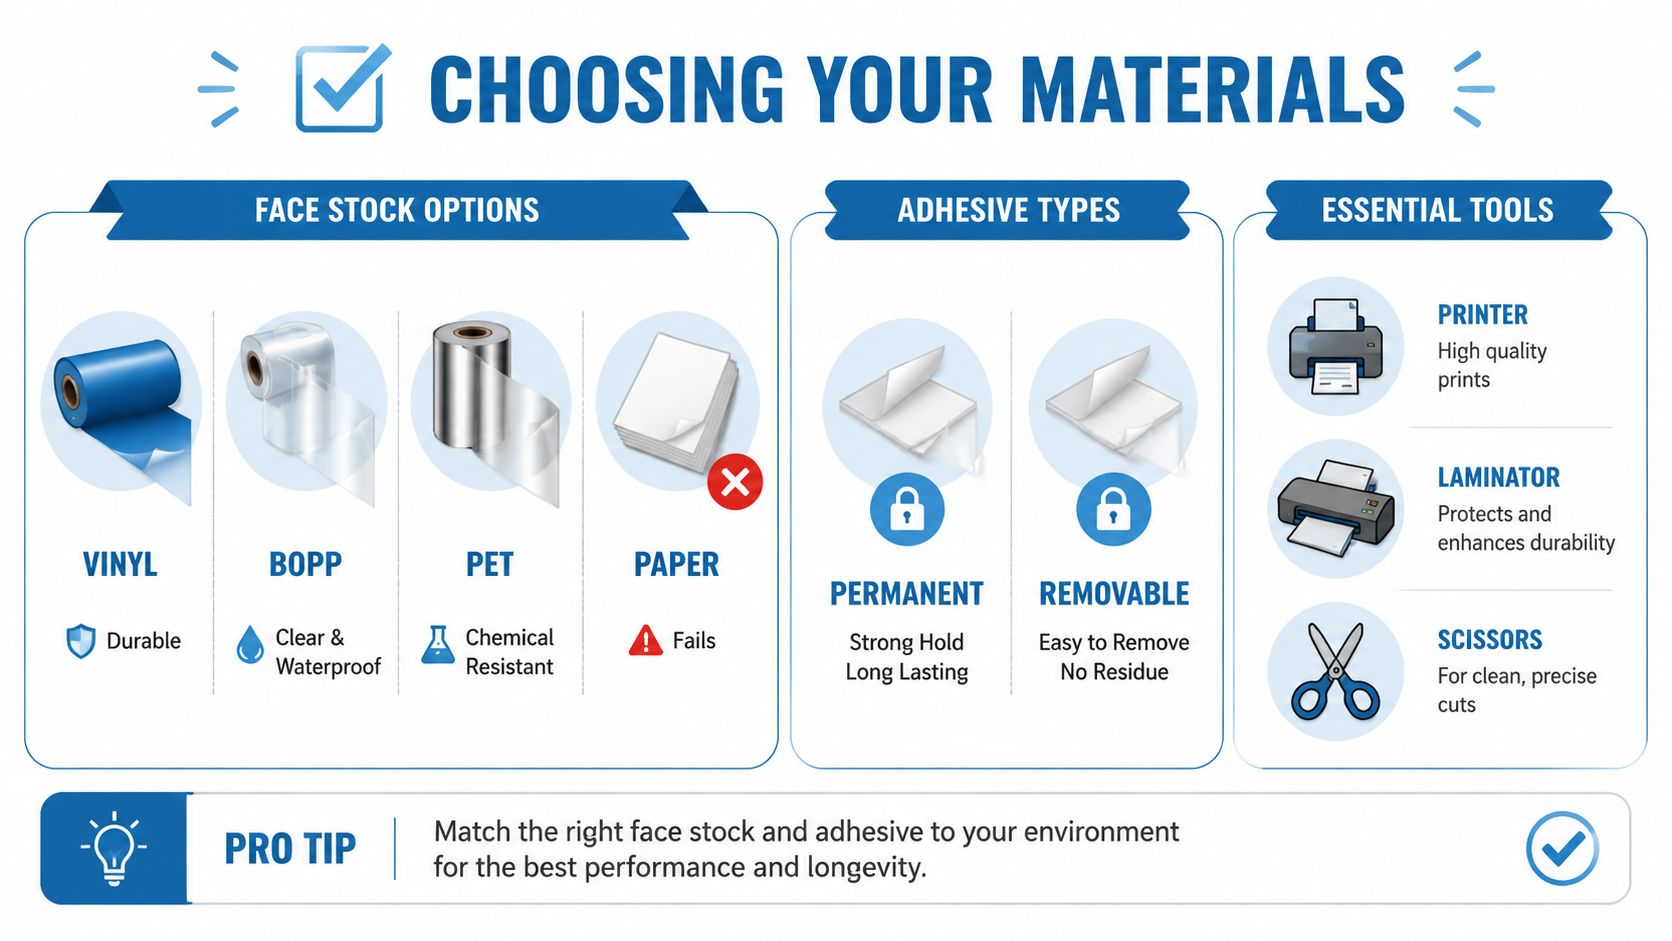
Start with the face stock. Ordinary paper absorbs moisture, softens around the edges, and gives the adhesive a weak foundation in wet conditions. A more sturdy DIY build uses synthetic stock such as vinyl, BOPP, or PET, followed by a clear overlaminate, as outlined in this waterproof sticker construction guide.
Build your shopping list around the item
Vinyl is a practical choice for many smooth bottles, bins, and lunch containers. It's flexible and easy to cut, although its performance still depends on the adhesive and the surface beneath it.
BOPP, or biaxially oriented polypropylene, is useful when you want a thin, water-resistant film with a clean appearance. PET is another synthetic option and can be appropriate where chemical resistance matters, but check that the sheet is compatible with your printer before buying.
The adhesive deserves equal attention. For wet environments, choose a permanent, moisture-resistant acrylic adhesive rather than a removable adhesive intended for temporary organization. Removable adhesive can be useful for containers you'll relabel often, but it's a poor match for a bottle that gets washed daily.
Clothing requires a different approach. A hard-surface label with aggressive adhesive may feel uncomfortable, detach from fabric, or damage the garment. Use a fabric-compatible label material or apply the label to a smooth care tag when the product instructions allow it. For more hard-surface ideas, see this practical overview of waterproof vinyl labels.
Match the ink to the wet environment
Inkjet dye inks can bleed when exposed to water. Pigment inks are a safer choice for many printable-label projects, while eco-solvent and UV-cured inks are intended for more specialized equipment. Your printer and printable media must be compatible, so confirm the manufacturer's instructions before loading synthetic sheets.
You'll also need:
- A printer: Use the highest suitable quality setting and confirm the sheet path won't bend or scrape the material.
- Clear overlaminate: This protects the printed face and gives you a second barrier against moisture and scuffing.
- A squeegee or old plastic card: Use it to press film down evenly without touching the adhesive excessively.
- Sharp scissors or a craft knife: Clean cuts reduce exposed edges and make rounded corners easier.
- Rubbing alcohol and a lint-free cloth: These help remove residue from hard surfaces before application.
- A cutting mat: It protects the table and makes trimming safer and more controlled.
The overlaminate is not decorative. It protects the ink, but it doesn't correct poor adhesion, a greasy surface, or a label that has been cut with lifted edges.
Printing and Sealing Your Labels Step by Step
A label can look perfect on the printer and still fail after one daycare wash. The reliable workflow is to size it for the item, let the ink cure, laminate without trapping air, and give the adhesive time to bond before the first dishwasher cycle.
Prepare the artwork and print
Measure the smooth area on the bottle, lunchbox, shoe tag, or container. Keep the design away from seams, hinges, flexible joints, and sharply tapered sections. Rounded rectangles usually hold up better than pointed shapes because they leave fewer corners for water and friction to catch.
Print a test page on ordinary paper. Hold it against the item to check the text size and confirm that it does not cover openings, seals, or safety information. A child's first name, surname initial, or family name may be enough, depending on the setting and your privacy preferences. Once the layout fits, print on the synthetic sheet using the media setting recommended for that stock.
Set the sheet aside until the ink is fully dry. Allowing it to dry for about 24 hours before laminating reduces smearing during assembly. Do not rush this step if the label will face repeated washing.
Laminate without trapping trouble
Use a clean, lint-free work surface. Align one edge of the clear film, tack down a small section, and press the laminate across the sheet gradually with a squeegee or plastic card. Work from the center outward so air moves toward the edges instead of remaining beneath the film.
A smooth laminate starts with a patient application, not a stronger adhesive.
Trim only after laminating. Leave no loose flap around the perimeter, and round the corners with scissors or a corner punch when available. Press firmly around the complete edge. Handling a wet item can start lifting an exposed edge before the label has had time to bond.
Use a printable label template resource to arrange several sizes on one sheet. For storage tubs or moving equipment, examples of printed labels for removal companies show how larger, high-contrast layouts differ from small personal labels.
Clean the item and let its surface dry before application. Press from the center toward the edges, then leave the label undisturbed while the adhesive bonds. Keep it out of the dishwasher until that bond has had time to strengthen.
Properly laminated labels are generally water-resistant rather than guaranteed fully waterproof. Heavy-use labels may need reapplication after 6–12 months, according to this waterproof-label durability guide. Check the edges after washing, especially where detergent, heat, and repeated handling meet.
Sealing Methods for Different Surfaces and Items
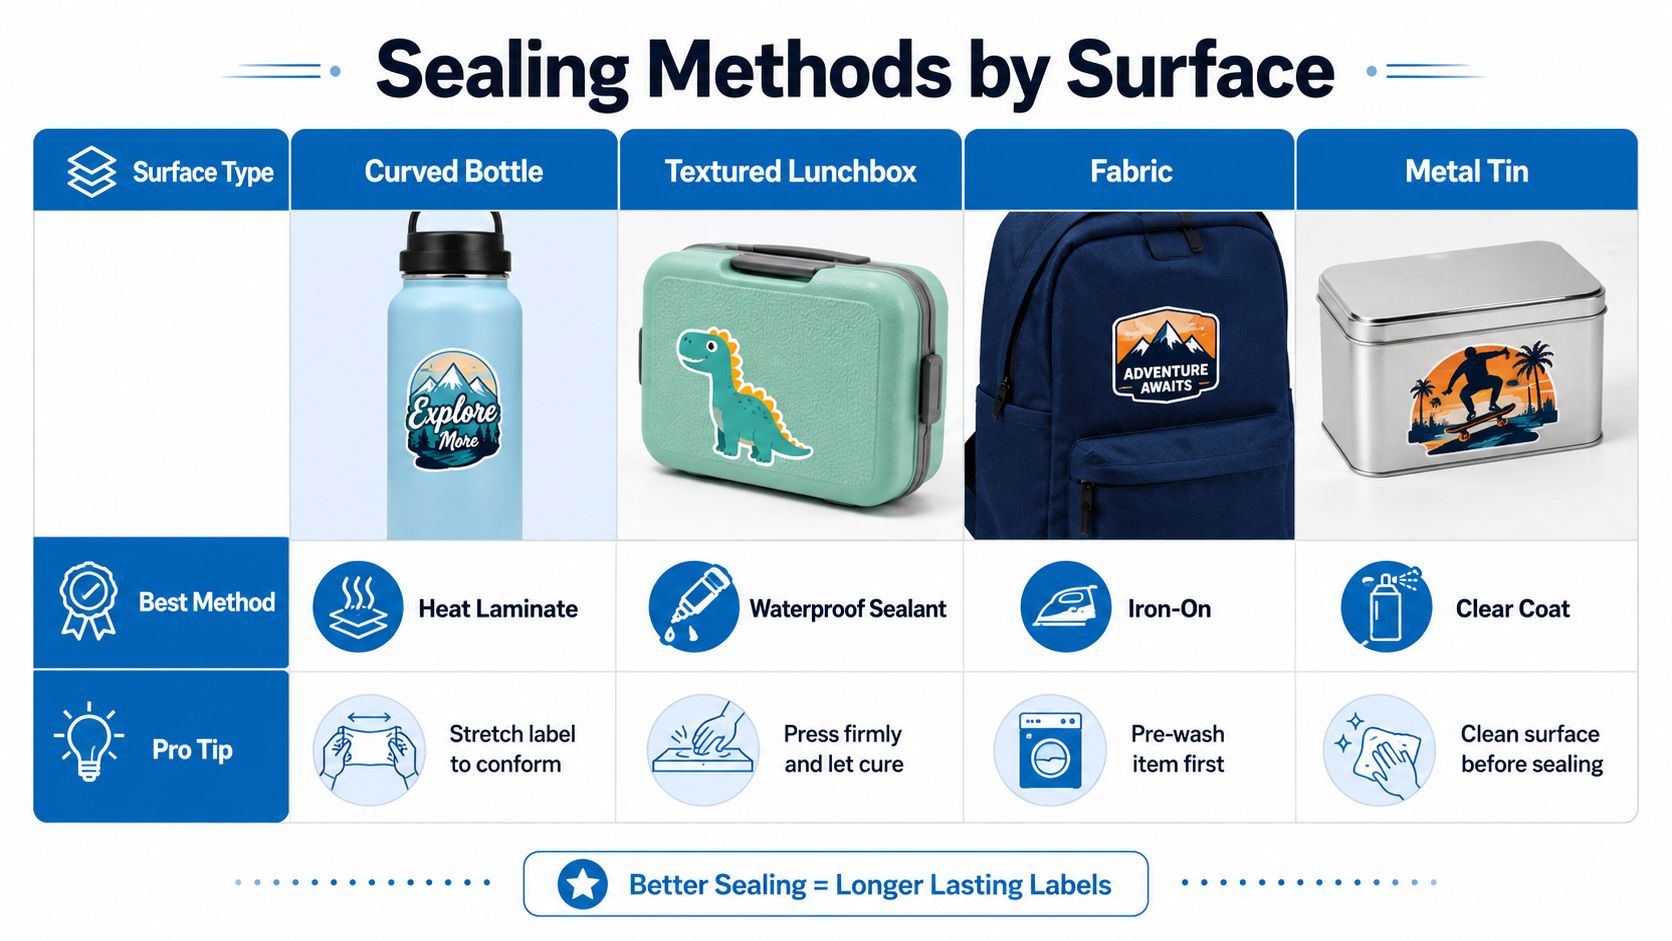
A method that works beautifully on a smooth stainless-steel tin can fail on a textured lunchbox. The surface determines how much contact the adhesive gets, how easily air escapes, and how much flexing the label experiences during use.
Smooth bottles and metal containers
Smooth plastic, glass, and metal are usually the friendliest surfaces. Clean them with an alcohol wipe, allow the surface to dry, and apply the label without stretching it. On a curved bottle, position the middle first and work toward the sides. A short, flexible label is easier to apply cleanly than a wide label forced around a tight curve.
Metal lunch containers and tins need careful cleaning because fingerprints and food oils can remain after ordinary washing. Press the perimeter firmly, especially if the lid or container flexes during opening.
Textured plastic and flexible gear
Texture creates tiny gaps beneath the label. Those gaps allow moisture and detergent to reach the edges, so a regular laminated sticker may lift sooner than it would on a smooth surface. Choose the flattest available area, use a flexible synthetic stock, and apply strong pressure across the complete label.
Clear packing tape can provide a temporary outer shield on a low-value item, but it often looks untidy and can lift at its own edges. Clear craft sealers may add protection, yet they aren't automatically suitable for food-contact items, dishwasher heat, or frequent sterilization. Treat them as decorative finishing products unless the manufacturer specifically states otherwise.
Clothing and shoes
Fabric labels should go on a smooth care tag or another compatible area, not directly onto a stretchy knit unless the label is designed for fabric. Wash and dry the garment according to its care instructions before judging the result. Shoe labels face constant rubbing, so place them where the foot or sock won't scrape them during wear.
Surface rule: Smoothness and cleanliness often matter more than adding another coat of sealant.
Use the appropriate label application methods for the material instead of forcing one technique onto every item. Heat-shrink tubing can protect identification placed on bottle accessories or narrow cords, but it isn't a substitute for a properly bonded label on the bottle itself.
Testing Your Labels for Real Daycare and School Conditions
A splash test proves very little. The true test starts when a child handles the item, it gets cleaned, dries, sits in a bag, and goes through the same routine again. A label that looks perfect on day one can begin lifting at the corners after its first proper wash.
Prepare the surface before testing. Wipe a hard item with alcohol, let it dry fully, and apply the label to the smoothest available area. Press across the entire label, especially the perimeter. After final application, wait until the adhesive has bonded firmly before running the first dishwasher or washing-machine cycle. Testing too soon can make a sound material look defective.
Test the complete routine
Use a spare or sample item rather than the only bottle your child needs for school. Clean it according to its normal routine, then inspect the center, corners, and edges after it has cooled and dried. Check for clouding, ink movement, edge lift, trapped moisture, and reduced readability.
Dishwasher performance depends on detergent, heat, wash frequency, and the item's surface type. School-label guidance describes “no fixed answer” for dishwasher durability because household conditions differ, as summarized in this practical school-label testing resource. A dishwasher-safe result on one bottle does not guarantee the same result on another plastic or coating.
Run the test in stages:
- Dry inspection: Confirm that every edge is pressed down before washing.
- Wet handling: Hand-wash the item and rub the label lightly while it is wet.
- Normal cleaning: Use the dishwasher or washing-machine cycle the item receives.
- Repeat inspection: Examine the label after cooling and drying, then repeat the routine if it passes.
- Replacement decision: Replace it when an edge catches, text fades, or moisture gathers beneath the film.
Record the number of cycles only as a comparison between your own materials and items. For a more systematic approach, follow this guide to label durability testing.
Food and sterilization need extra caution. A waterproof decorative label is not automatically food-safe, child-safe, or suitable for repeated sterilization. Keep it on the outside of bottles and containers, away from food and drink contact, and follow the material manufacturer's instructions. A label that survives the dishwasher may still be unsuitable for a child who chews or picks at it.
DIY Labels Versus Professional Custom Labels
DIY makes sense when you need a small batch, unusual dimensions, or a quick label for an item you're unlikely to use for long. It also lets you change the design whenever you want. The trade-off is that the apparent material cost isn't the whole cost. Printer ink, synthetic sheets, laminate, cutting time, failed applications, and relabeling all count.
Professional labels shift that work to a finished product. Modern personalized children's labels commonly use industrial adhesive film systems with waterproof, dishwasher-safe, and microwave-safe claims, a development described in the SSRN discussion of personalized labeling products. You still need to clean the surface and follow application instructions, but you aren't testing every combination of paper, ink, laminate, and adhesive yourself.
| Factor | DIY Labels | Professional Labels |
|---|---|---|
| Upfront materials | Requires printable synthetic stock, ink, laminate, and cutting tools | Arrive as finished labels or bands |
| Design control | Flexible sizing, colors, and one-off layouts | Personalization follows the available product formats |
| Time | Includes design, printing, curing, laminating, trimming, and testing | Requires ordering and application |
| Consistency | Depends on printer settings and manual cutting | Produced to a consistent shape and finish |
| Surface range | You choose the stock and adhesive, with more trial and error | Product types are usually matched to bottles, clothes, shoes, bags, or containers |
| Durability confidence | Must be established through your own testing | Based on the manufacturer's stated material and care guidance |
| Best fit | Small projects, temporary needs, unusual sizes | Daycare bundles, school gear, repeated washing, and busy back-to-school preparation |
For families who want ready-made options, InchBug offers personalized hard-surface name labels, reusable Orbit bottle bands, clothing labels, and shoe identifiers designed for children's everyday belongings. The choice is straightforward: make labels yourself when control and experimentation matter most, or buy finished labels when reducing preparation time and uncertainty matters more.
If you're preparing a complete daycare set, test one DIY label on the hardest-use item first. If it lifts, smears, or needs constant attention, switch before labeling everything else.
For a simpler school and daycare setup, visit InchBug to explore personalized waterproof labels, reusable Orbit bottle bands, clothing labels, and shoe identifiers. Choose the formats that match your child's gear, apply them to clean surfaces, and spend less time rewriting names after every wash.