

You're already late, the bottles are filled, and your baby's bag is waiting by the door. Then you notice that yesterday's label has curled at the edge, the marker has bled through condensation, or the date is no longer readable. At daycare, that can be enough for staff to set the bottle aside and ask you to take it home.
Baby bottle date labels aren't merely a way to identify your child's things. They help caregivers trace what's inside, when it was prepared or expressed, and whether it can still be served. The difficult part is building a system that handles pumped milk, frozen milk, thawed milk, formula, refrigeration, bottle warmers, sterilizers, and rushed handoffs without losing the information staff need.
Why Daycare Centers Care So Much About Bottle Dates
Morning drop-off can involve several bottles, multiple parent handoffs, and a teacher trying to place each item in the correct refrigerator. A clearly marked full name and date lets staff make that decision quickly. If condensation has blurred the writing or the label has lifted, they may have no reliable way to confirm ownership or safe handling, so setting the bottle aside may be the responsible choice.
This is not a strict center preference. California childcare rules require bottles, dishes, and food containers brought by an infant's authorized representative to show the infant's name and the current date. Partially consumed formula must be discarded during end-of-day cleanup, and food not consumed within 72 hours of the container date label must also be discarded, as described in the California childcare food-container requirements.
Georgia's childcare rules also require baby bottles to display the child's name and the current day's date. Refrigerated formula served in care must be dated for the current day and kept at 45°F or below, according to the verified regulatory summary provided for this guide. The date therefore supports several safety decisions, from accepting the bottle at drop-off to removing it after feeding.
Practical rule: If a caregiver cannot read the name and date at a glance, the label has failed, even if the information was written correctly.
A readable label also limits mix-ups as bottles move between home refrigerators, insulated bags, classroom refrigerators, warmers, and feeding areas. It helps staff rotate bottles consistently and gives every caregiver the same information without requiring a separate lookup. Choose writing or labels that remain legible after condensation, washing, and routine sterilizer use, since a system that fades during the first handoff creates work for everyone.
Families often extend the same identification system to pacifiers, clothing, bags, and other daycare supplies. Relatives shopping for practical additions to a new routine may find a baby gifts collection useful. Before the first day, ask how the center applies its personalized label requirements, because its policy may require details or label placement beyond the minimum rule.
What to Write on Every Baby Bottle Label
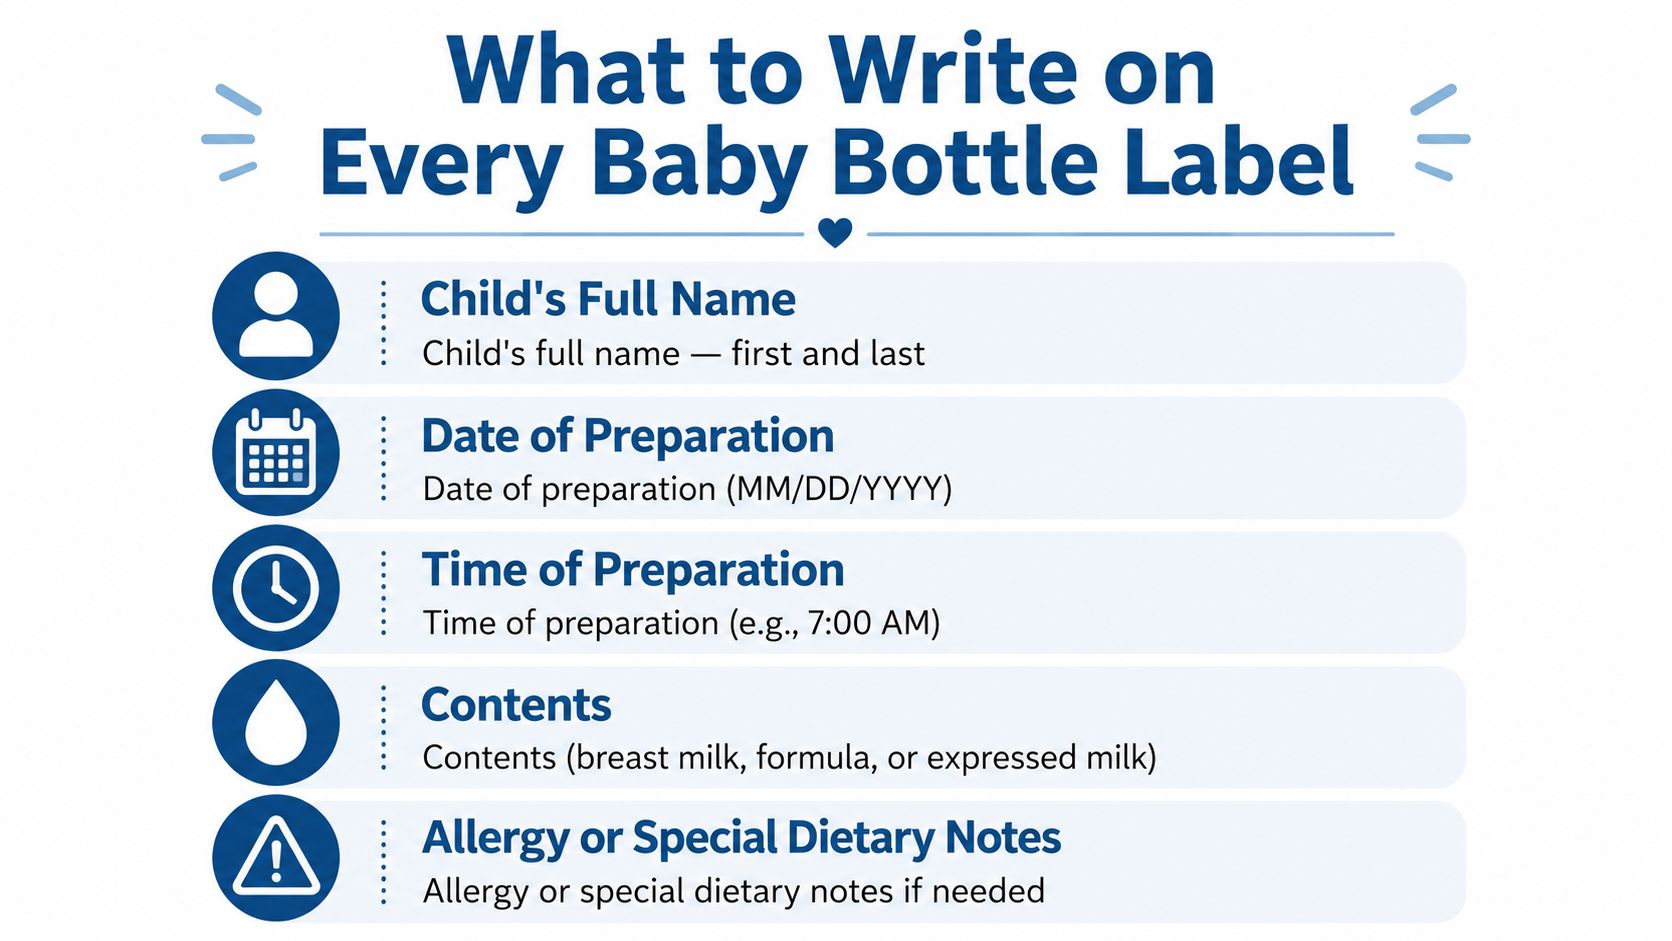
When a teacher picks up a bottle at 7:45 a.m., the label should answer three questions immediately: who it belongs to, what it contains, and when it was prepared. Write the child's full name, the relevant date, the milk type, and any handling note the center requires. If expressed milk has moved through several storage stages, include enough dates to preserve that history.
Name matters more than you think
Write the child's first and last name. Full names help staff separate bottles belonging to children with similar names and support tracking as bottles move between classrooms and shifts.
Use the date format your daycare requests. If it has not specified one, a complete format such as MM/DD/YYYY is easier to interpret than a shortened date. A day-of-week abbreviation can become unclear after the original drop-off, especially when staff handle the bottle later.
Add the handling details
For expressed breast milk, write the expression date and, when relevant, the thaw date. For formula, write the preparation date. Add the contents in plain language, such as “breast milk,” “formula,” or “breast milk and formula.” Include the volume if your center records intake that way.
Add a time when the provider requests it, particularly for milk prepared or removed from refrigeration during the day. Keep special instructions clear and operational, such as “warm only” or a documented dietary alert. Confirm allergy procedures with the center instead of relying on label color alone.
Choose a visible placement
Place the label on the bottle's upper body, below the collar and away from the nipple. The upper third generally stays visible when bottles are stored upright or horizontally. The base can rub against shelves, bags, and neighboring bottles.
Keep measurement markings uncovered so staff can check the amount without removing the cap or repeatedly turning the bottle. Smooth, flat plastic gives adhesive labels a better bond and helps reusable bands stay in position.
For more examples of organizing names, dates, and contents, use this daycare bottle labeling guide. Before adopting a new format, show one completed bottle to your provider and ask whether every field remains readable under normal classroom lighting.
Which Date to Use for Breastmilk and Formula
A bottle pumped on Monday, frozen on Tuesday, thawed on Thursday, and delivered to daycare on Friday carries several relevant dates. Expression, thawing, and formula preparation are different events, so one generic “made on” date can hide how the milk was handled.
For expressed breast milk, write the expression date and add the time if your daycare requests it. If the milk was frozen, keep the original expression date visible on the storage container. After thawing, add the thaw date and time when transferring the milk to a bottle. Caregivers can then see both the milk's history and when the thawed-use window began.
Formula needs its preparation timestamp. Write the date and time it was mixed, rather than the date the container was purchased or the powder was opened. Packaged formula still follows its printed use-by date, while the bottle label identifies the prepared serving being handled at daycare. FDA-inspected infant formula carries a use-by date, whereas date marking for some other foods may address quality rather than safety, as explained in the FDA infant formula date-marking guidance.
| Milk Type | Date to Write | Refrigerator Storage | Room Temperature |
|---|---|---|---|
| Expressed breast milk | Expression date and, if requested, expression time | Follow your daycare's approved expressed-breast-milk storage procedure | Track the time since expression and follow provider guidance |
| Frozen expressed breast milk | Original expression date, plus thaw date and time after thawing | Follow the center's thawed-milk procedure. The thaw date does not replace the expression date | Track removal time carefully |
| Prepared formula | Mixing date and preparation time | Use the center's required refrigerated handling process | Track time from preparation and discard according to the center's policy |
| Mixed milk from different sessions | Dates for the component milk when relevant | Use the older milk's history for rotation decisions | Apply the more restrictive handling history to the bottle |
A simple decision path
Ask three questions before labeling:
- Was the milk freshly expressed? Write the expression date and time if required.
- Was it frozen and thawed? Keep the expression date visible, then add the thaw date and time.
- Was it formula? Write when it was mixed and follow the provider's refrigeration and discard rules.
A bottle marked “10/15” that enters daycare thawed at 6:00 p.m. on 10/18 has its thawed-use window starting at 6:00 p.m. on 10/18, not on the original expression date of 10/15.
If one bottle combines milk from different sessions, keep the older date in the handling record. Do not replace it with the date of the newest milk. If the bottle has already been offered to the baby, ask the center how staff mark and discard leftovers instead of returning that bottle to general refrigerated stock.
Transportation creates another handoff. Label the bottle before it leaves home, keep it cold during transit, and tell staff when it was removed from refrigeration if the center records that detail. The USDA childcare milk-handling guidance emphasizes the child's name and date on the label, prompt refrigerated storage, and first-in-first-out rotation. These dates form a chain of safety decisions, not decorative details.
Choosing Between Reusable and Disposable Labels
The right label depends less on appearance than on your bottle routine. A parent sending several bottles daily may value a reusable system that reduces repeated application. Another family may prefer disposable labels because the daycare requires a fresh date field and the parent wants a crisp, single-use surface.
Reusable silicone or plastic write-on labels can stay with the bottle through daily washing, but the writing surface becomes the weak point. Condensation, bottle warmers, and wet hands can cause some markers to smear or leave ghosting after erasure. Choose a label with a clearly defined write-on area and test the marker on one bottle through your actual wash and warming routine before relying on it.
Disposable adhesive labels are straightforward for daily dating. They can provide a clean field for the name, contents, and date, but repeated washing and heat may lift the edges. Some families also dislike removing adhesive residue when they change bottles or labels.
| Factor | Reusable Write-On Labels | Disposable Adhesive Labels |
|---|---|---|
| Dishwasher and sterilizer exposure | No adhesive edge to peel, but writing must remain legible | Bond quality varies, and heat can weaken edges |
| Condensation and warming | Marker choice matters; wet surfaces can cause smearing | Printed or waterproof formats usually remain clearer |
| Daily preparation | Move the label and refresh the date | Apply a new label for each required dating cycle |
| Waste and residue | Creates less daily waste and avoids adhesive residue | Produces used labels and may leave glue behind |
| Daycare format rules | May not fit centers requiring a specific sticker layout | Easier to match a prescribed name and date format |
Match the system to the policy
| Your situation | A practical fit |
|---|---|
| The center accepts reusable bands and you wash bottles frequently | A reusable write-on format with a marker tested for condensation |
| The center requires a new dated sticker each day | Removable, waterproof adhesive labels with a large date field |
| You send multiple bottles and want permanent identity plus changing dates | A permanent name band paired with a daily date label |
| Staff need contents and special notes visible together | A larger adhesive format or reusable label with dedicated fields |
No label type wins every category. A reusable format reduces relabeling, but it demands a disciplined nightly wipe and rewrite. A disposable format simplifies the written record, but it makes edge inspection and residue removal part of bottle maintenance. The reusable bottle label comparison can help you evaluate that trade-off alongside your center's rules.
Applying and Maintaining Labels That Stay Legible
A label that peels during the first wash is useless. Clear ink cannot rescue a bottle that arrives at daycare with its date missing or unreadable. Milk residue, hand lotion, condensation, and sterilizer heat can all weaken adhesion or blur writing, so the application method matters.
Apply adhesive labels to a dry surface
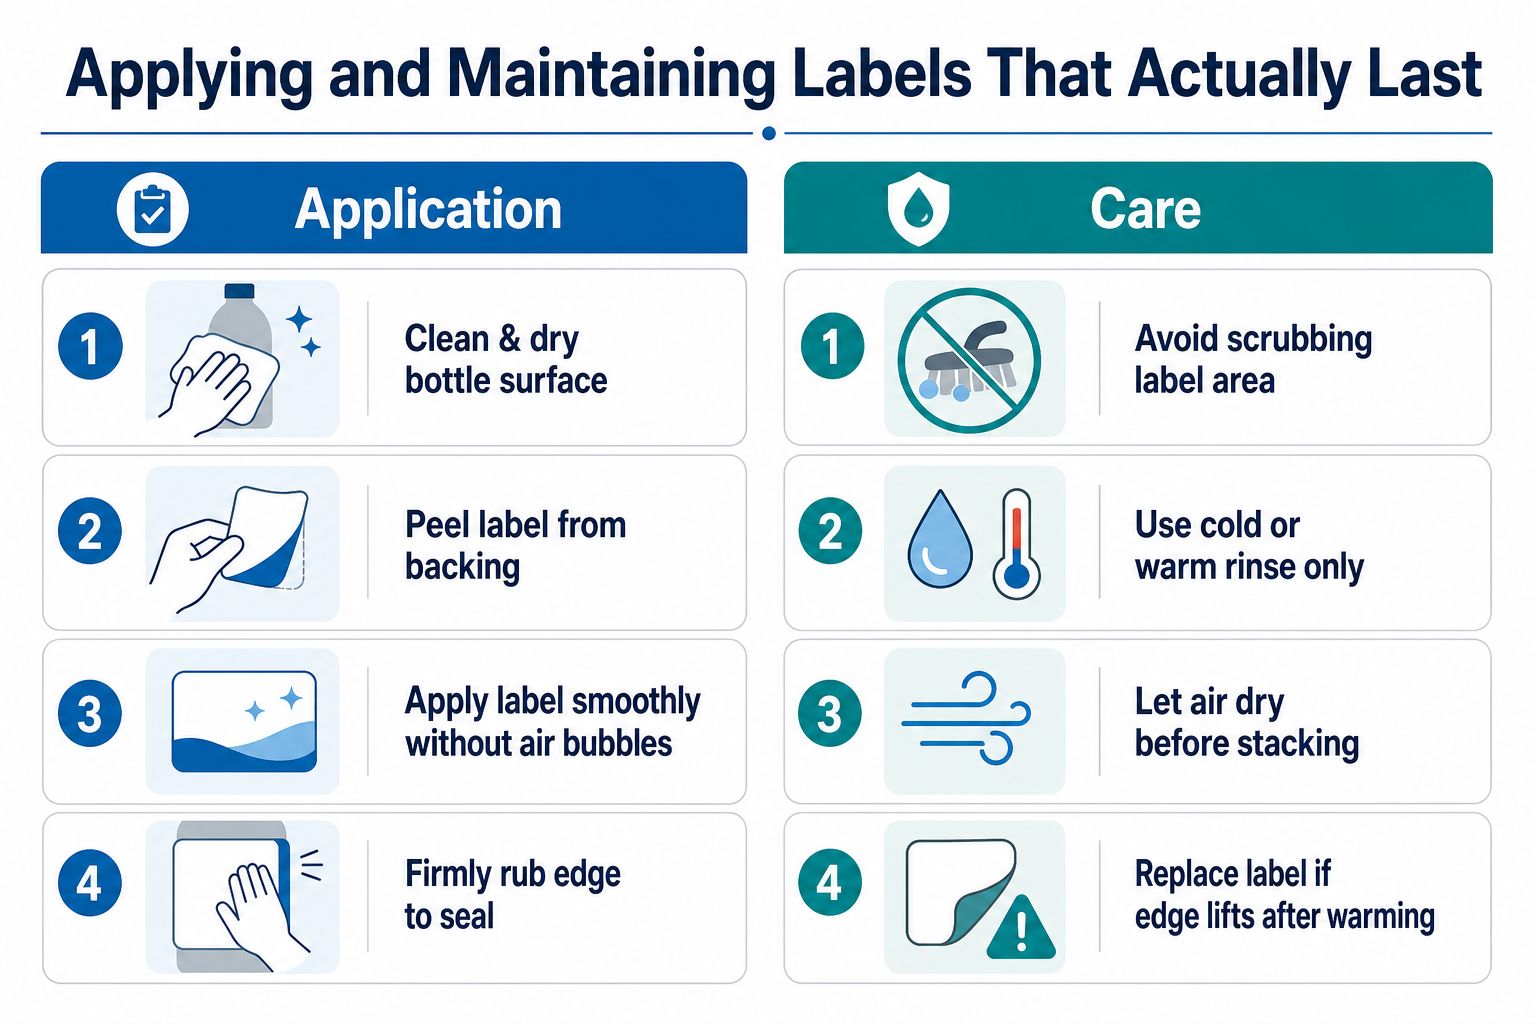
Wash the bottle first and dry it completely. Wipe the intended area with isopropyl alcohol, then let it air-dry before applying the label. Smooth the label from one side to the other, press out bubbles, and rub firmly around every edge. For more detailed placement guidance, see this guide to applying labels to bottles.
Allow the adhesive to cure for 24 hours before the first wash. That wait is inconvenient when bottles are needed immediately, but washing too soon can lift the edges and leave water trapped underneath.
Choose a broad, smooth section of the bottle body. Keep the label away from grip ridges, measurement lines, and curved transitions where the adhesive must stretch. If the bottle will pass through a sterilizer, test the label on one bottle first and check whether the print, edges, and adhesive remain intact.
Keep reusable writing legible
Use the marker specified by the label manufacturer. Test it through refrigeration, condensation, warming, and washing before putting the bottle into regular daycare rotation. If the ink transfers to your fingers or a caregiver's gloves, remove it and switch to a compatible marker. Adding a clear coating can interfere with a surface designed for rewriting.
Inspect the label during the usual bottle-washing routine:
- Curling after washing: Remove a label that traps water or hides the date. Reapply only after the bottle is clean and dry.
- Fading or transfer: Replace the writing or label if staff must turn the bottle toward the light to read it.
- Adhesive residue: Soak the bottle in warm, soapy water, use a bottle-safe adhesive remover, then wash the surface again before applying a replacement.
A label that survives washing but loses its date during warming still needs replacing. Legibility is the performance test.
The useful test is visibility after refrigeration, washing, sterilizer exposure, and staff handoffs, not appearance at the kitchen counter. A readable label lets daycare staff confirm the bottle quickly when several containers arrive together.
Building a Stress-Free Daycare Bottle Routine
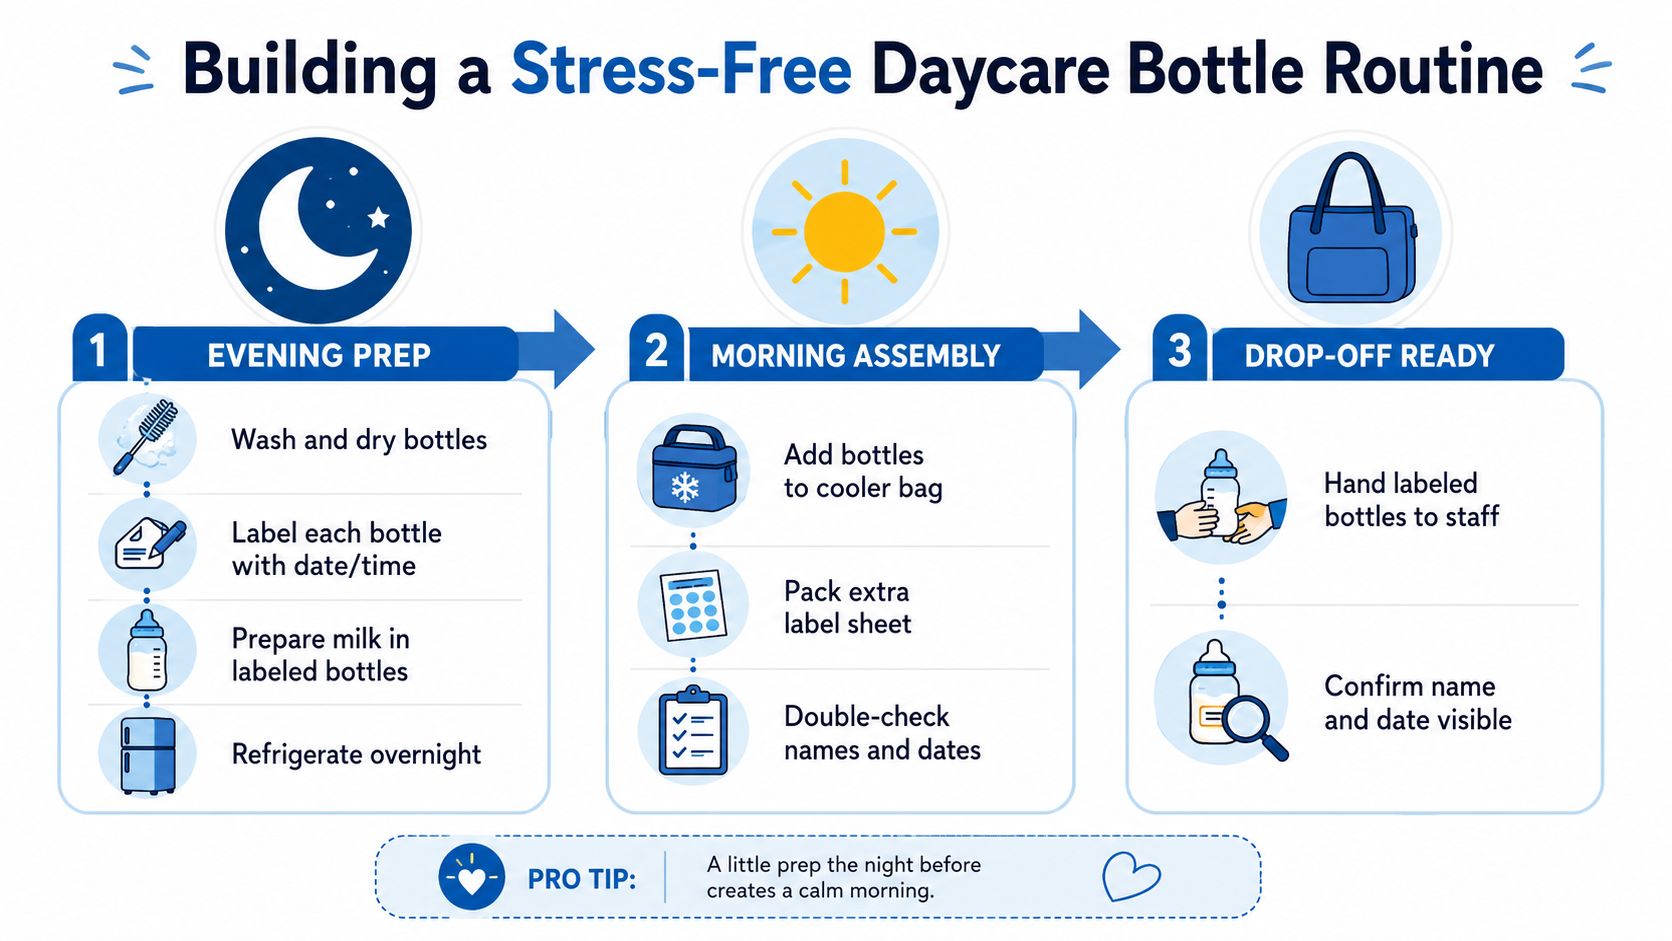
The easiest routine removes decisions from the morning. After the evening bottle wash, set out the labels and marker, fill the bottles according to your provider's instructions, record the appropriate date history, and place the finished bottles in the refrigerator.
Use a three-stage handoff
Evening prep handles washing, labeling, filling, and refrigeration. Keep a small station together with the marker, spare labels, and a written reminder of the information your center requires.
Morning assembly is for checking, not composing. Confirm that every bottle shows the full name, date, contents, and any required time or instruction before placing it in the cooler bag.
Drop-off should end with a quick visual confirmation. Hand the bottles directly to staff and ask them to confirm that the name and date are visible, especially when you're introducing a new label format.
For frozen milk, label storage bags with the expression date when you prepare them. When you thaw milk for a daycare bottle, preserve that original date and add the thaw date before the bottle enters the next day's bag. Use older milk first so the refrigerator doesn't become a collection of unidentified containers.
Use the daycare checklist for parents to keep labeling alongside the rest of your daily handoff supplies. During enrollment, ask: “Does every bottle need the child's full name, the current date, contents, and preparation or expression time? Do you require a separate thaw date, and how should leftovers be handled?” Write the answers on your reference card.
A short video can also help you visualize a practical daycare preparation flow before the first drop-off.
InchBug offers customizable bottle labels, including reusable Orbit Labels and date-focused options for recording daily bottle information, along with labels for other daycare essentials. Visit InchBug to choose a bottle-labeling setup that fits your center's requirements and survives the routines you actually use.